How to Use Shrewd LMS as Teacher
Step-by-step instructions for installing the app, setting up courses, adding and managing activities, and accessing reports — all within Microsoft Teams.
Important Note: Shrewd LMS works natively within Microsoft Teams and does not require Azure Active Directory (Azure AD) configuration. We strongly recommend not using Azure AD groups or custom restrictions to control access, as this may cause unexpected access issues. Manage access using Microsoft Teams settings and policies only.
Managing Course
Configure title, cover image, dates, copy, archive, and notifications
Inside Shrewd LMS, you can build learning content by adding Sections and Activities (content types inside each section).
Activities supported: Text, Documents, BLC (requires active BLC subscription), Video, Audio, Link, Image, SCORM, Quiz, and Panorama Interactive.
Course Settings - Title & Cover
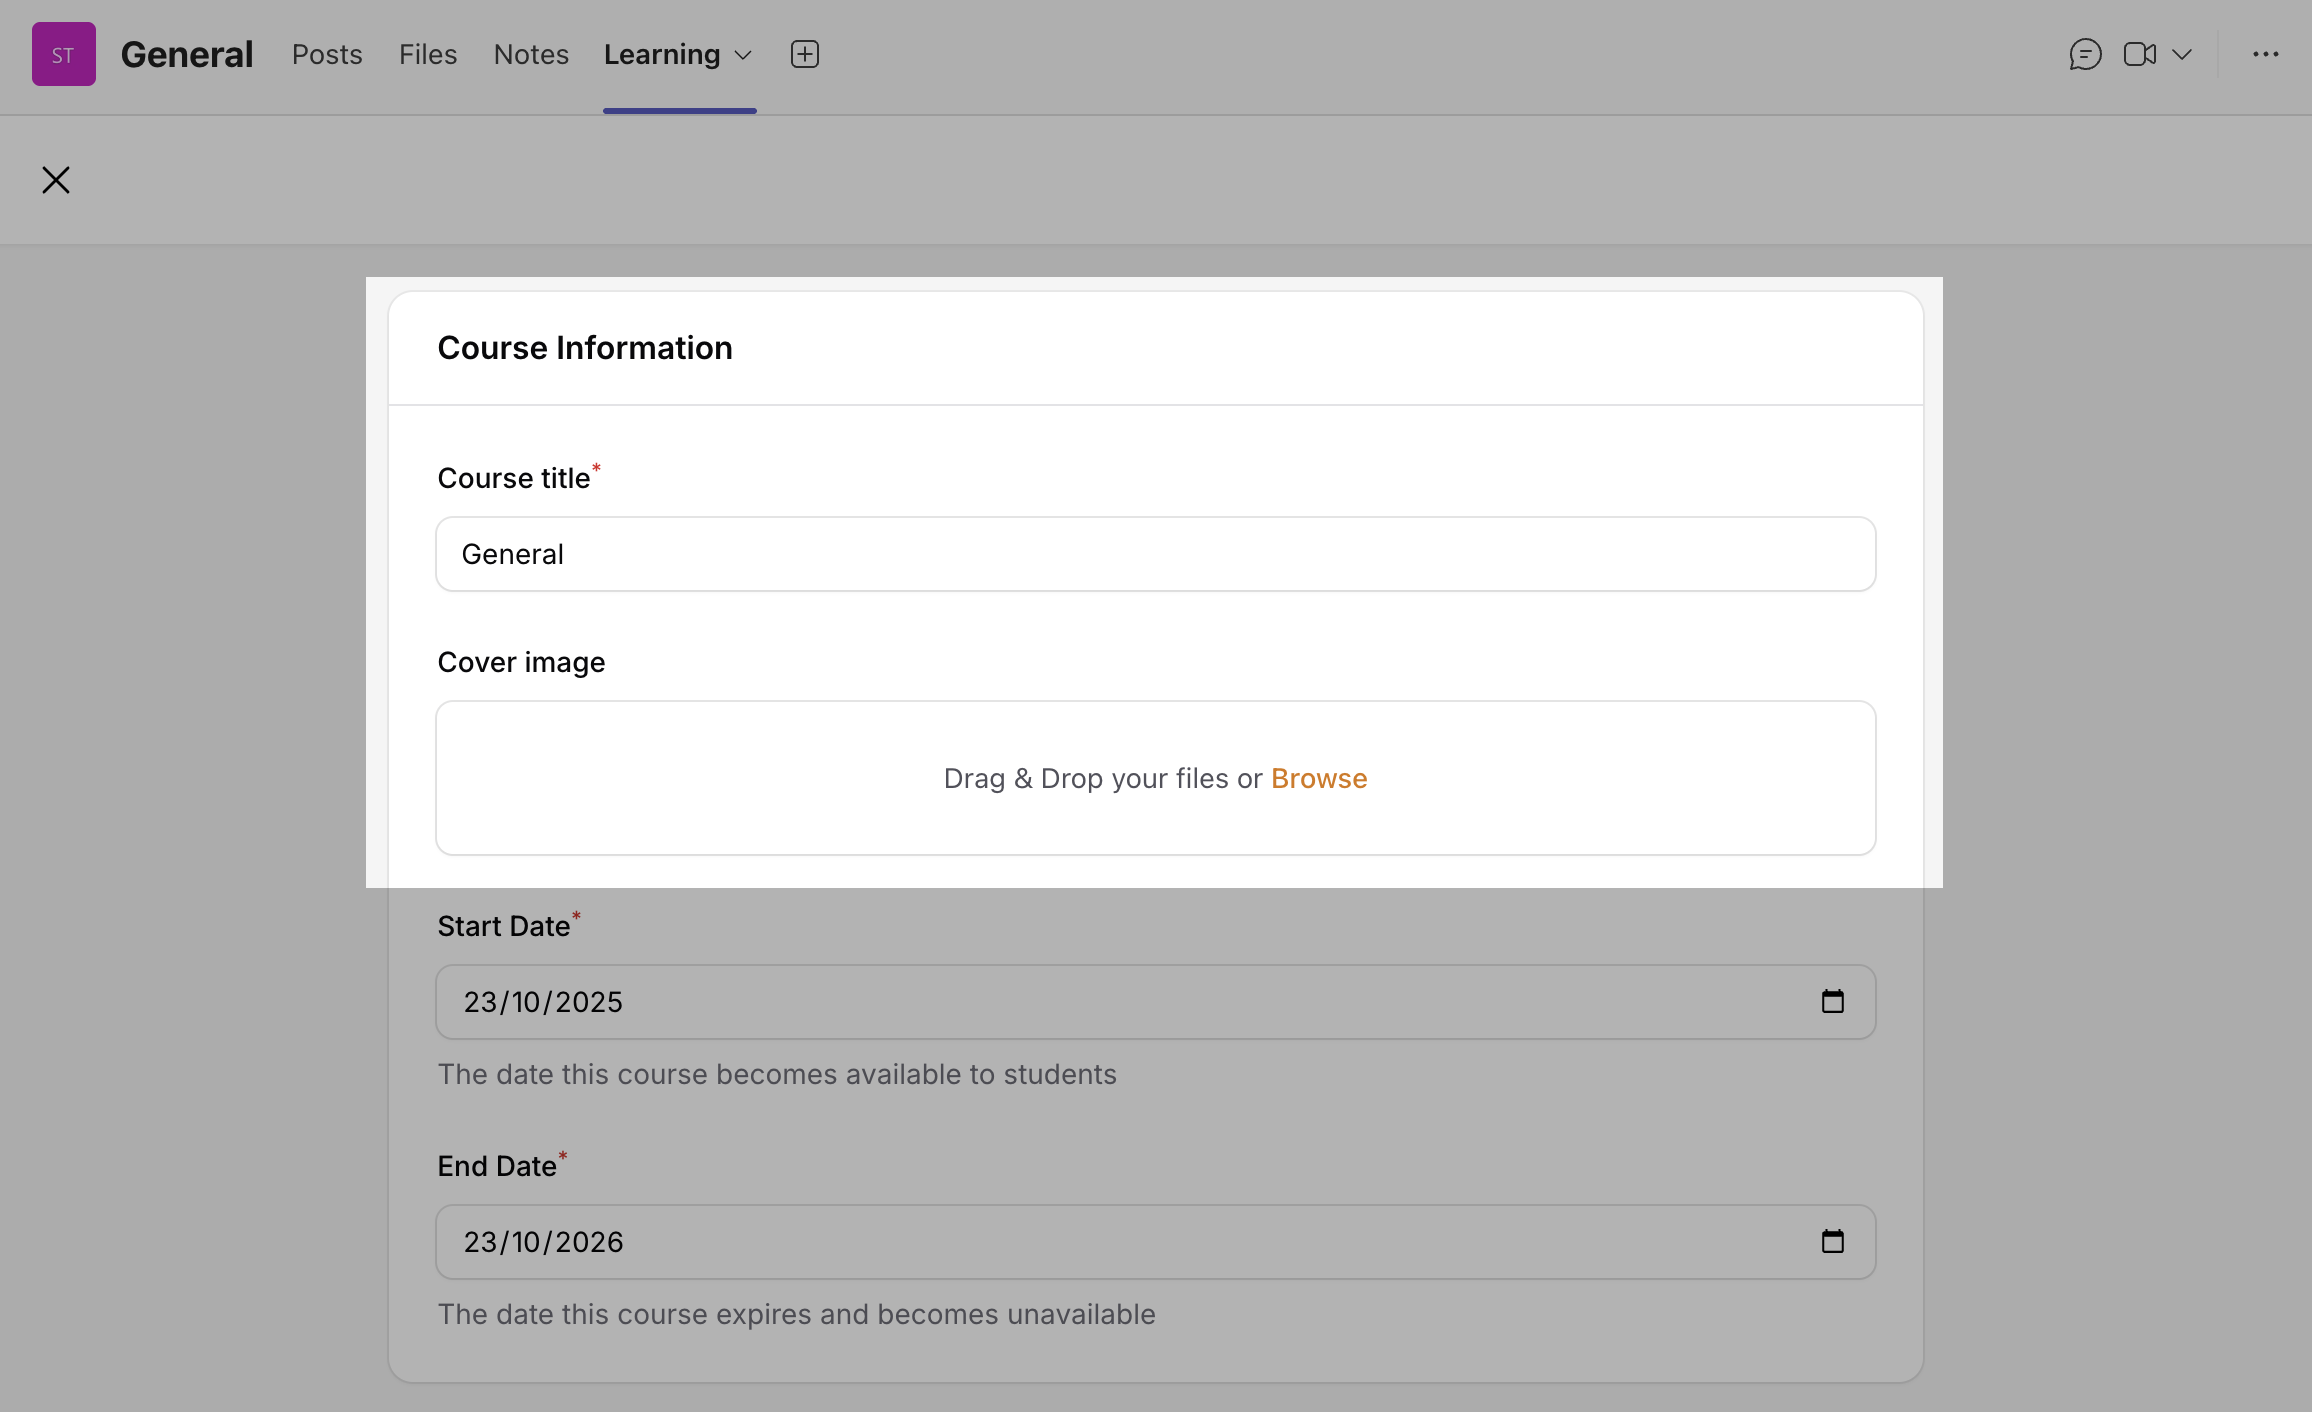
Enter your Course Title and upload a cover image that represents your course.
Enter your Course Title
Click Browse to select a file, or drag-and-drop your image file.
Course Settings - Start & End Dates
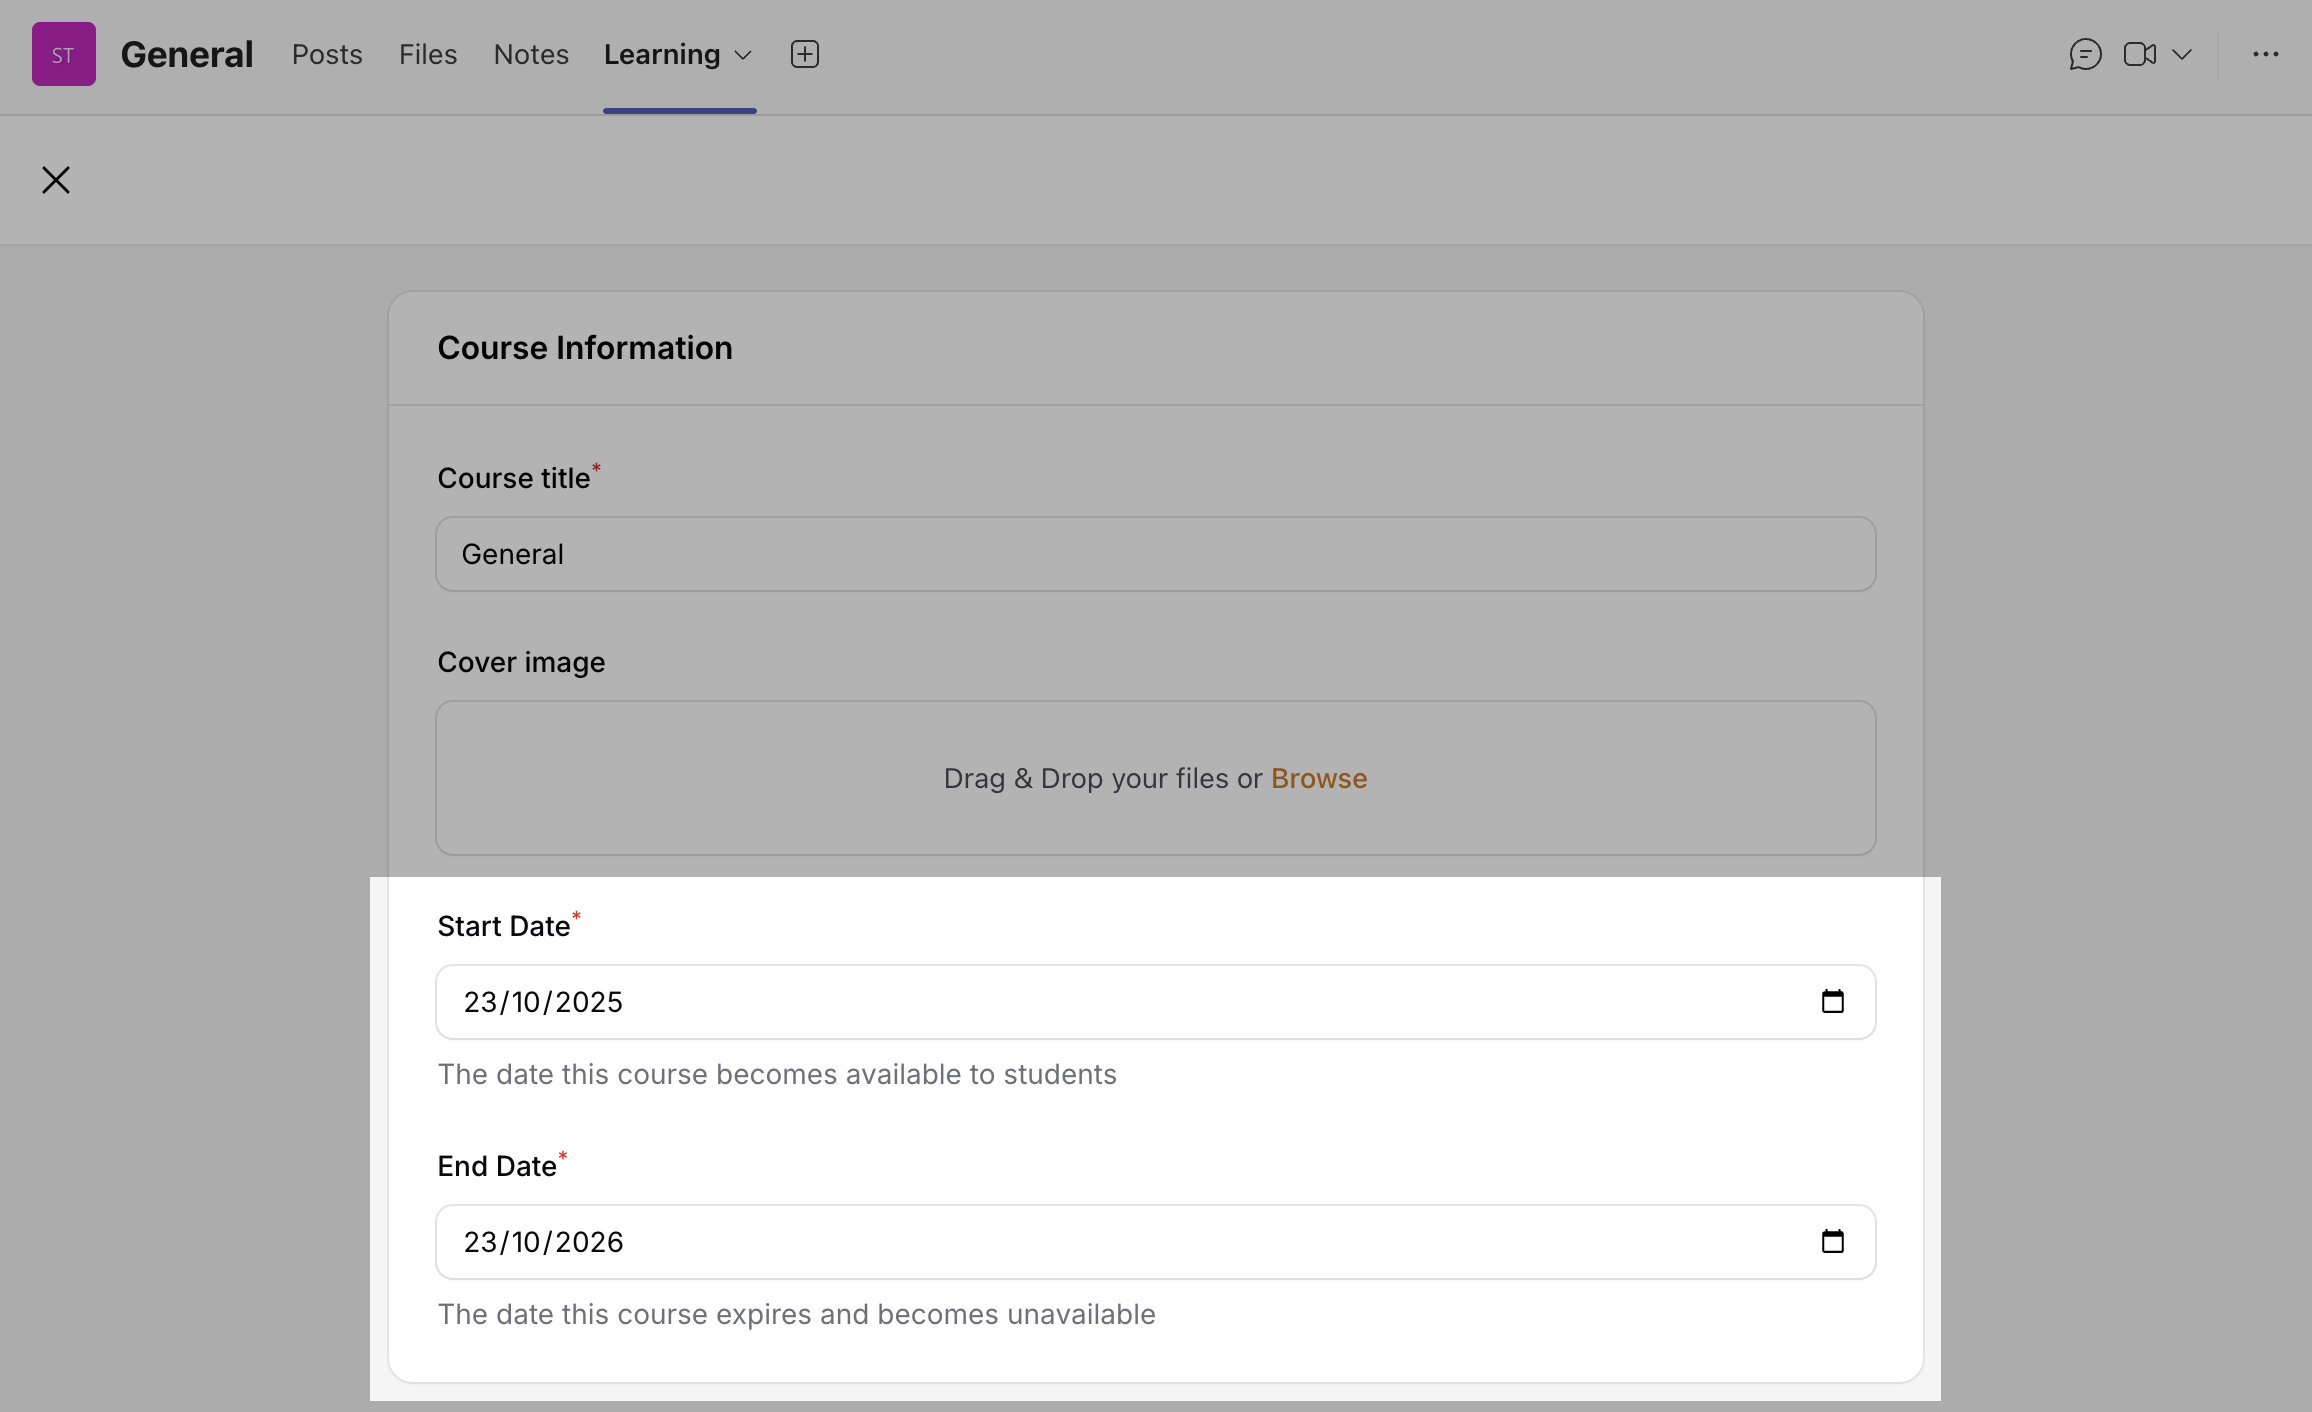
Define when a course becomes available and when it expires. If not set, the course duration defaults to 1 year.
- Start Date — The date when the course becomes available to students.
- End Date — The date when the course expires and becomes unavailable.
Course Settings - Copy Content
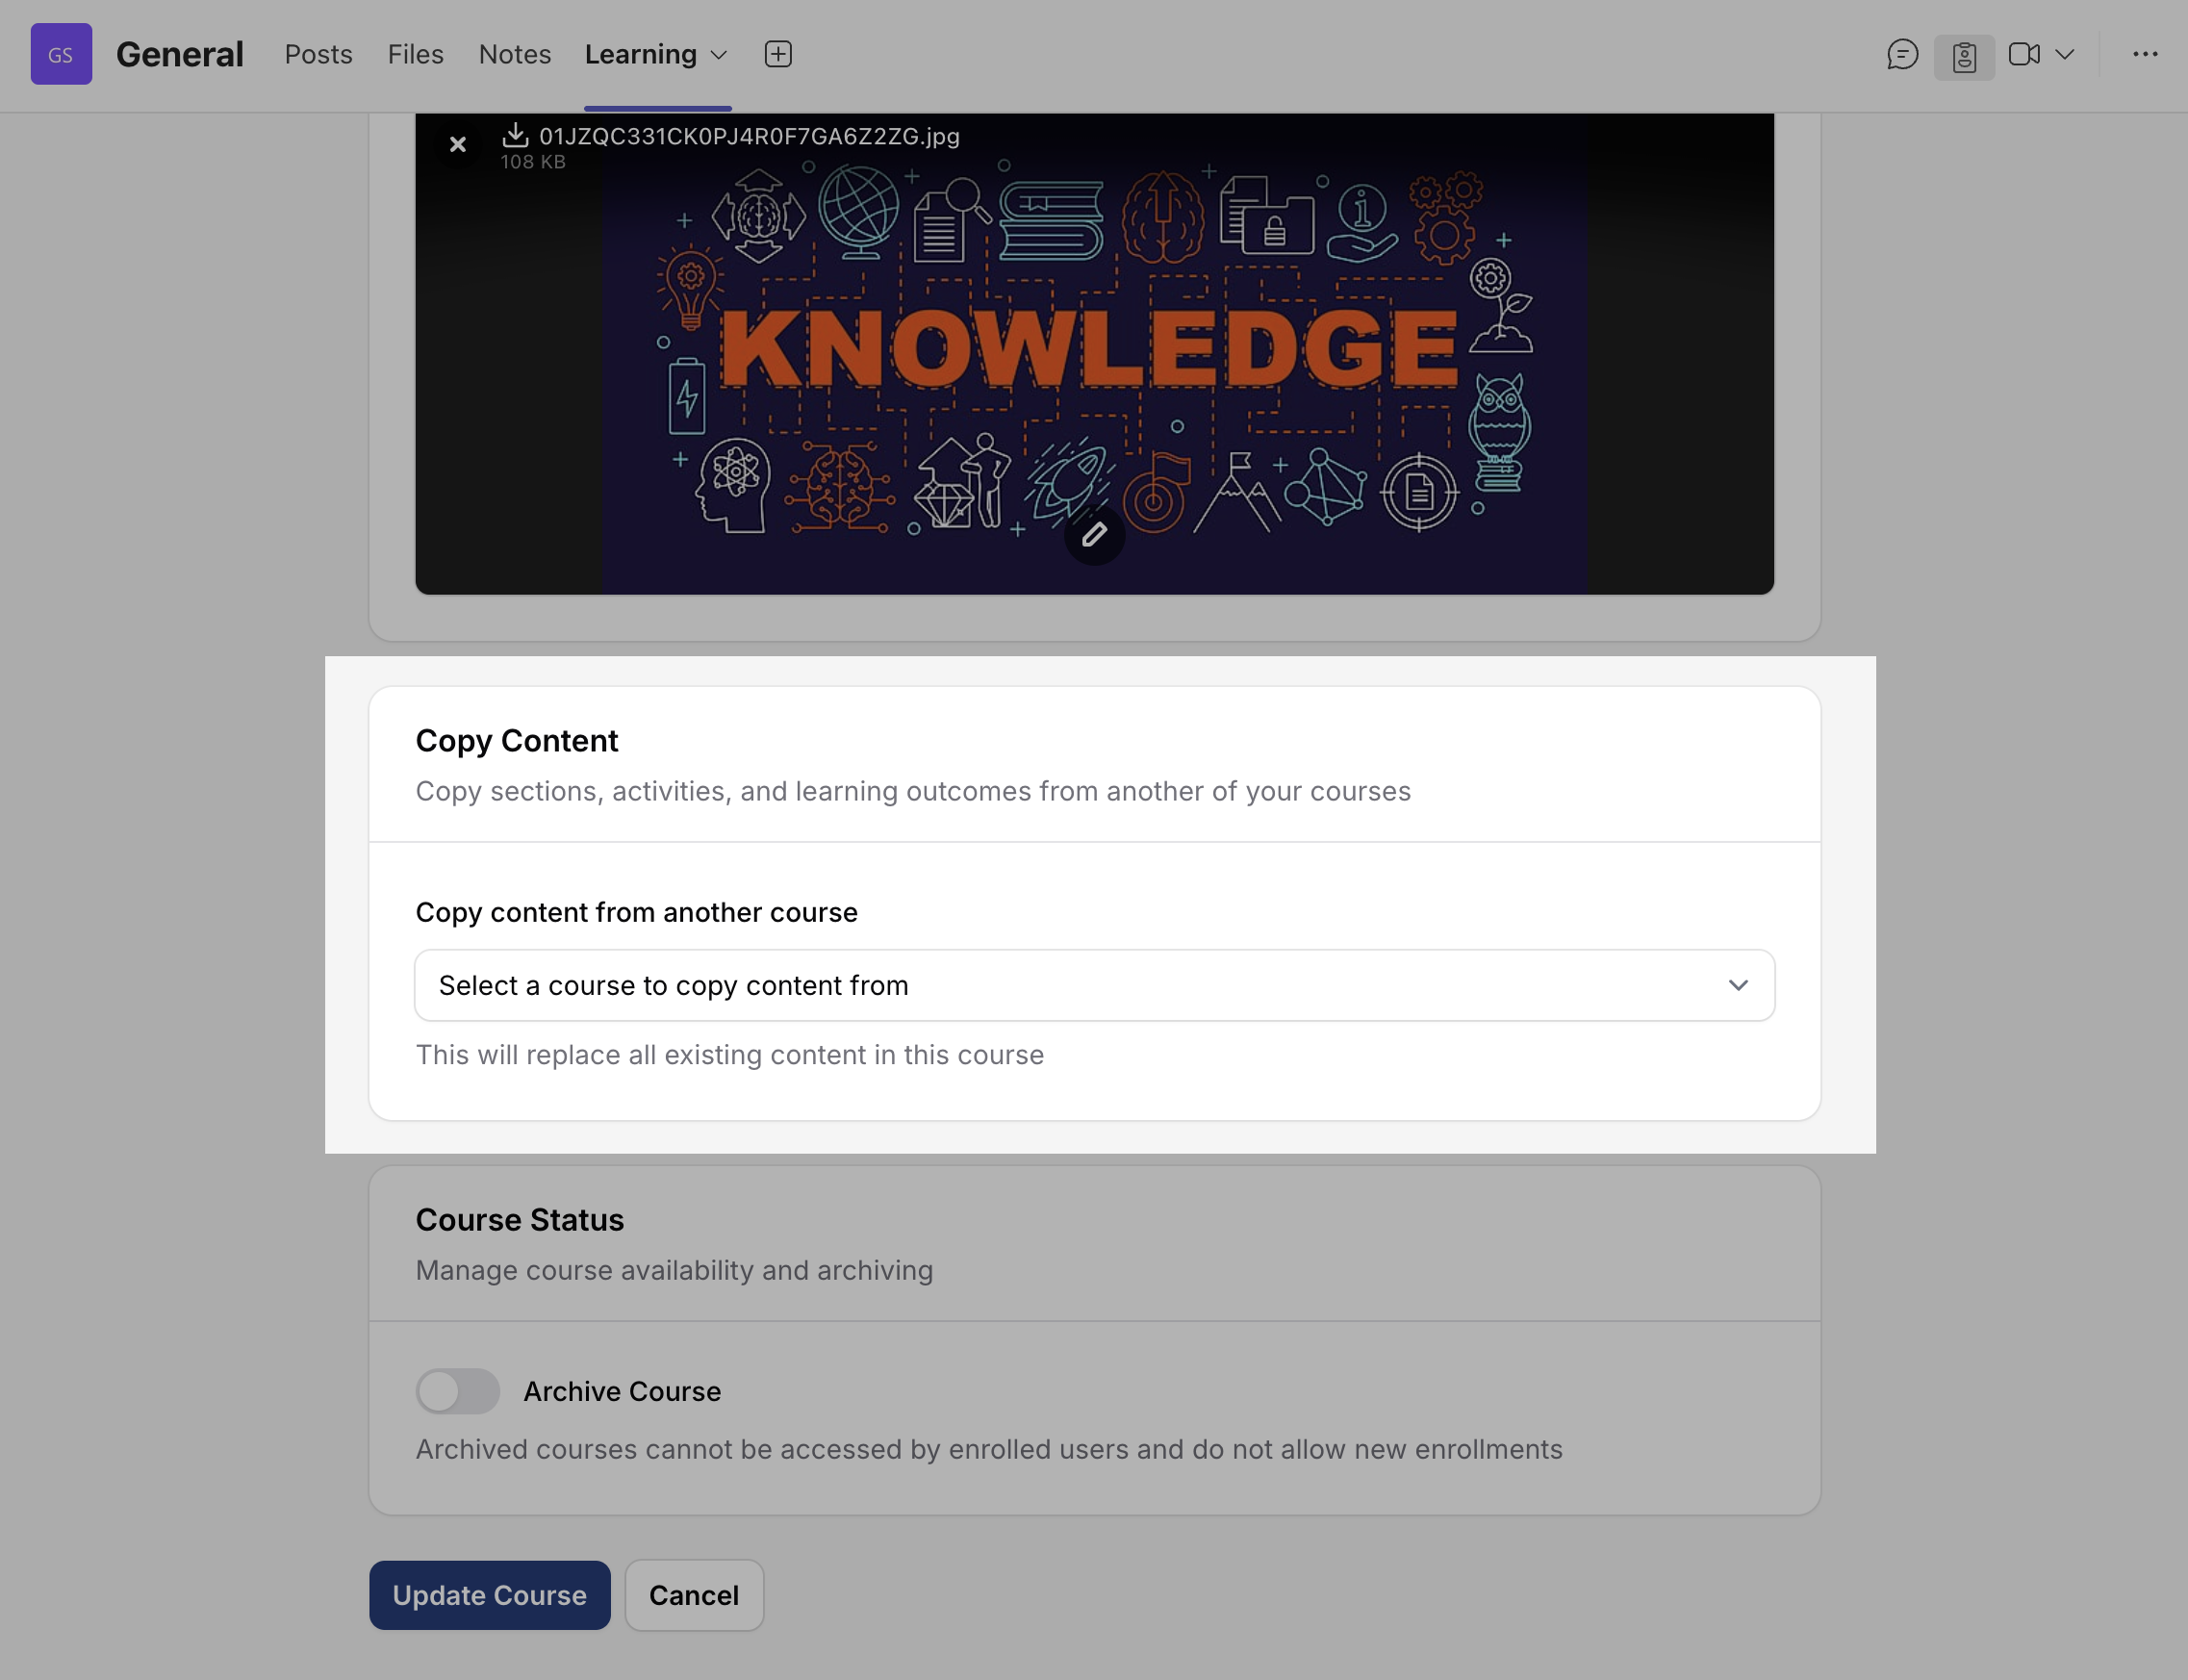
Copy all sections and activities from an existing course into a new one.
Go to the Copy Content section.
Click the dropdown menu.
Select one of your existing courses from the list.
Course Settings - Archive
In Course Settings, go to Course Status
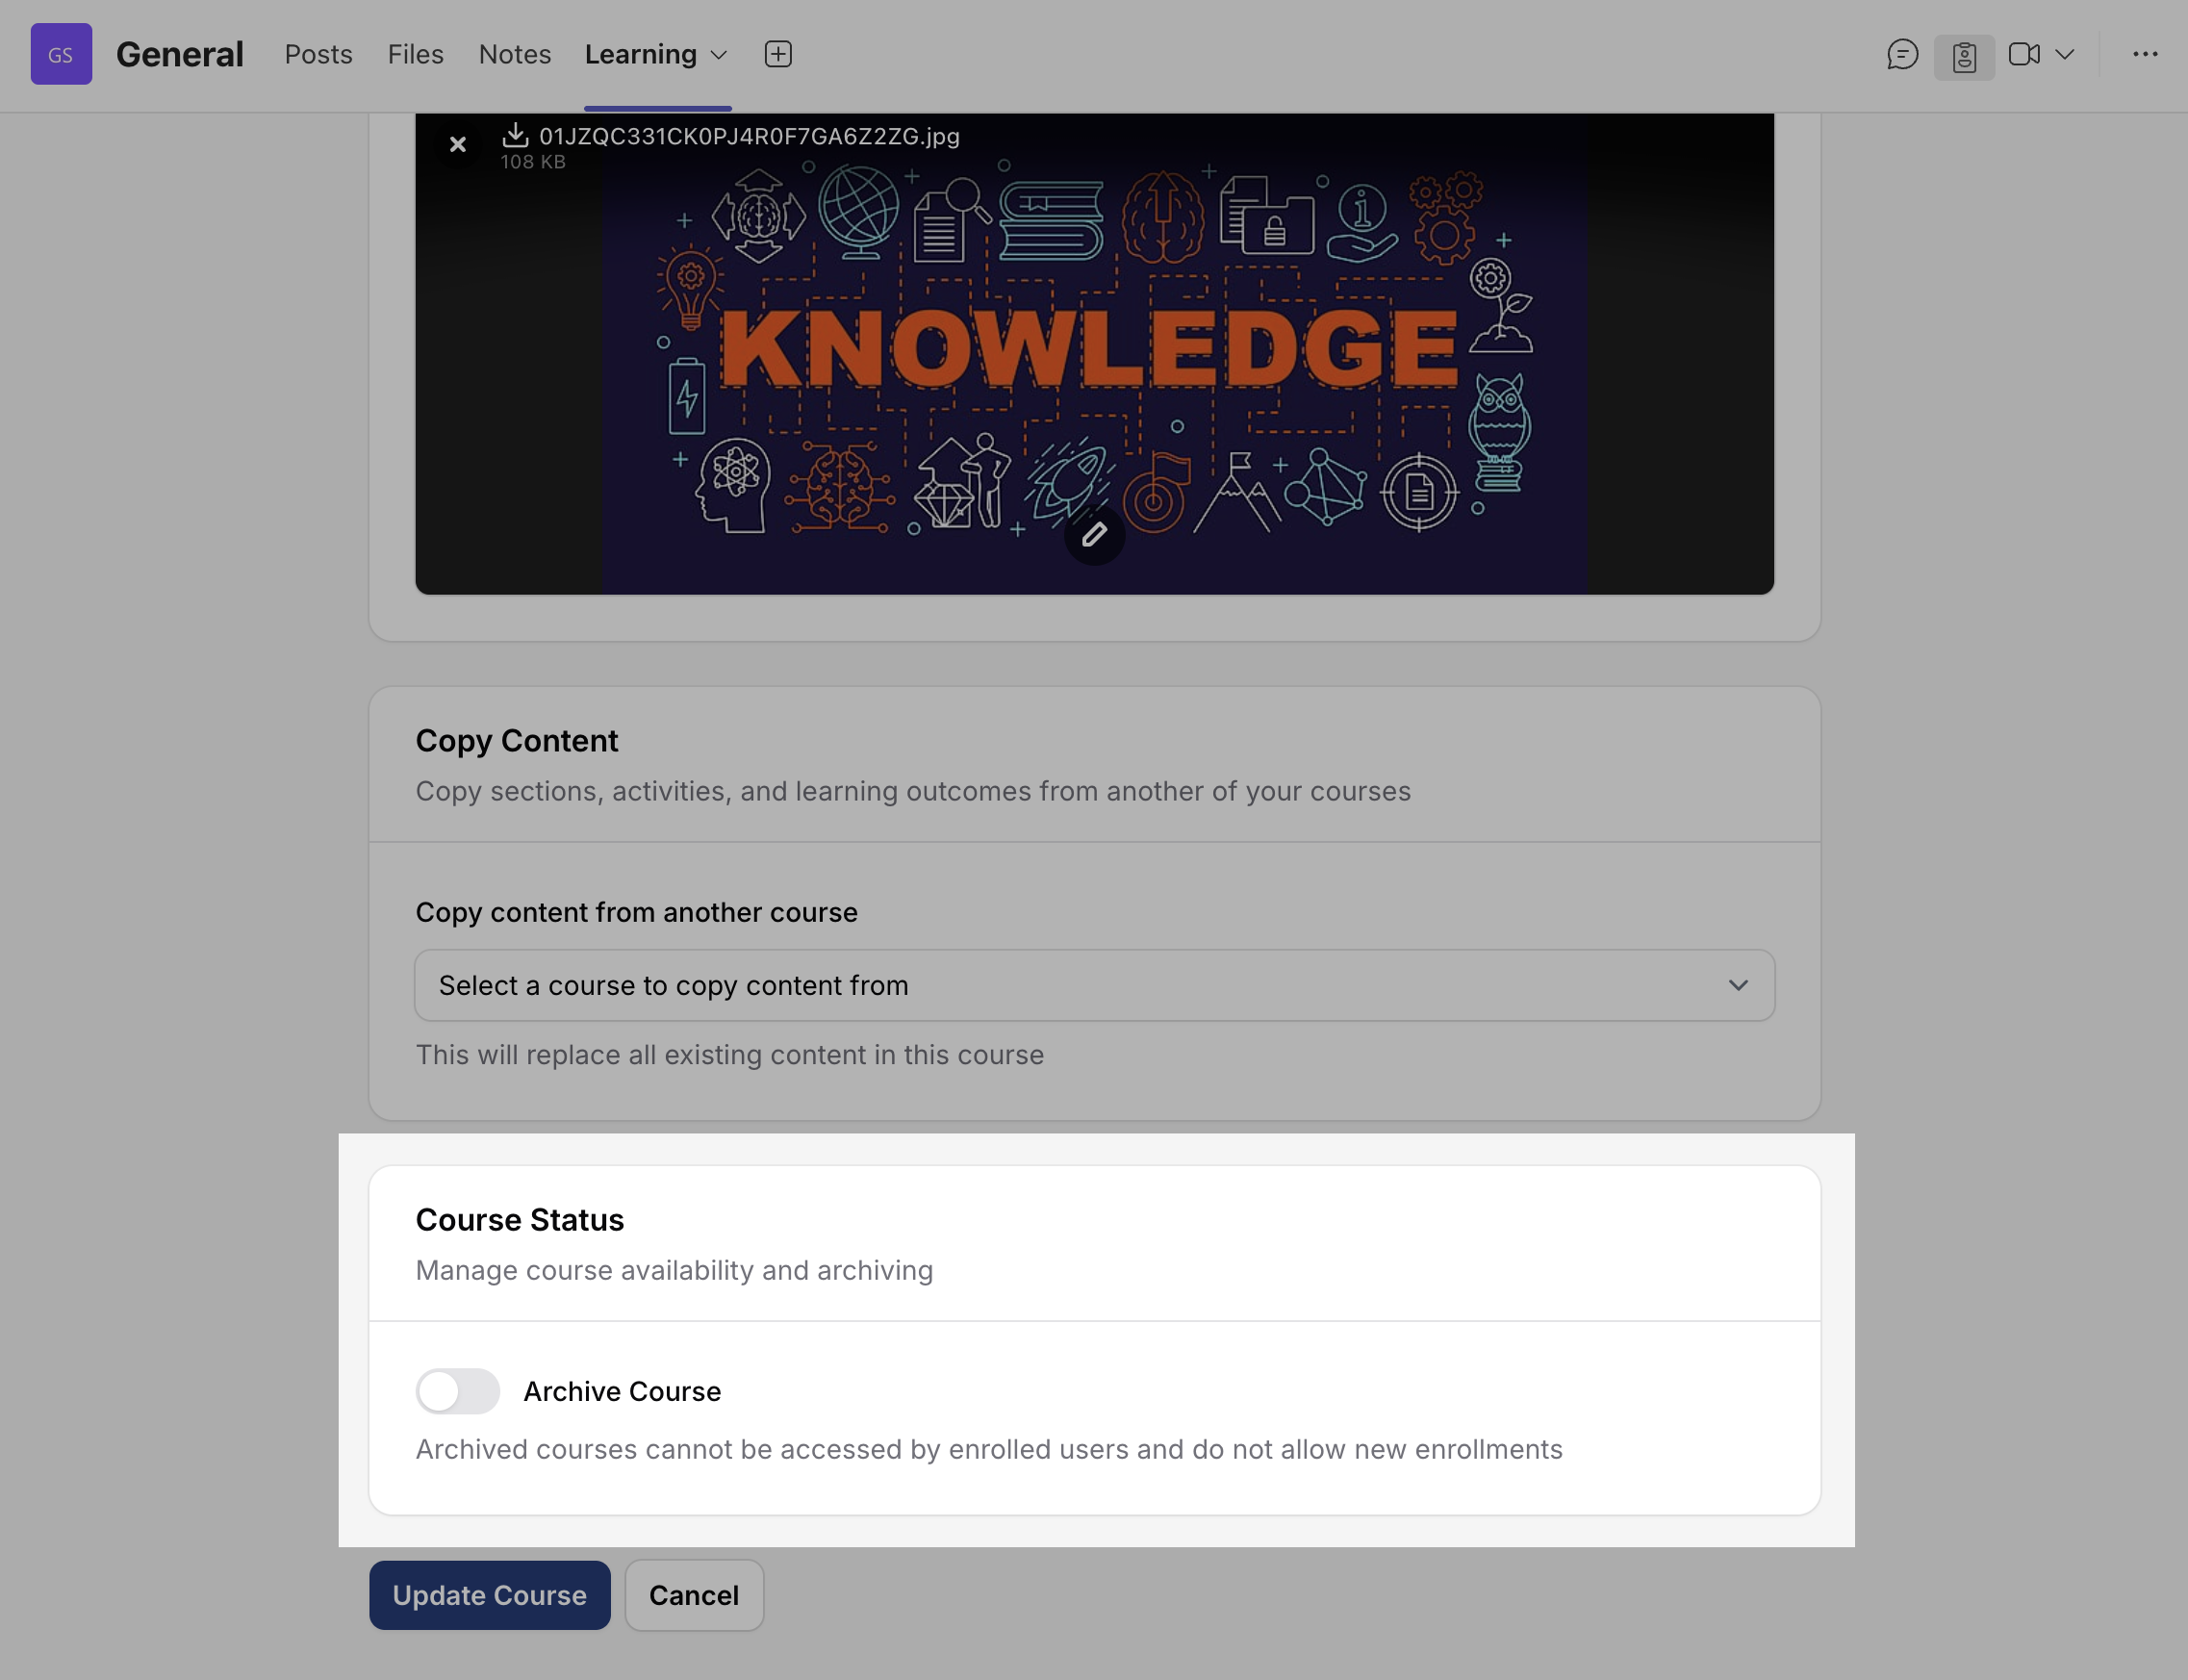
Enable the Archive Course toggle
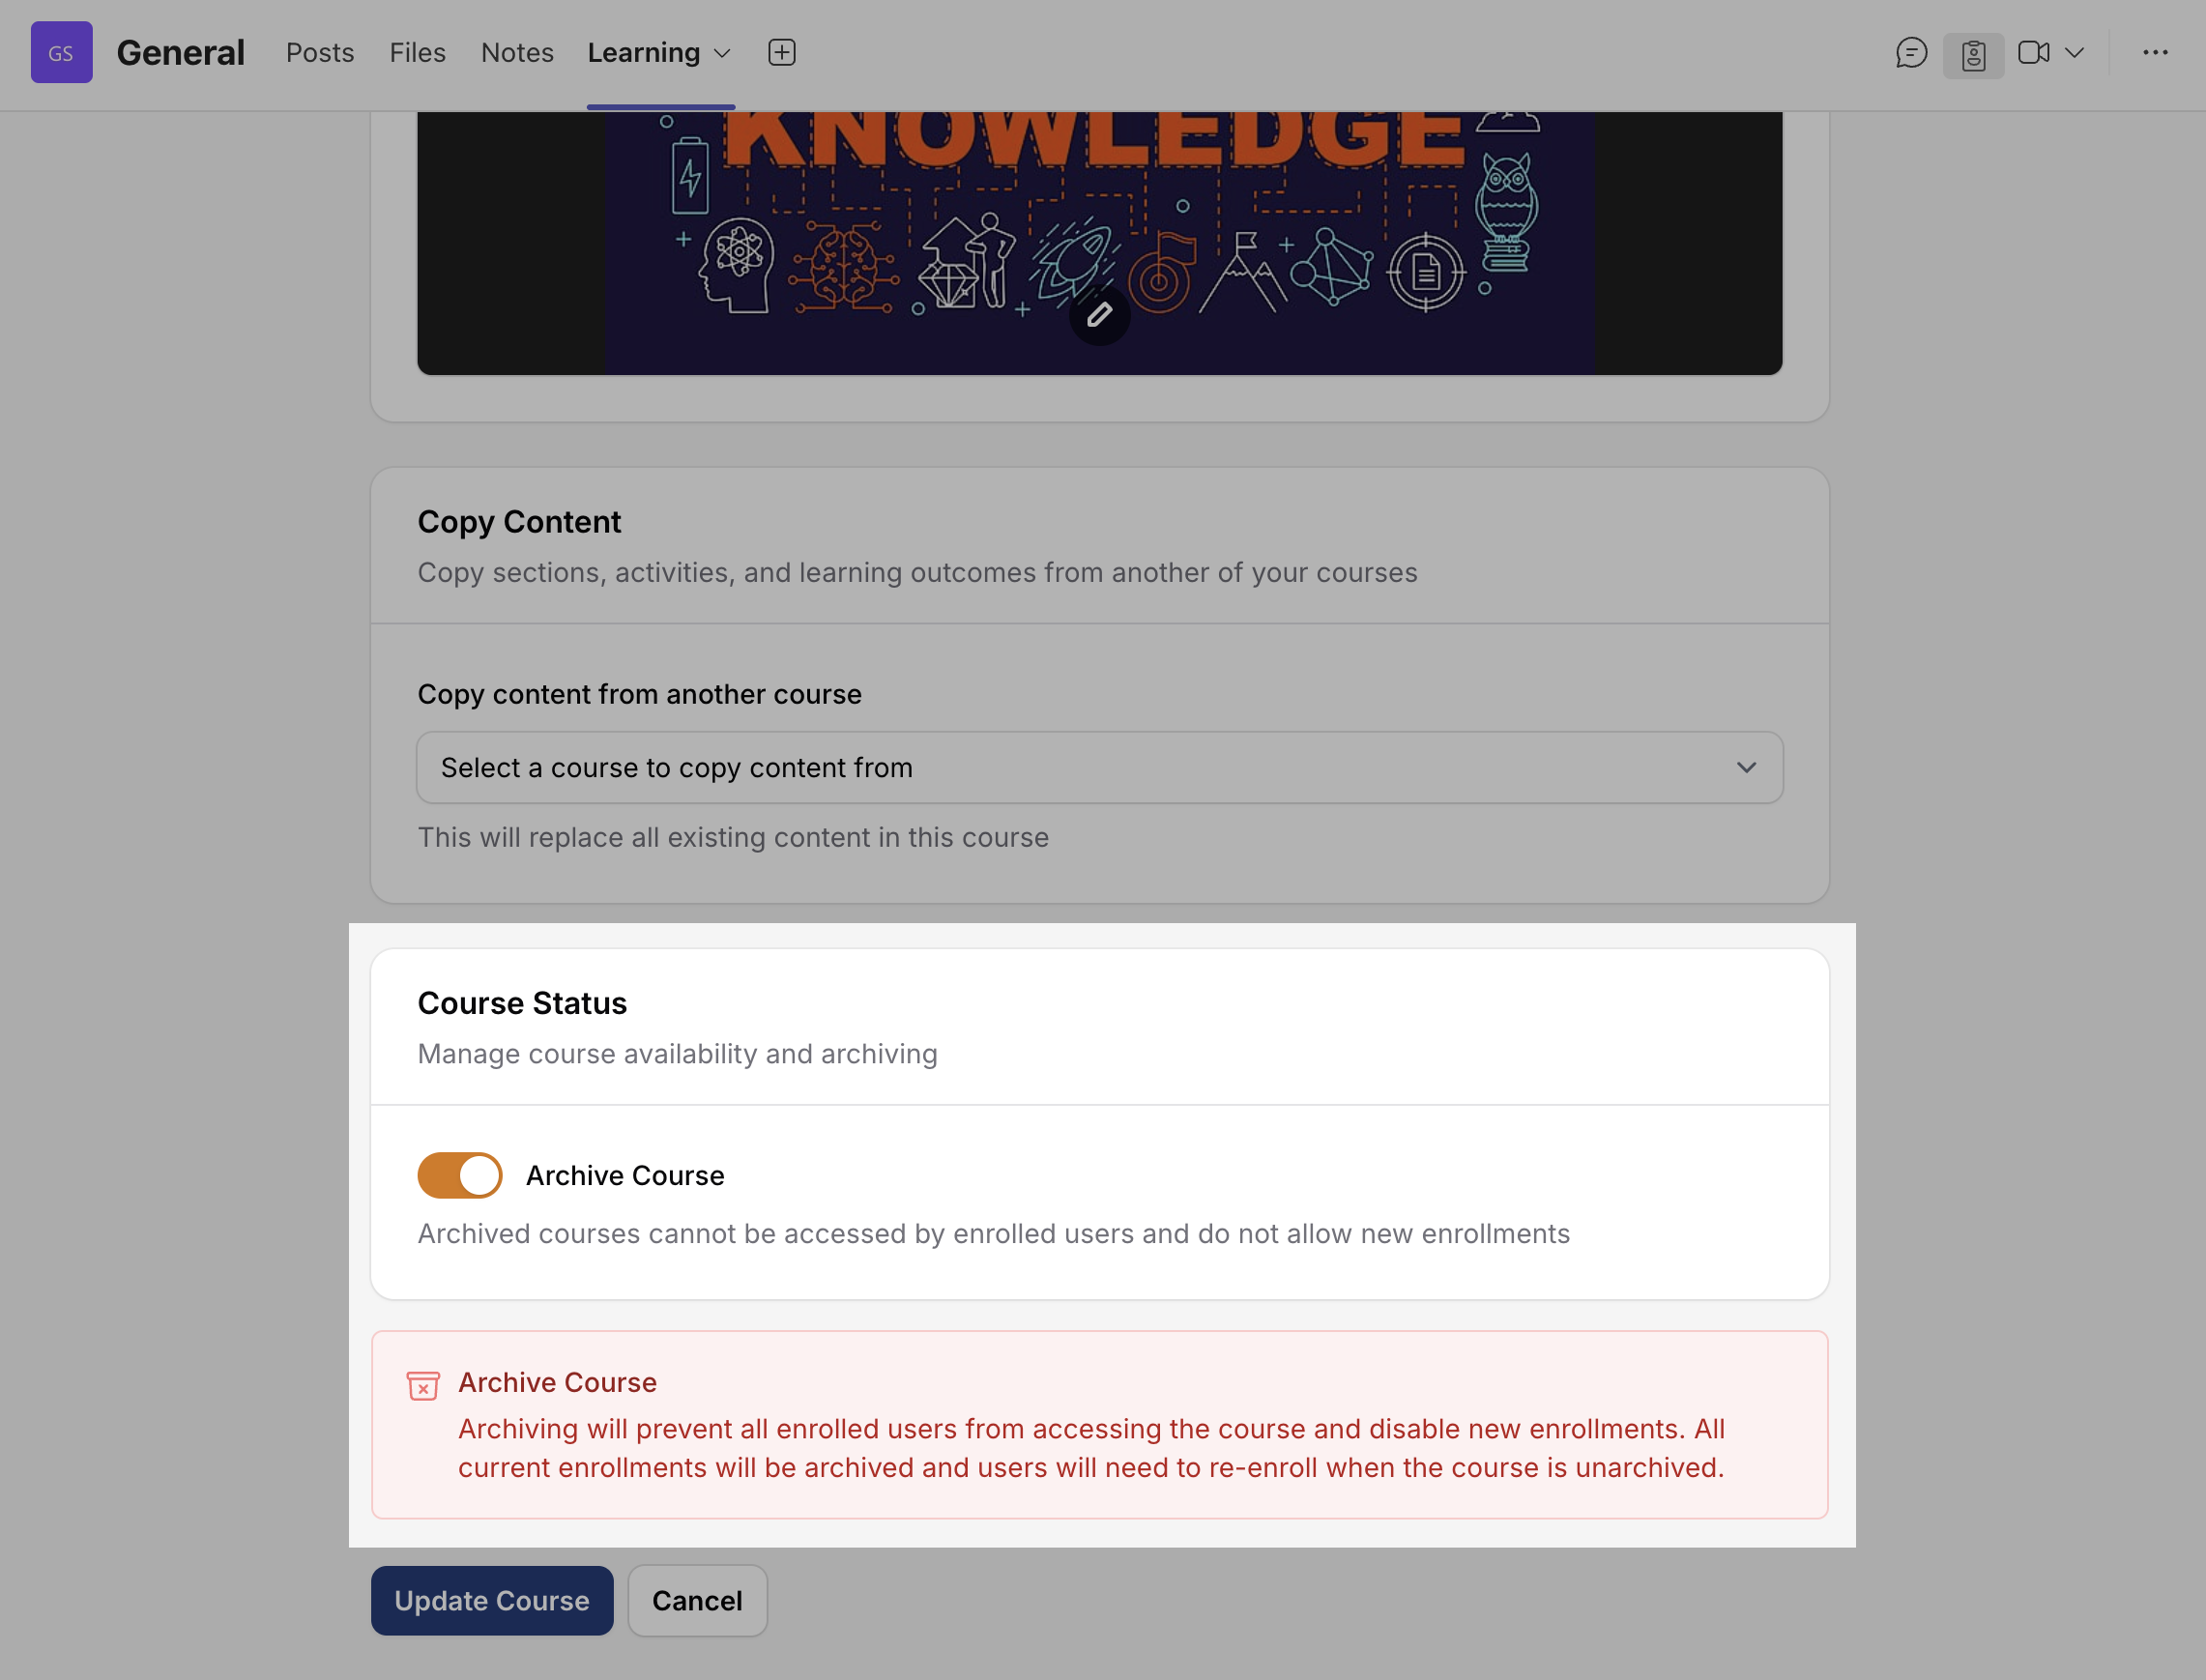
Read the warning message carefully
Click Update Course to save changes
Your course is now archived and marked with a flag
Course Settings - Unarchiving / Resetting a Course
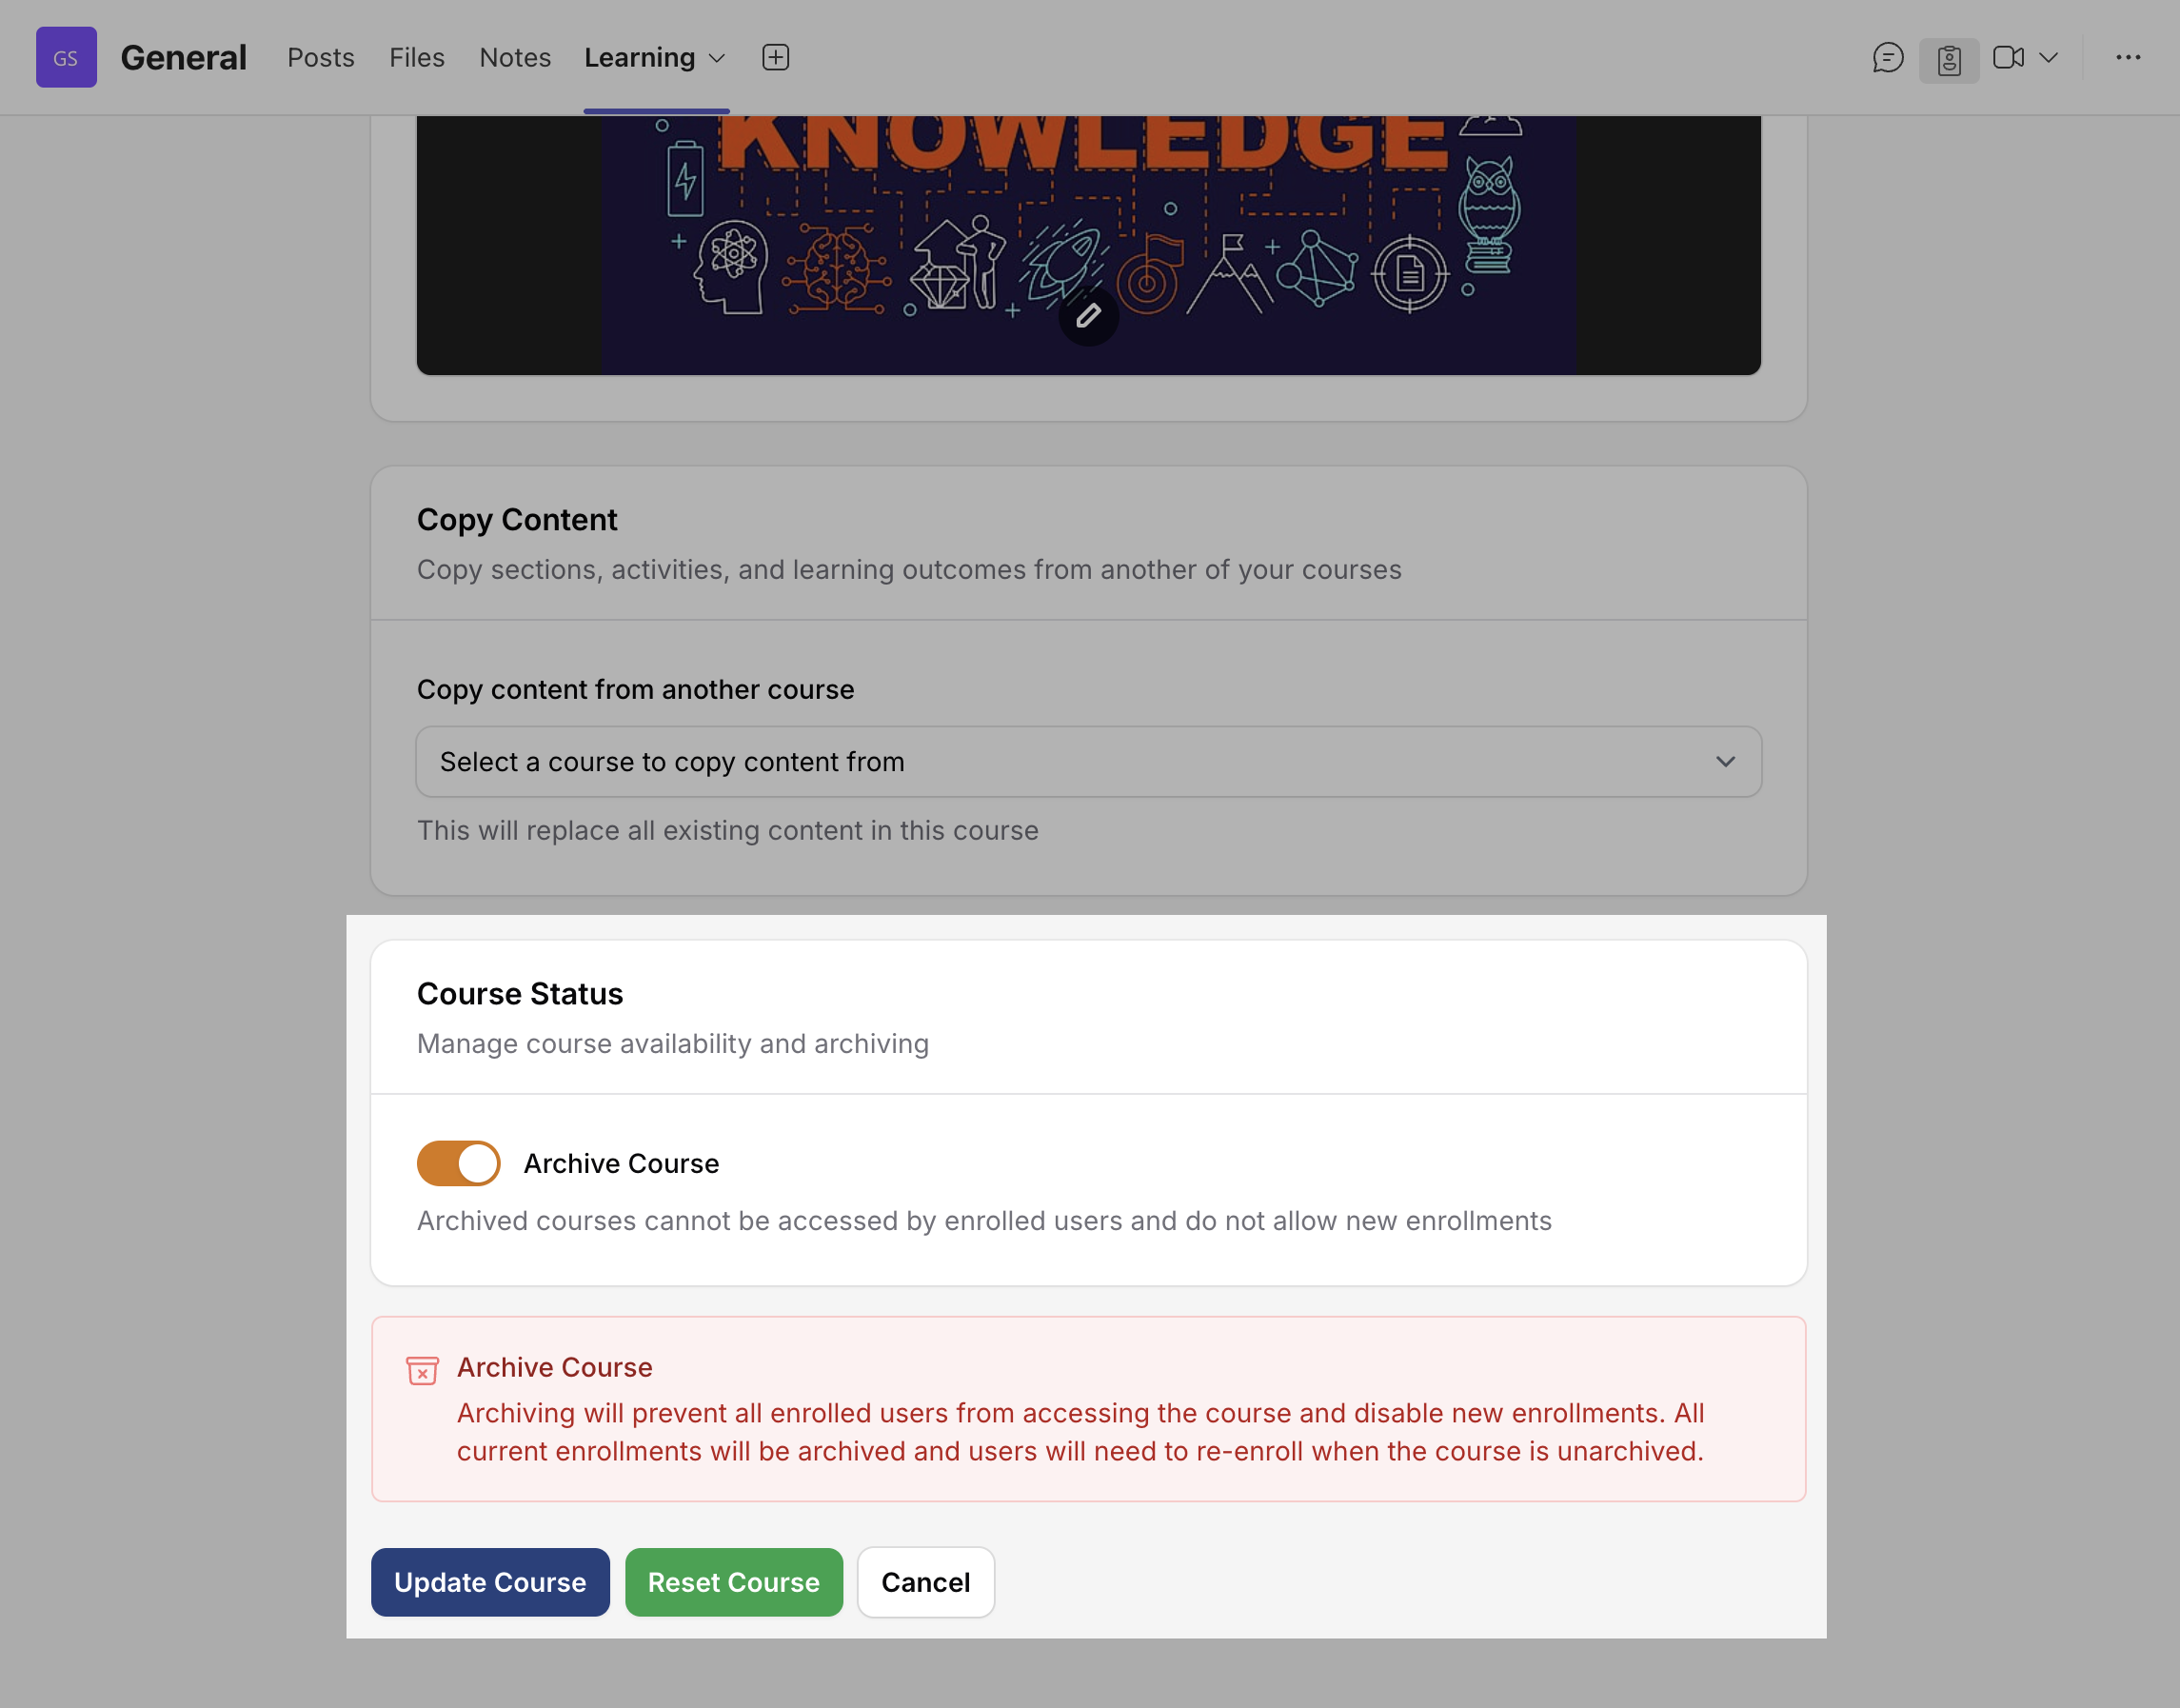
Open the Course Settings page.
Either turn off the Archive Course toggle, or click Reset Course.
If using the toggle, read the warning and click Update Course.
If using Reset Course, changes are saved automatically.
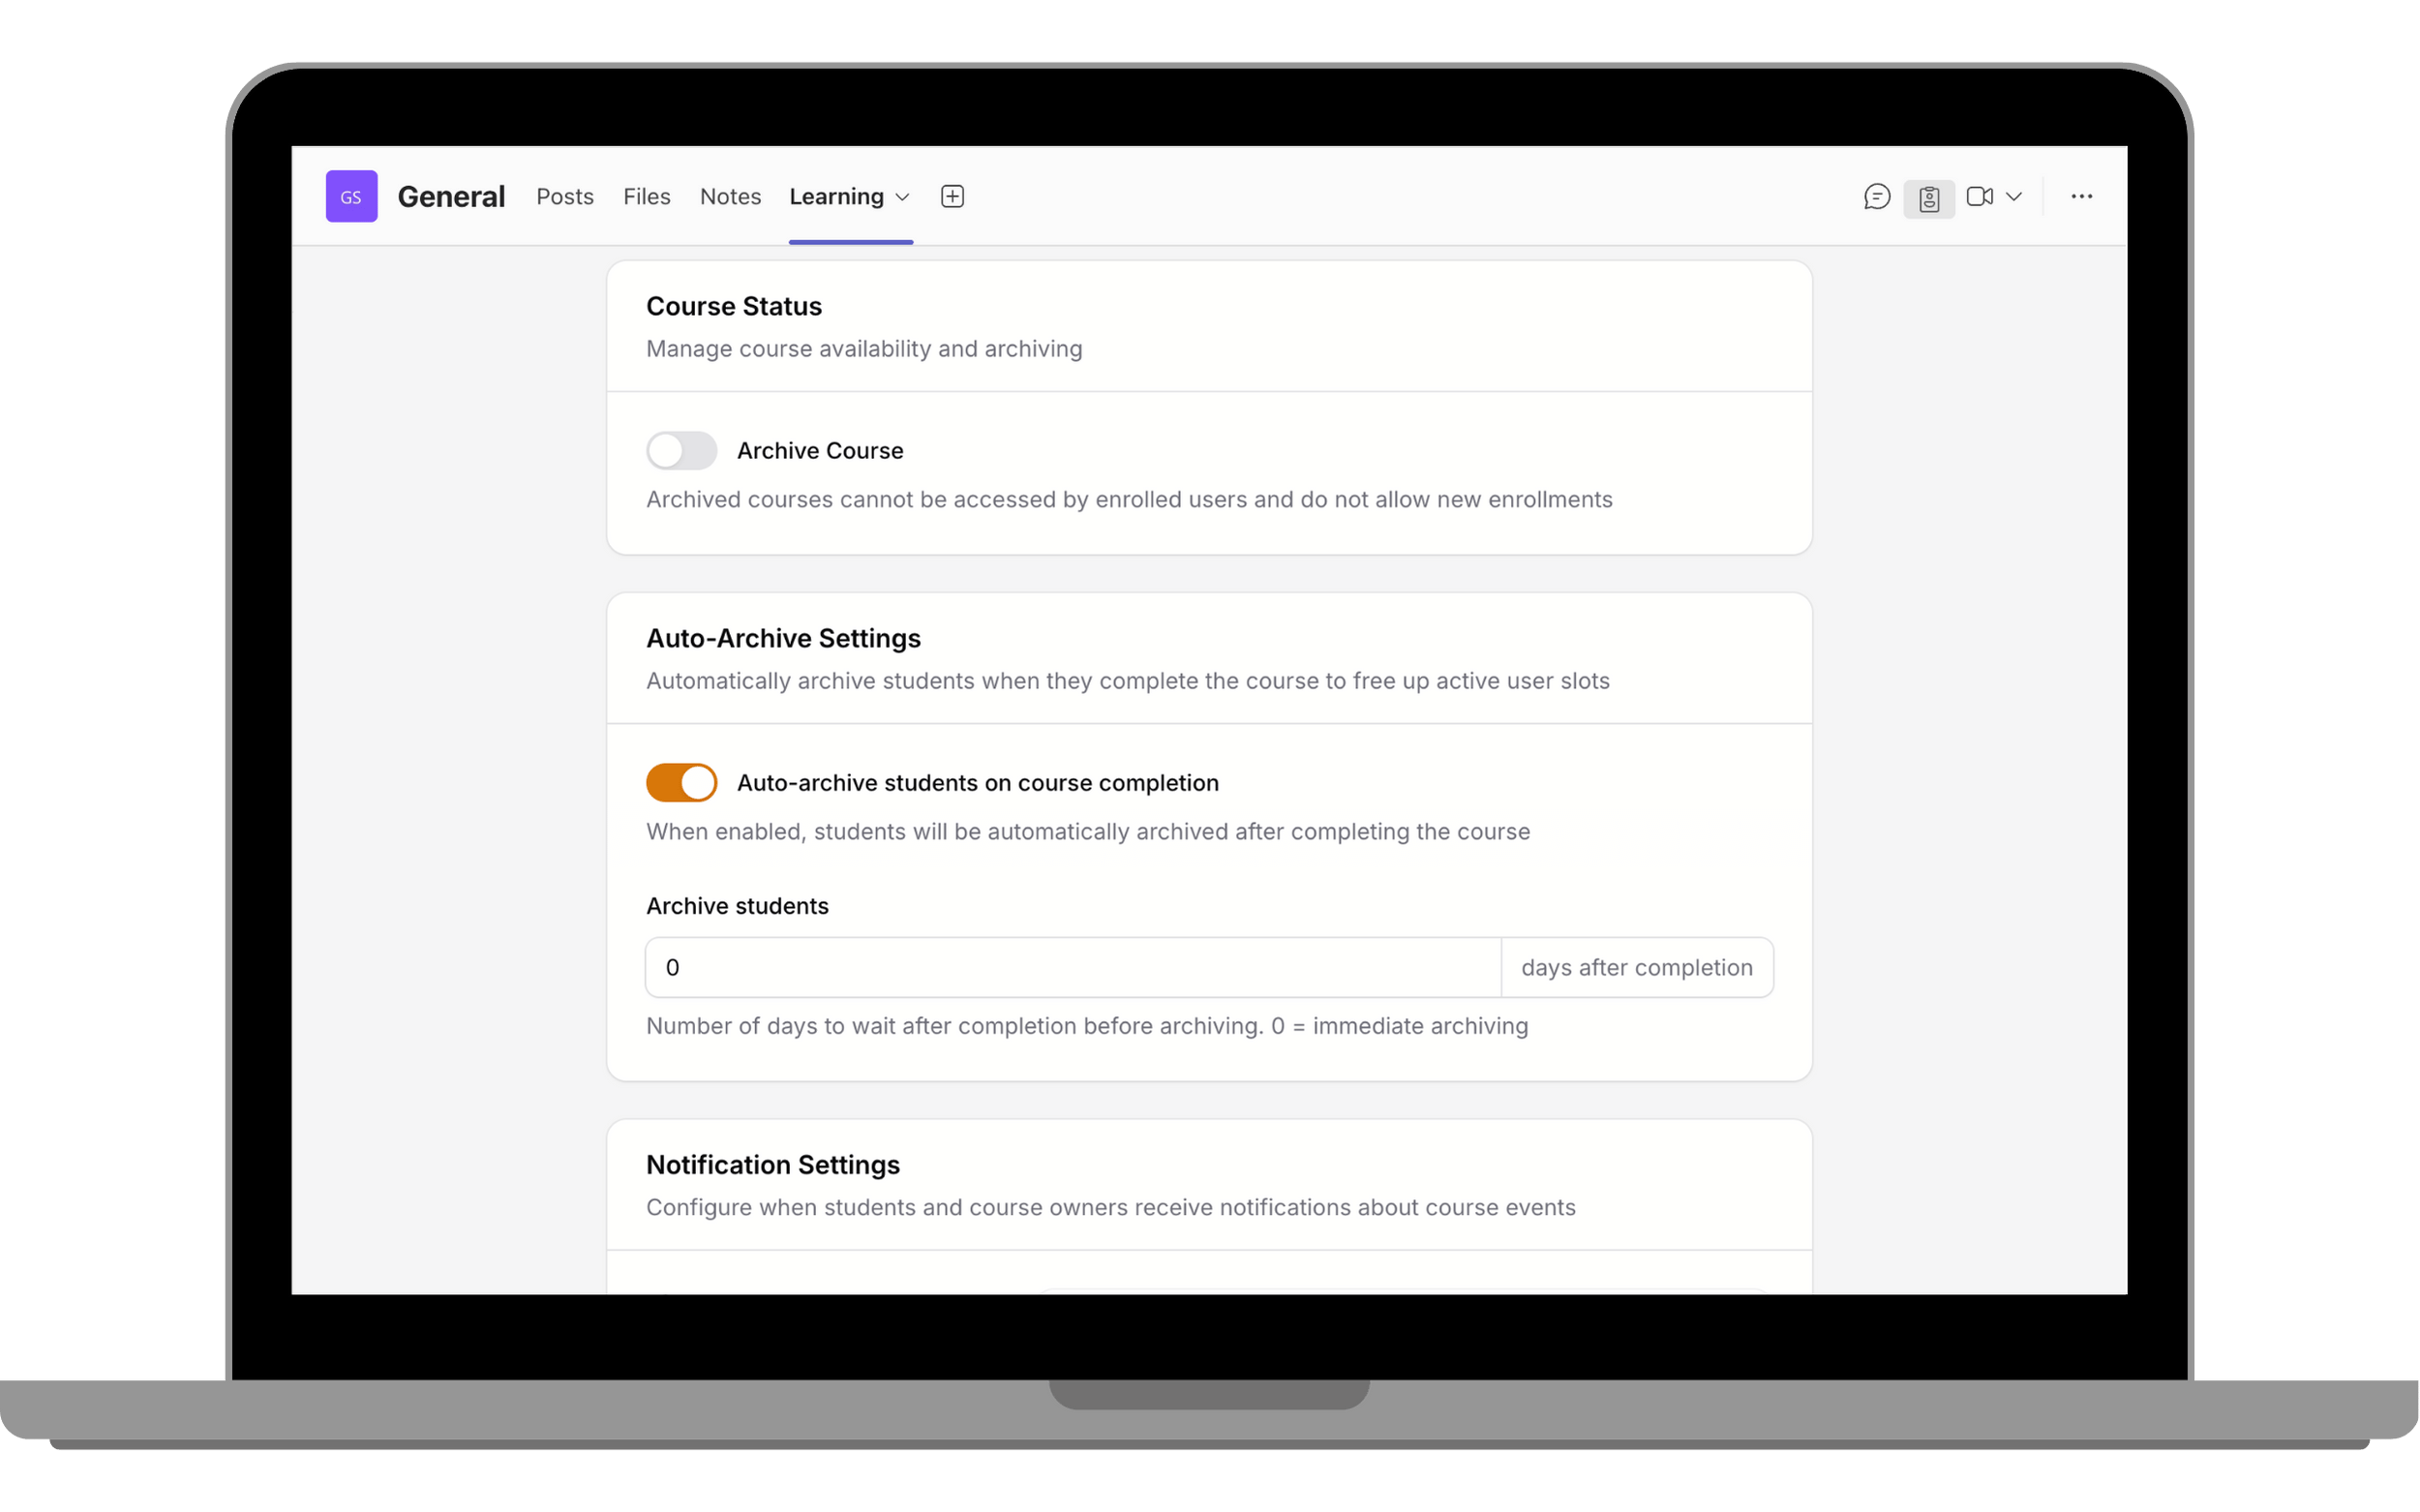
Course Settings - Auto-Archive Students
Automatically archive students after they complete a course to manage active user slots and licence usage.
In Course Settings, go to Auto-Archive Settings
Enable Auto-archive students on course completion
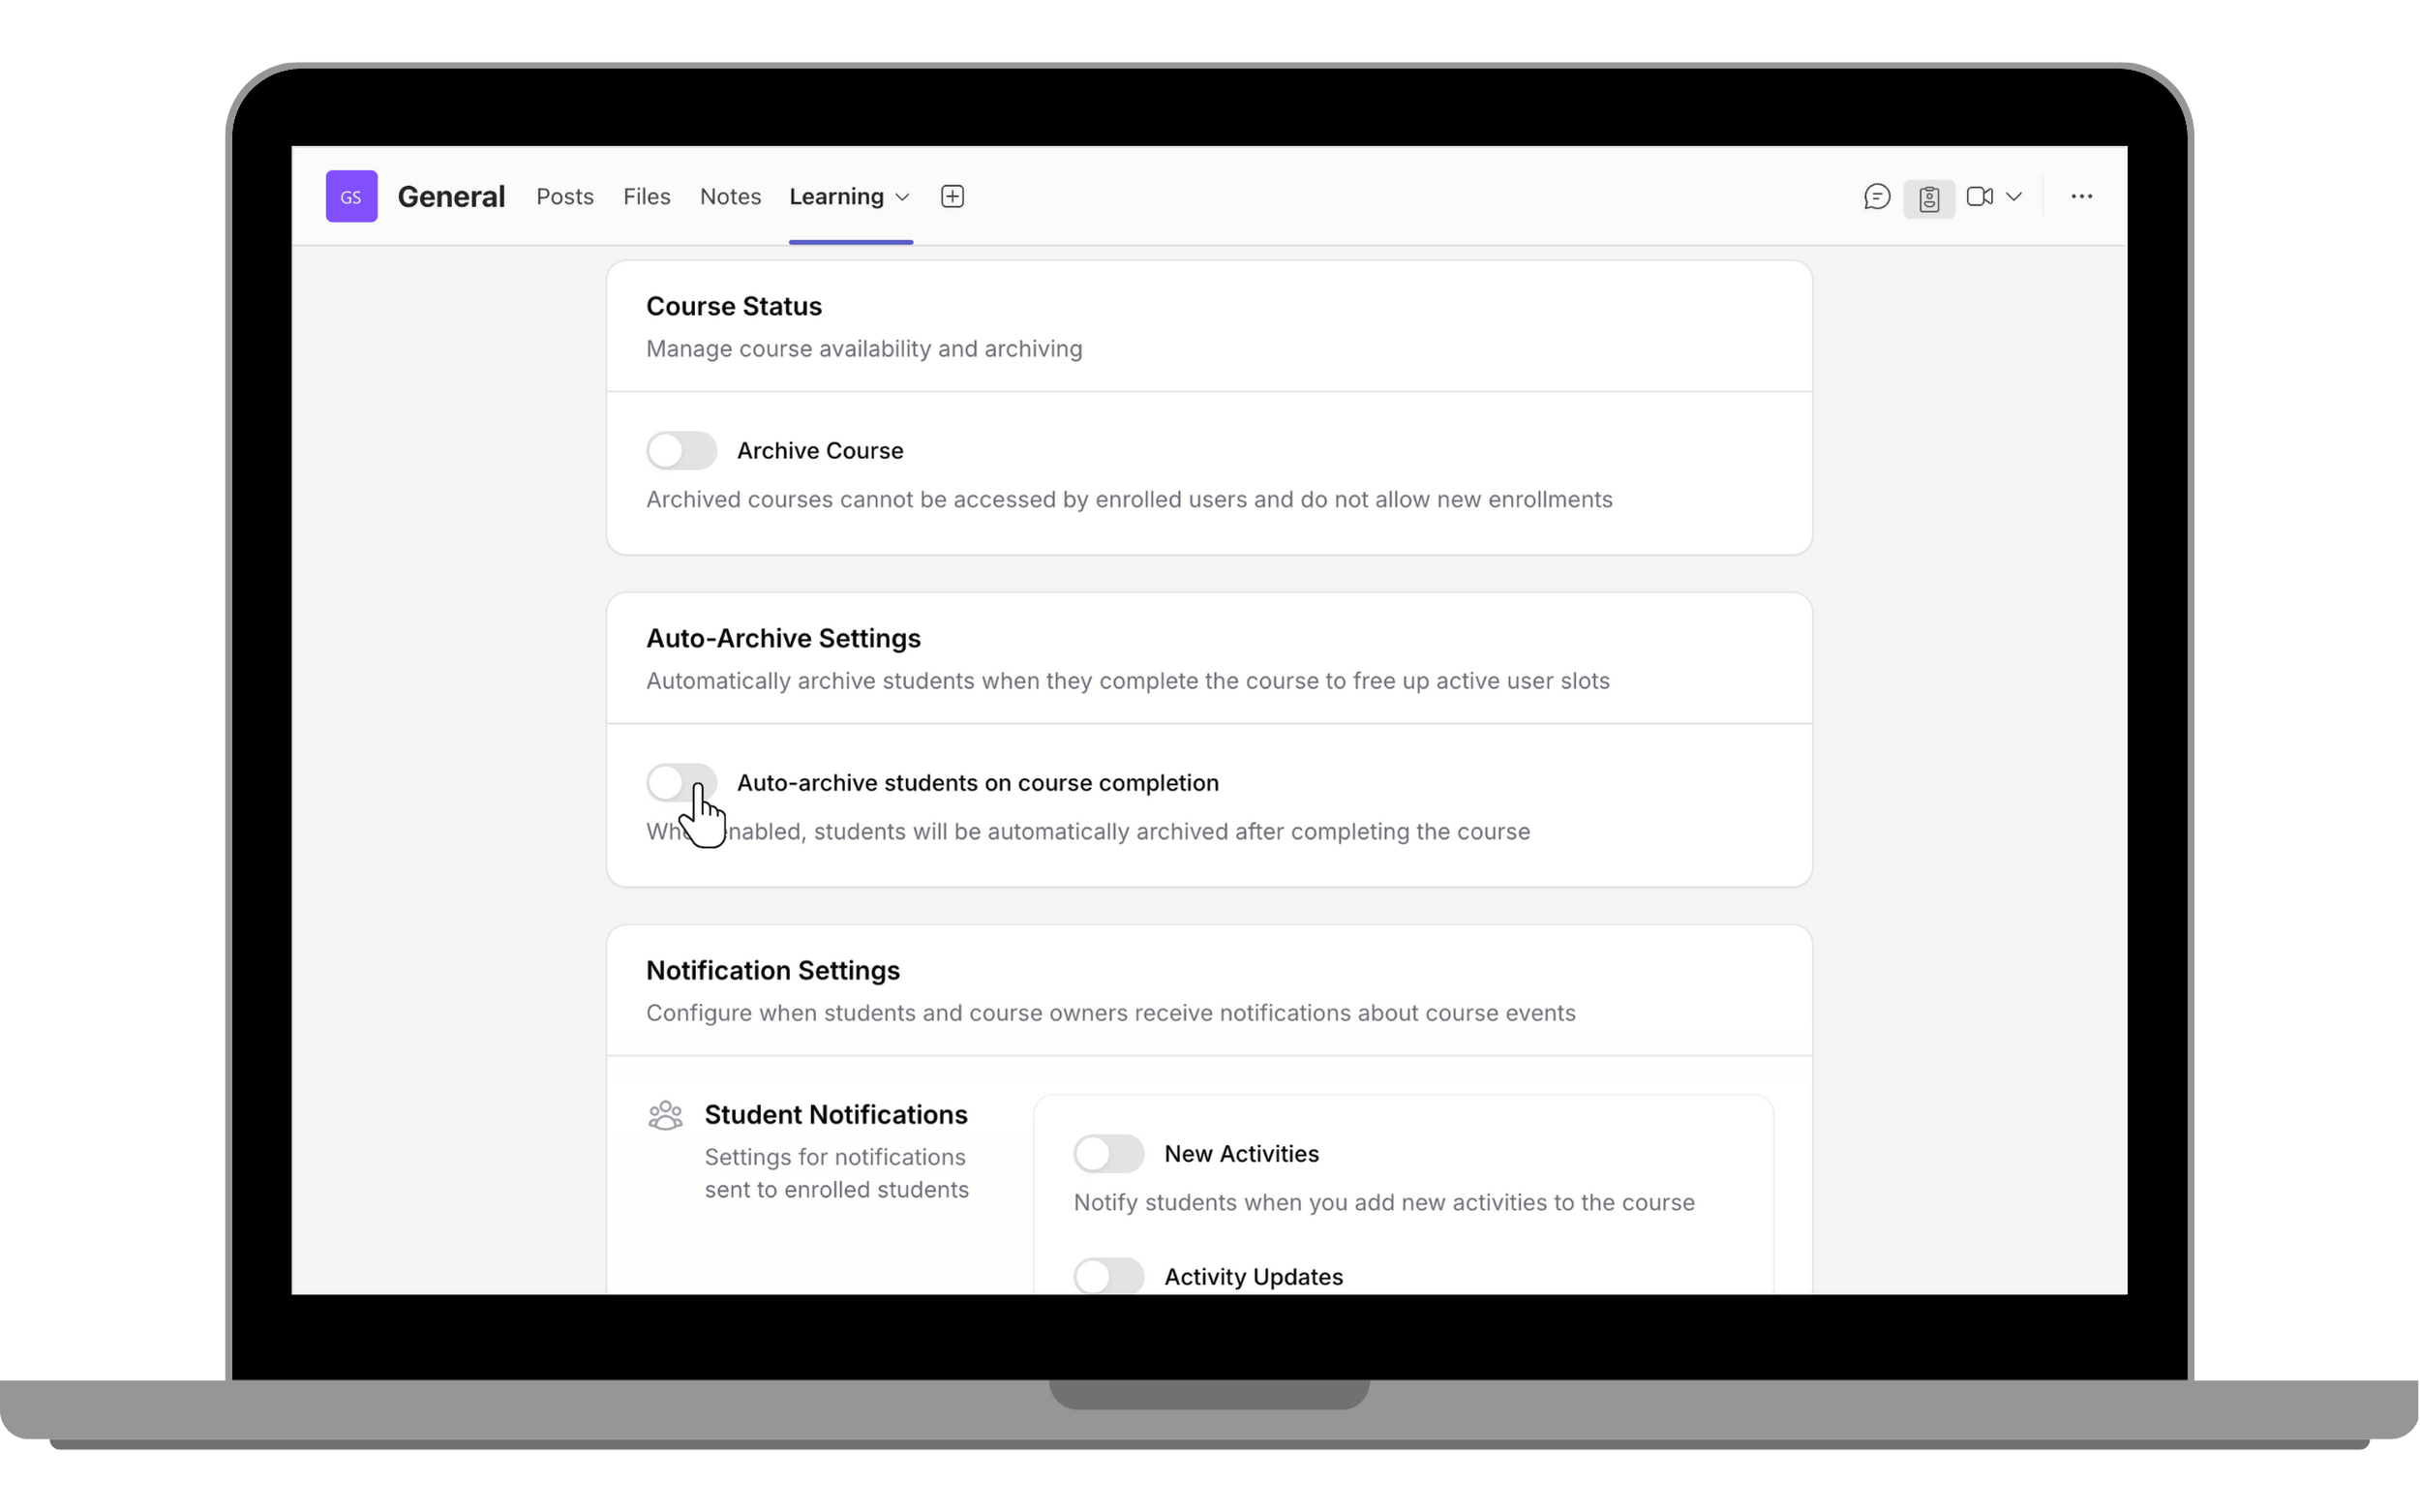
Specify the number of days to wait after completion (default 0 days means immediate)
Course Settings - Notification Settings
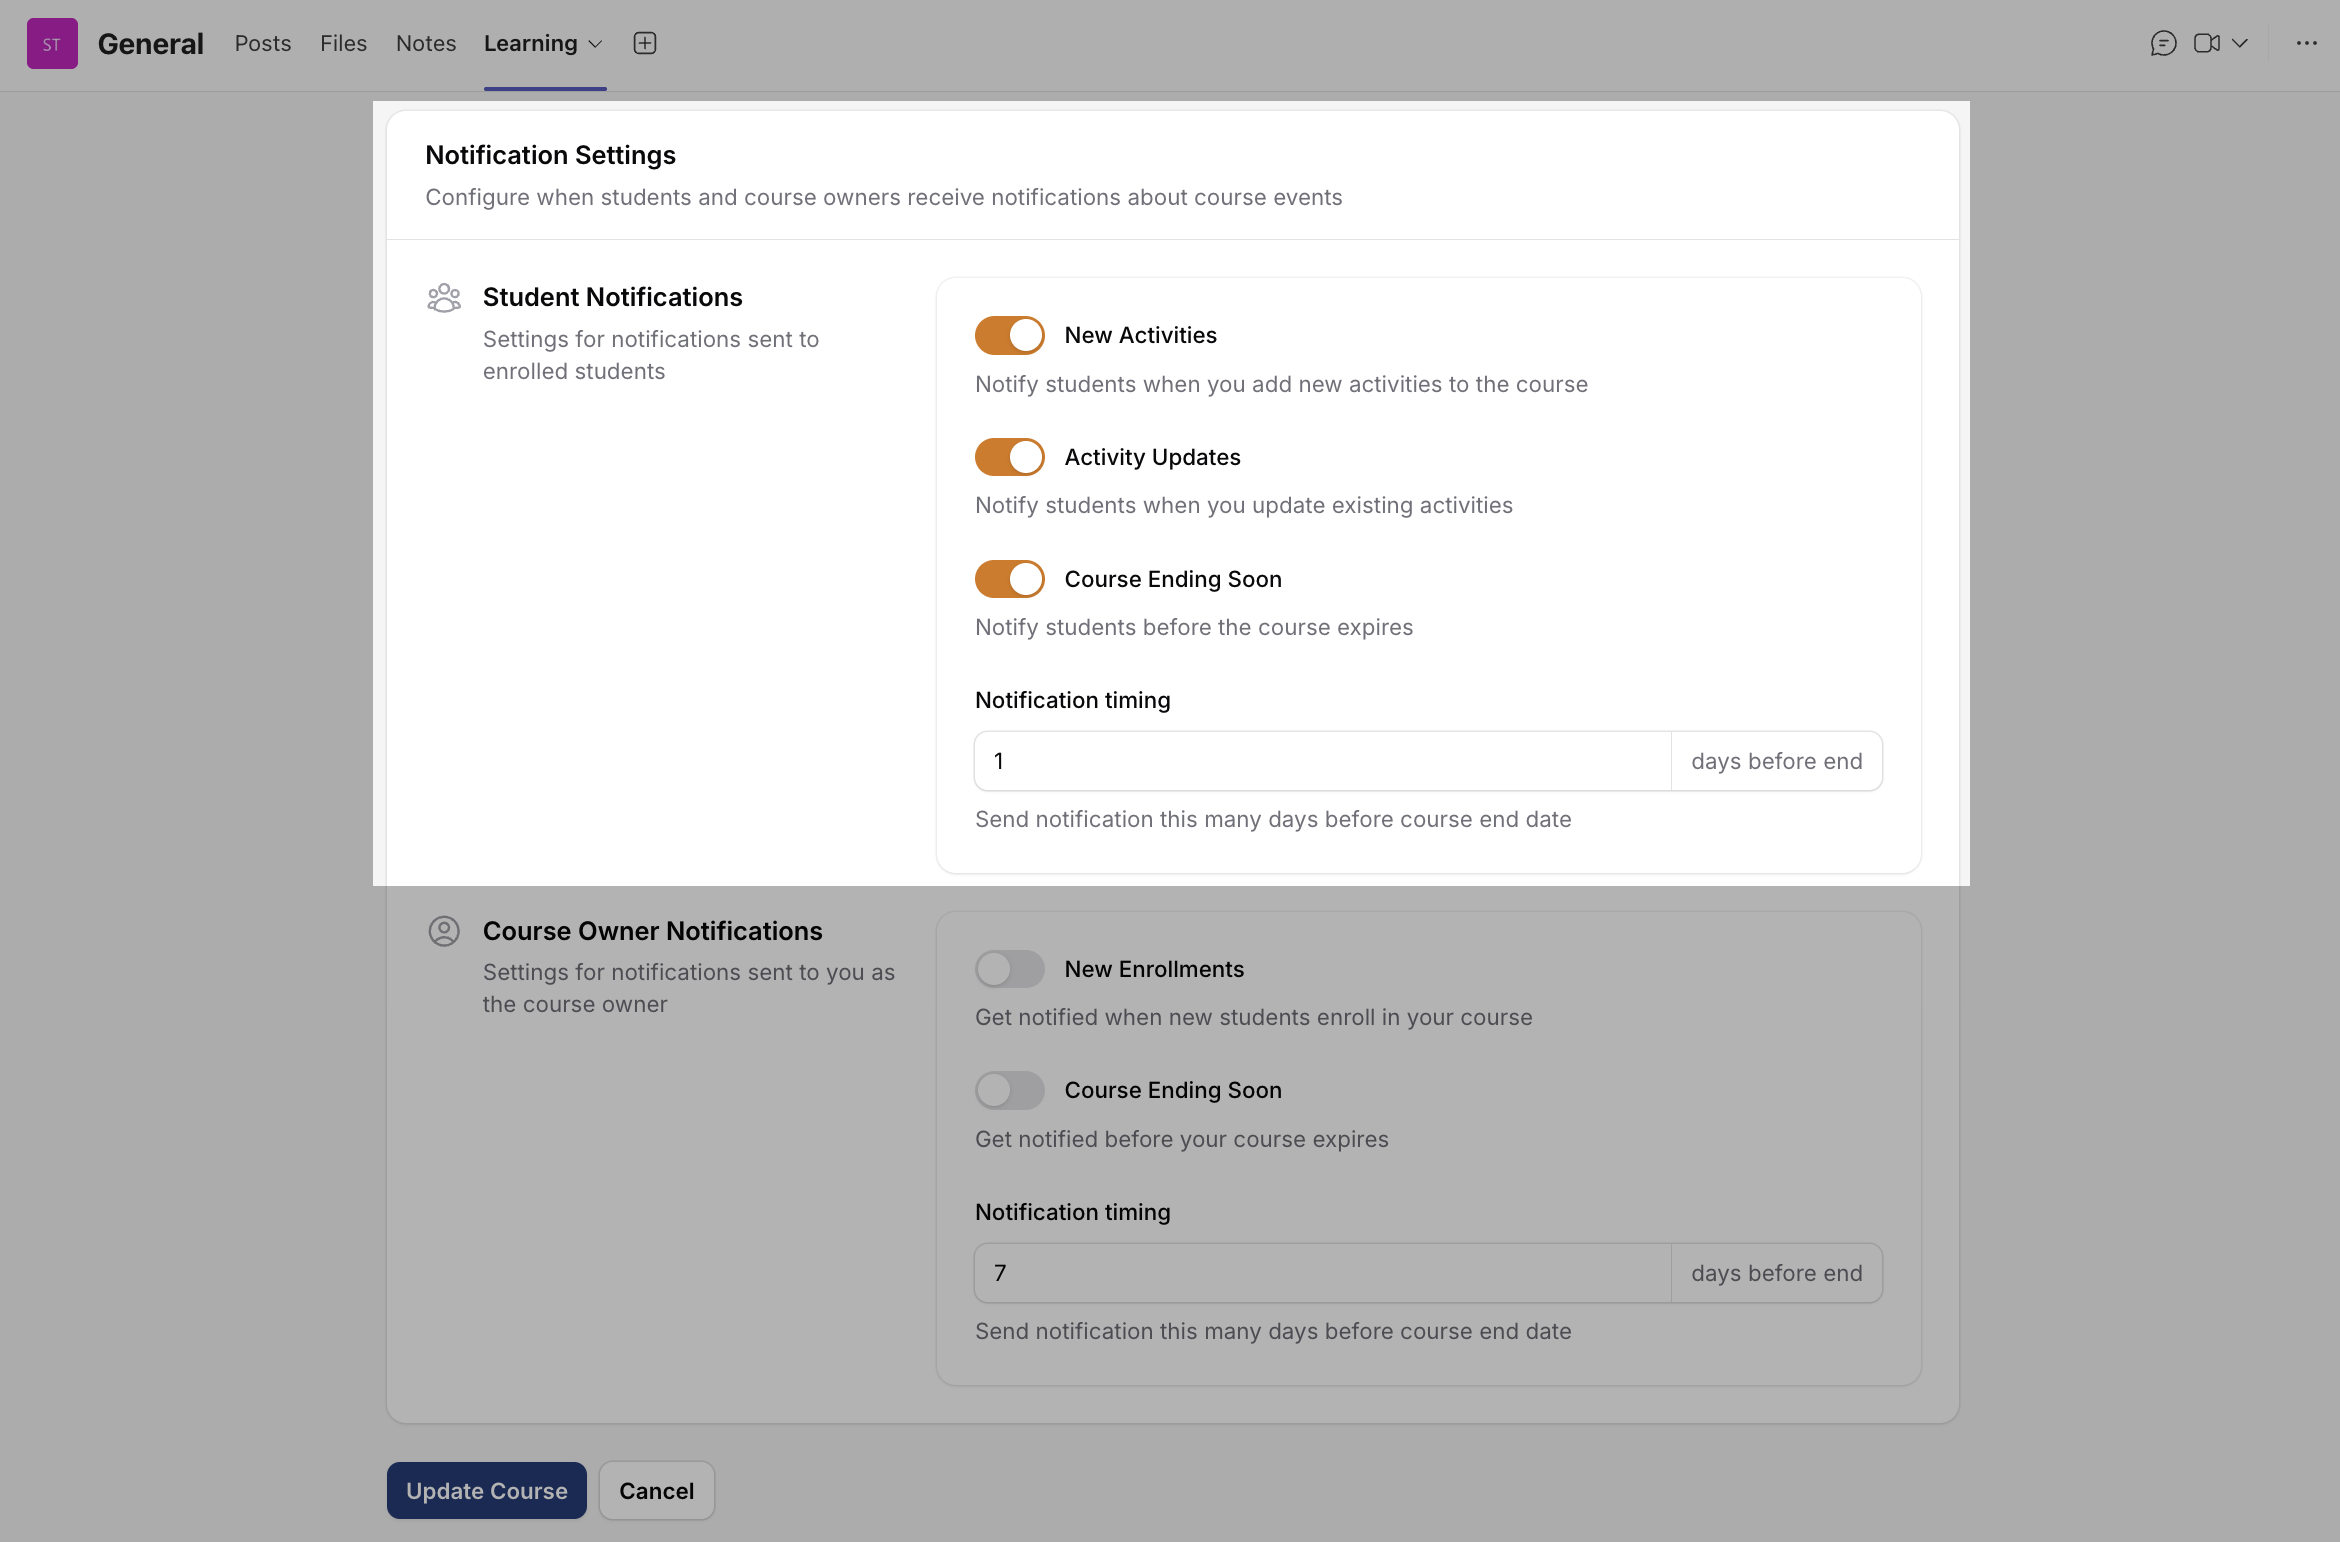
Manage alerts for course activities and updates.
Student Notifications:
- New Activities — Notify students when new activities are added to the course.
- Activity Updates — Notify students when existing activities are updated.
- Course Ending Soon — Notify students before the course expires.
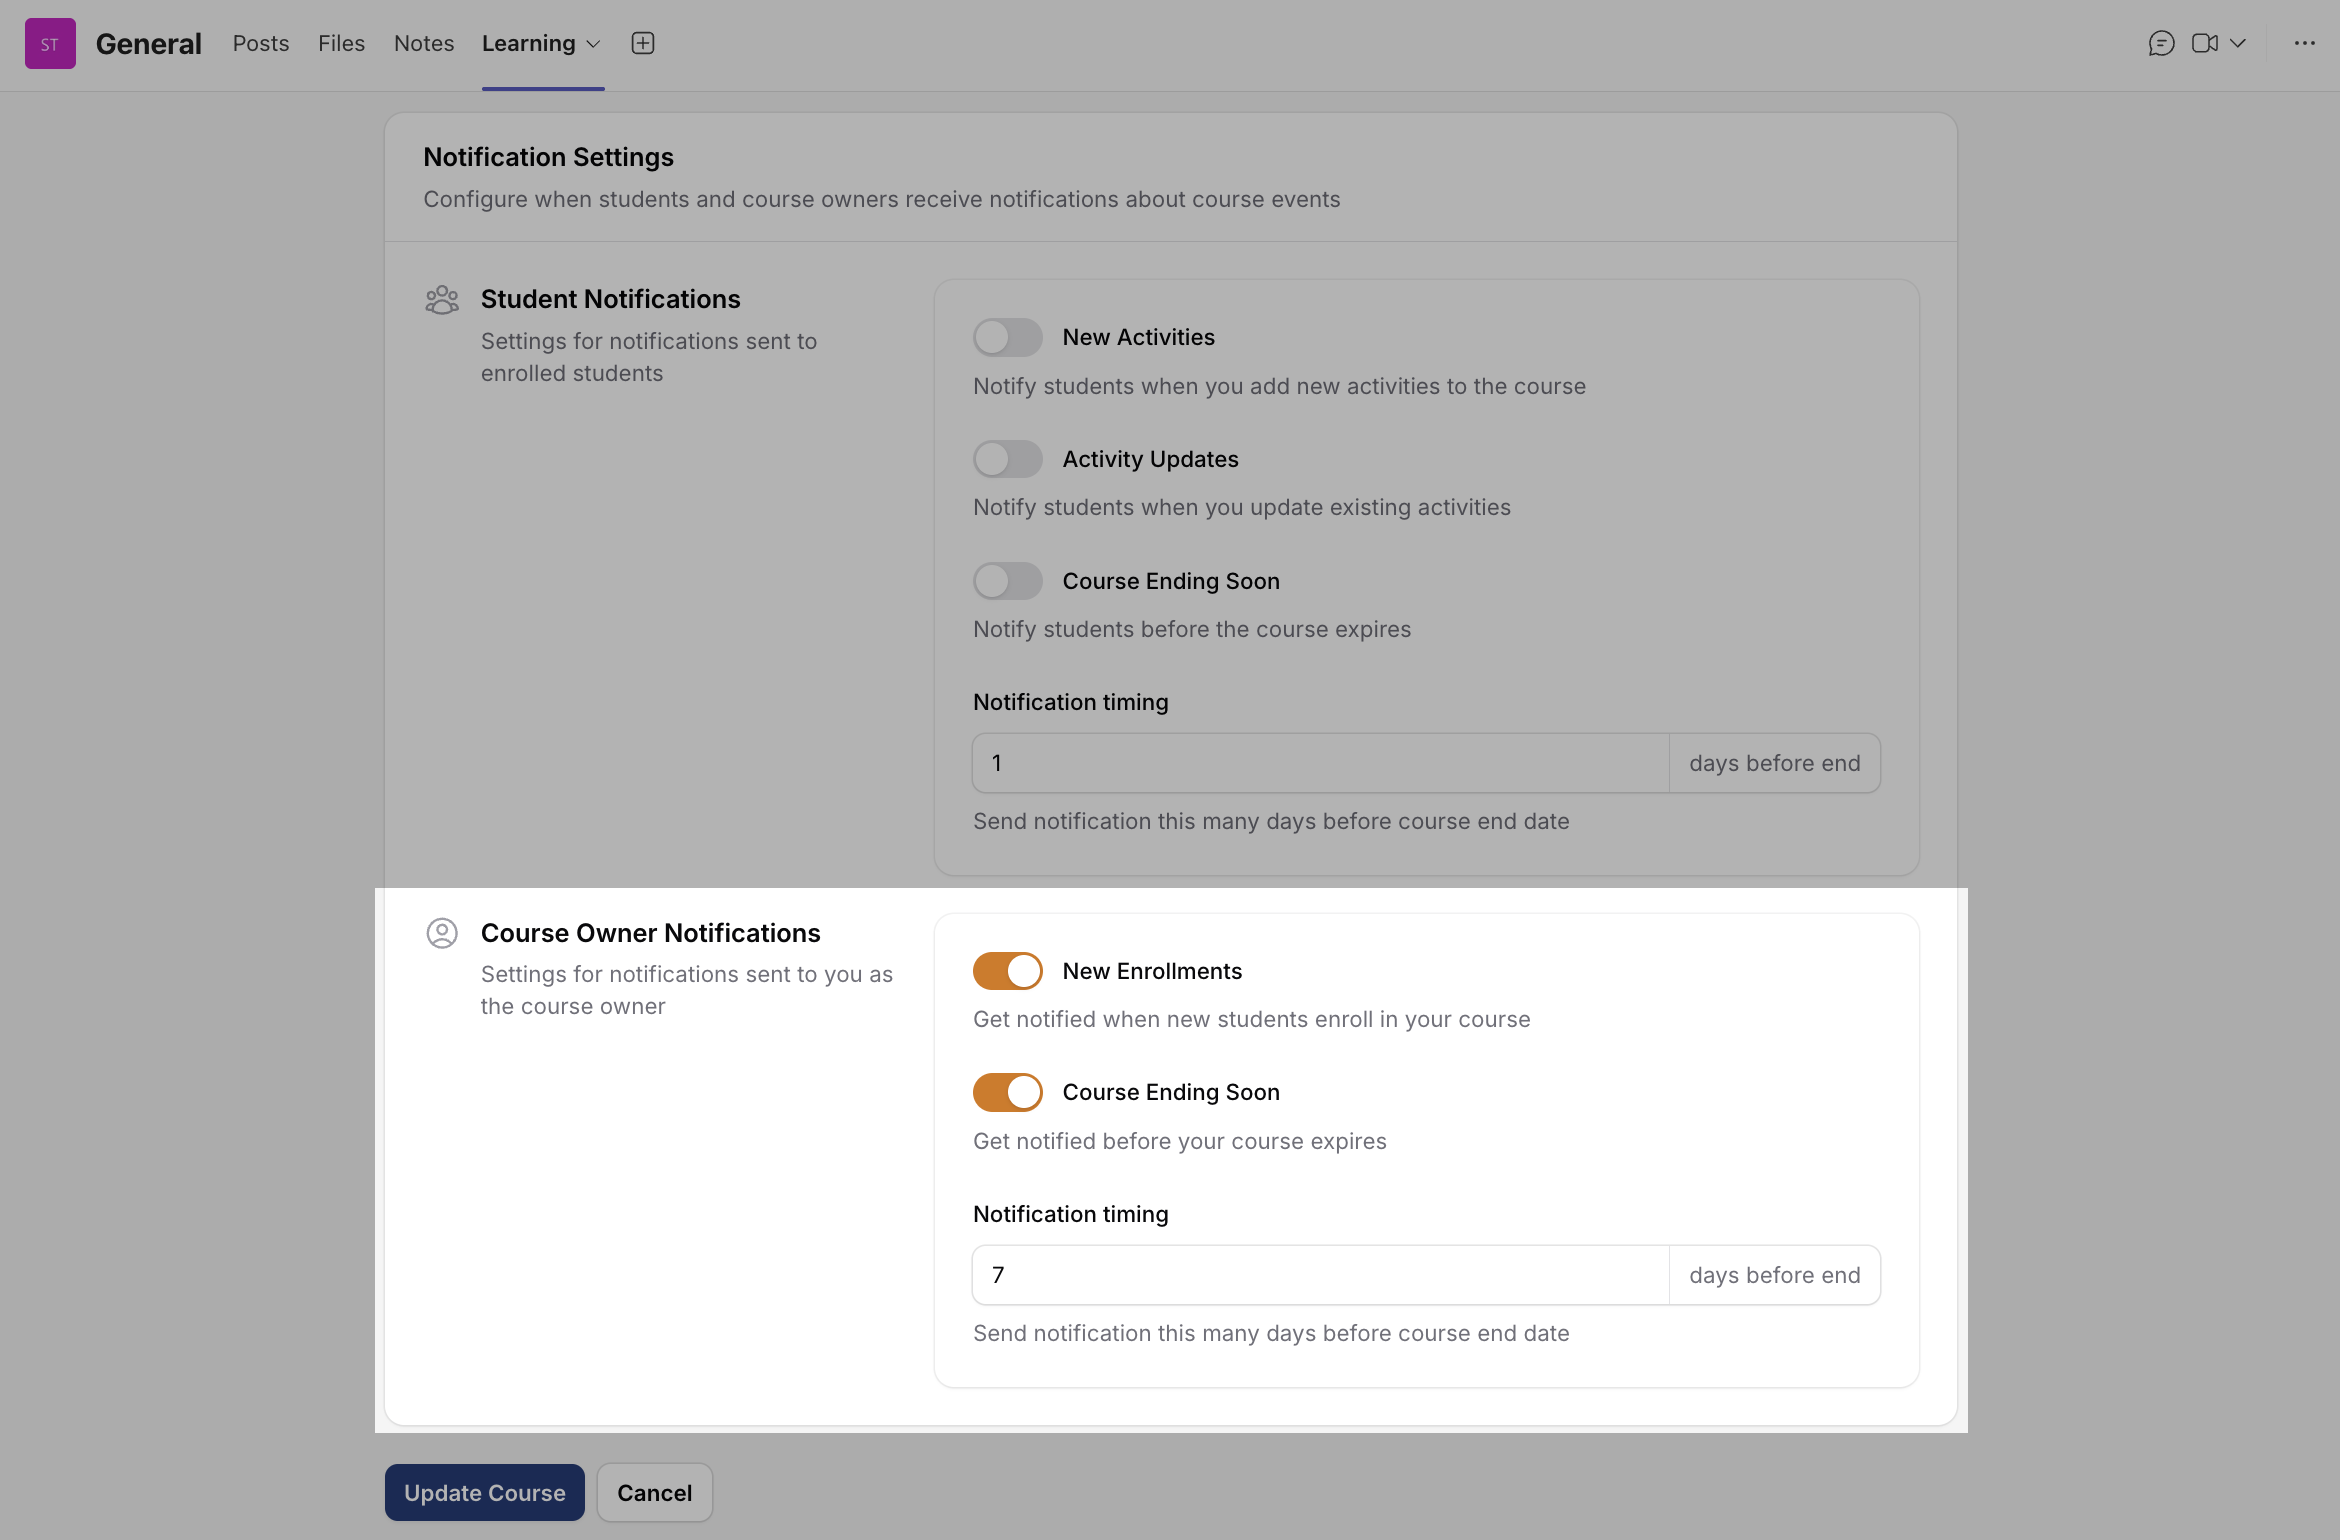
Course Owner Notifications:
- New Enrolments — Get notified when new students enrol.
- Course Ending Soon — Get notified before your course expires.
Set the Notification Timing — choose how many days before the course end date notifications should be sent.
Sections
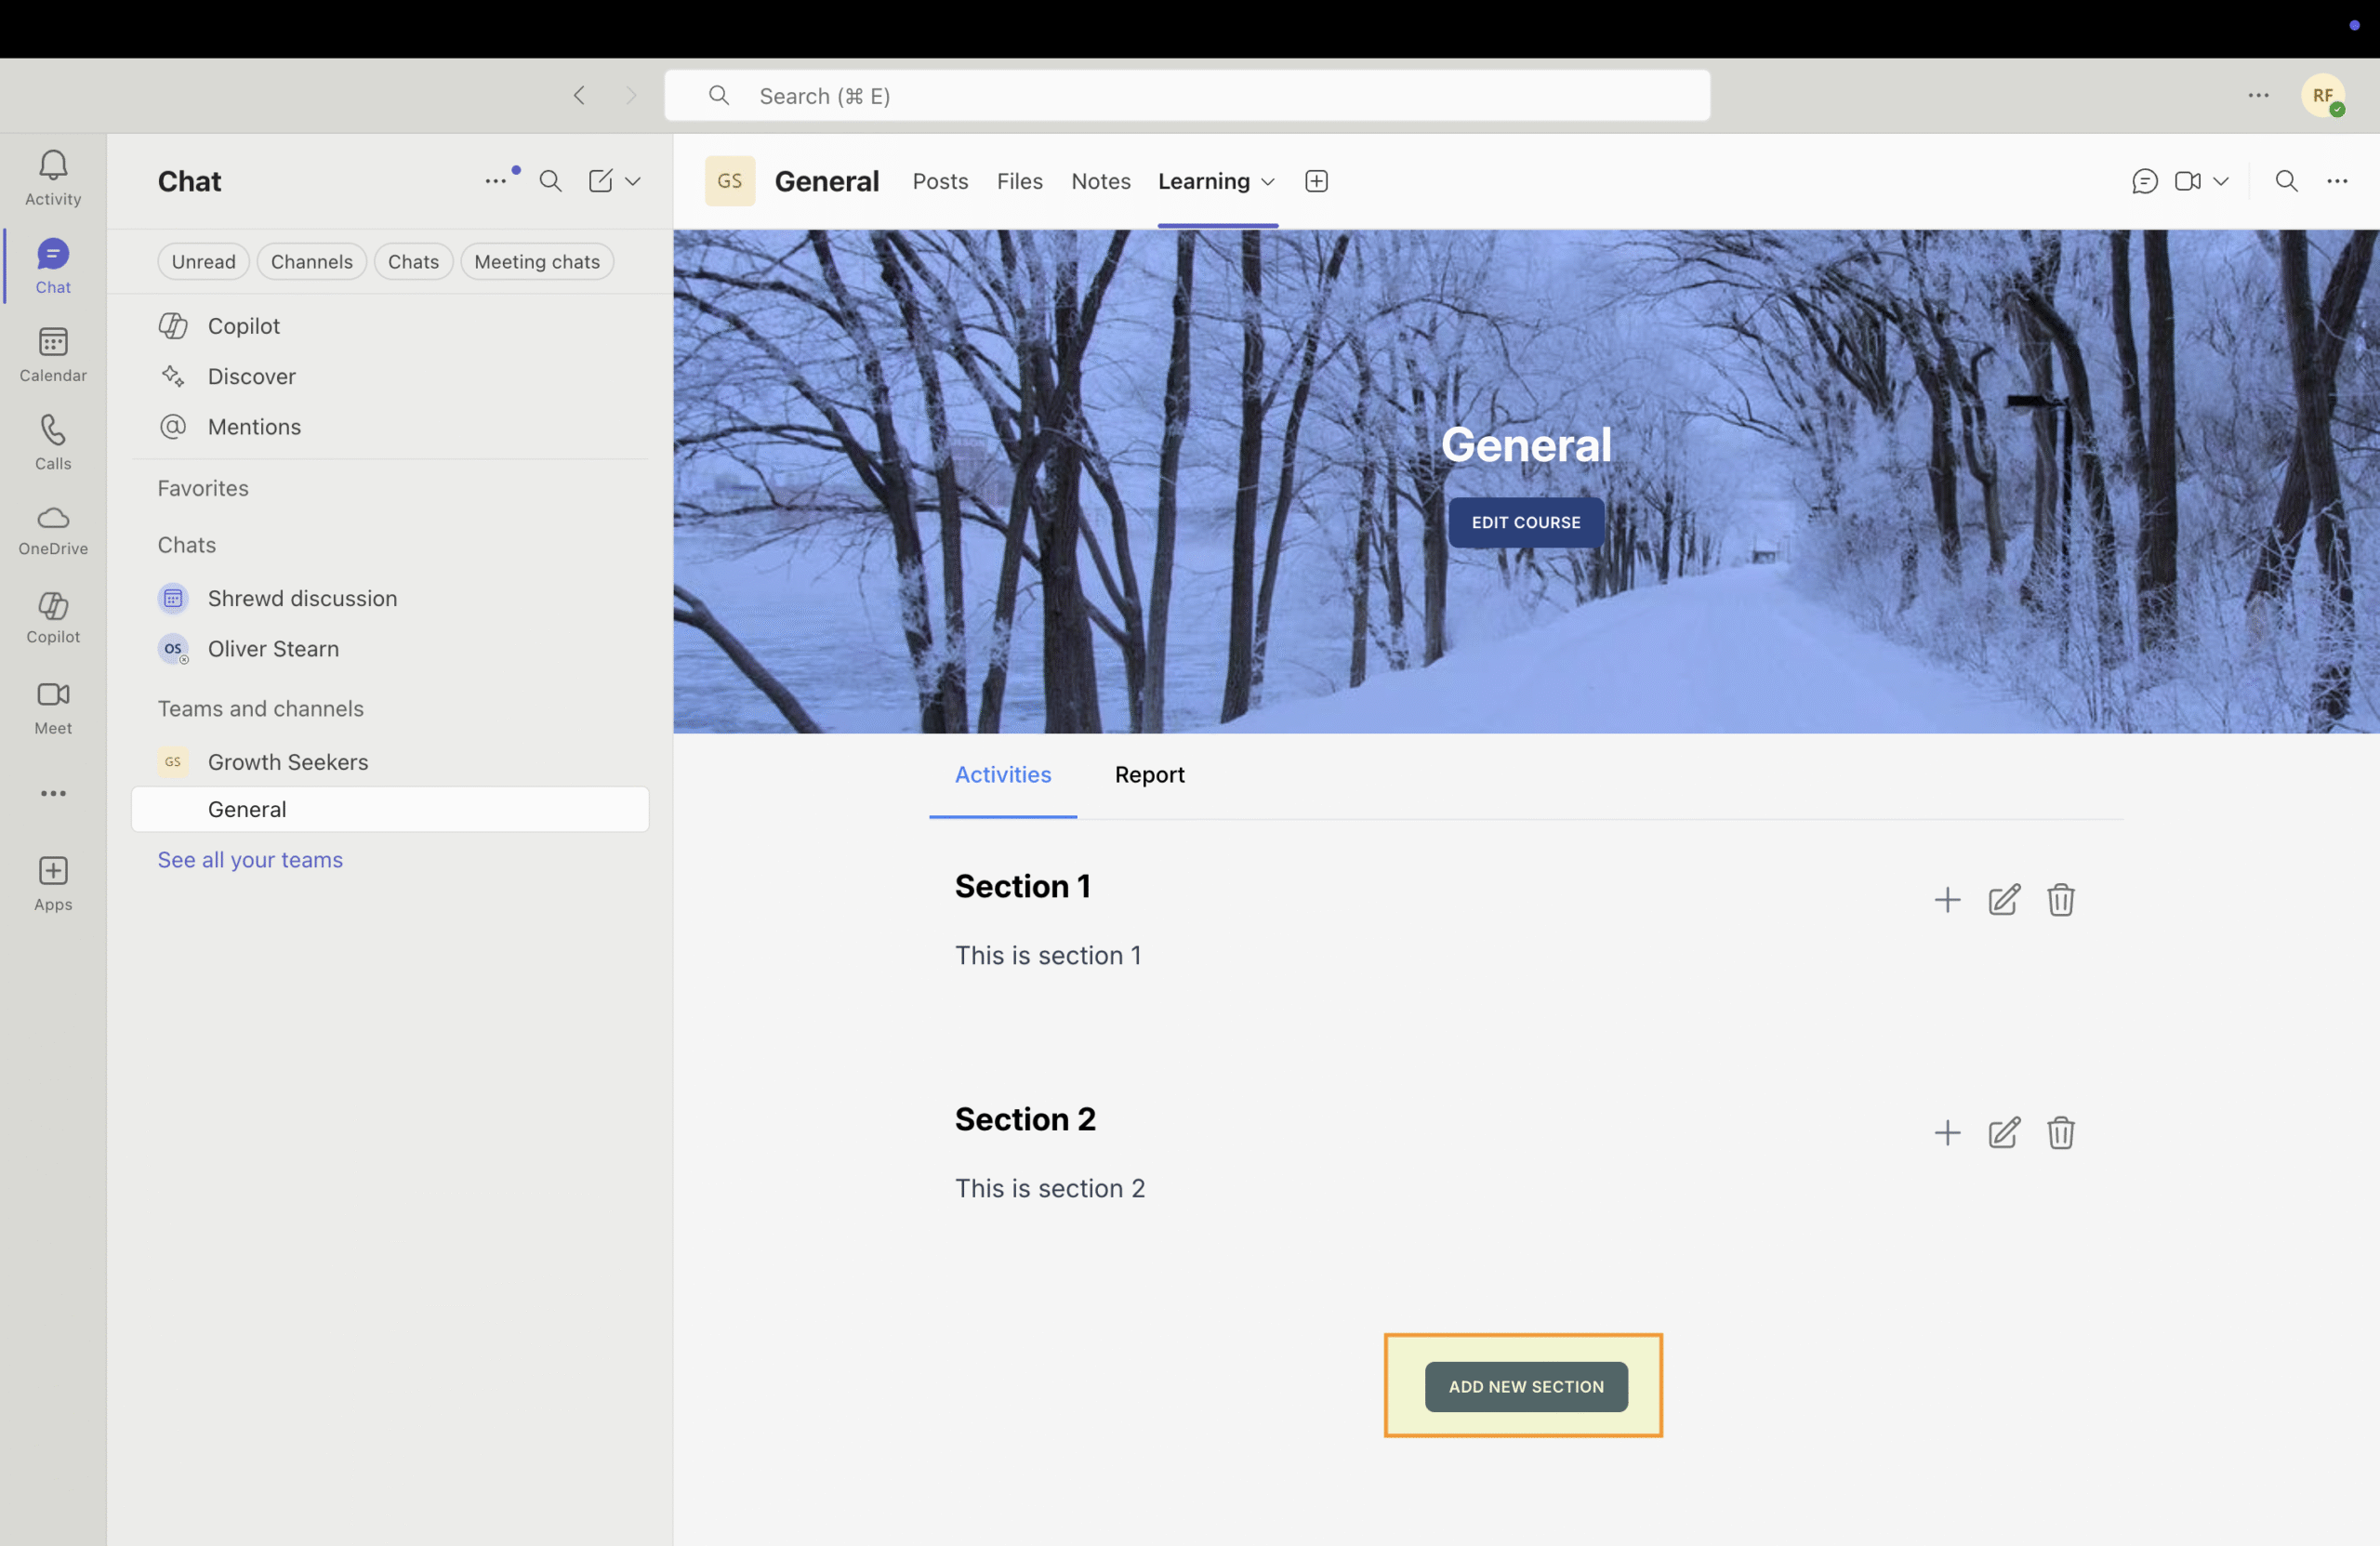
Organize your course content by adding sections.
Click Add New Section to create a new content section in your course.
Enter section details
Enter a section name and a short description (optional).
Save the section
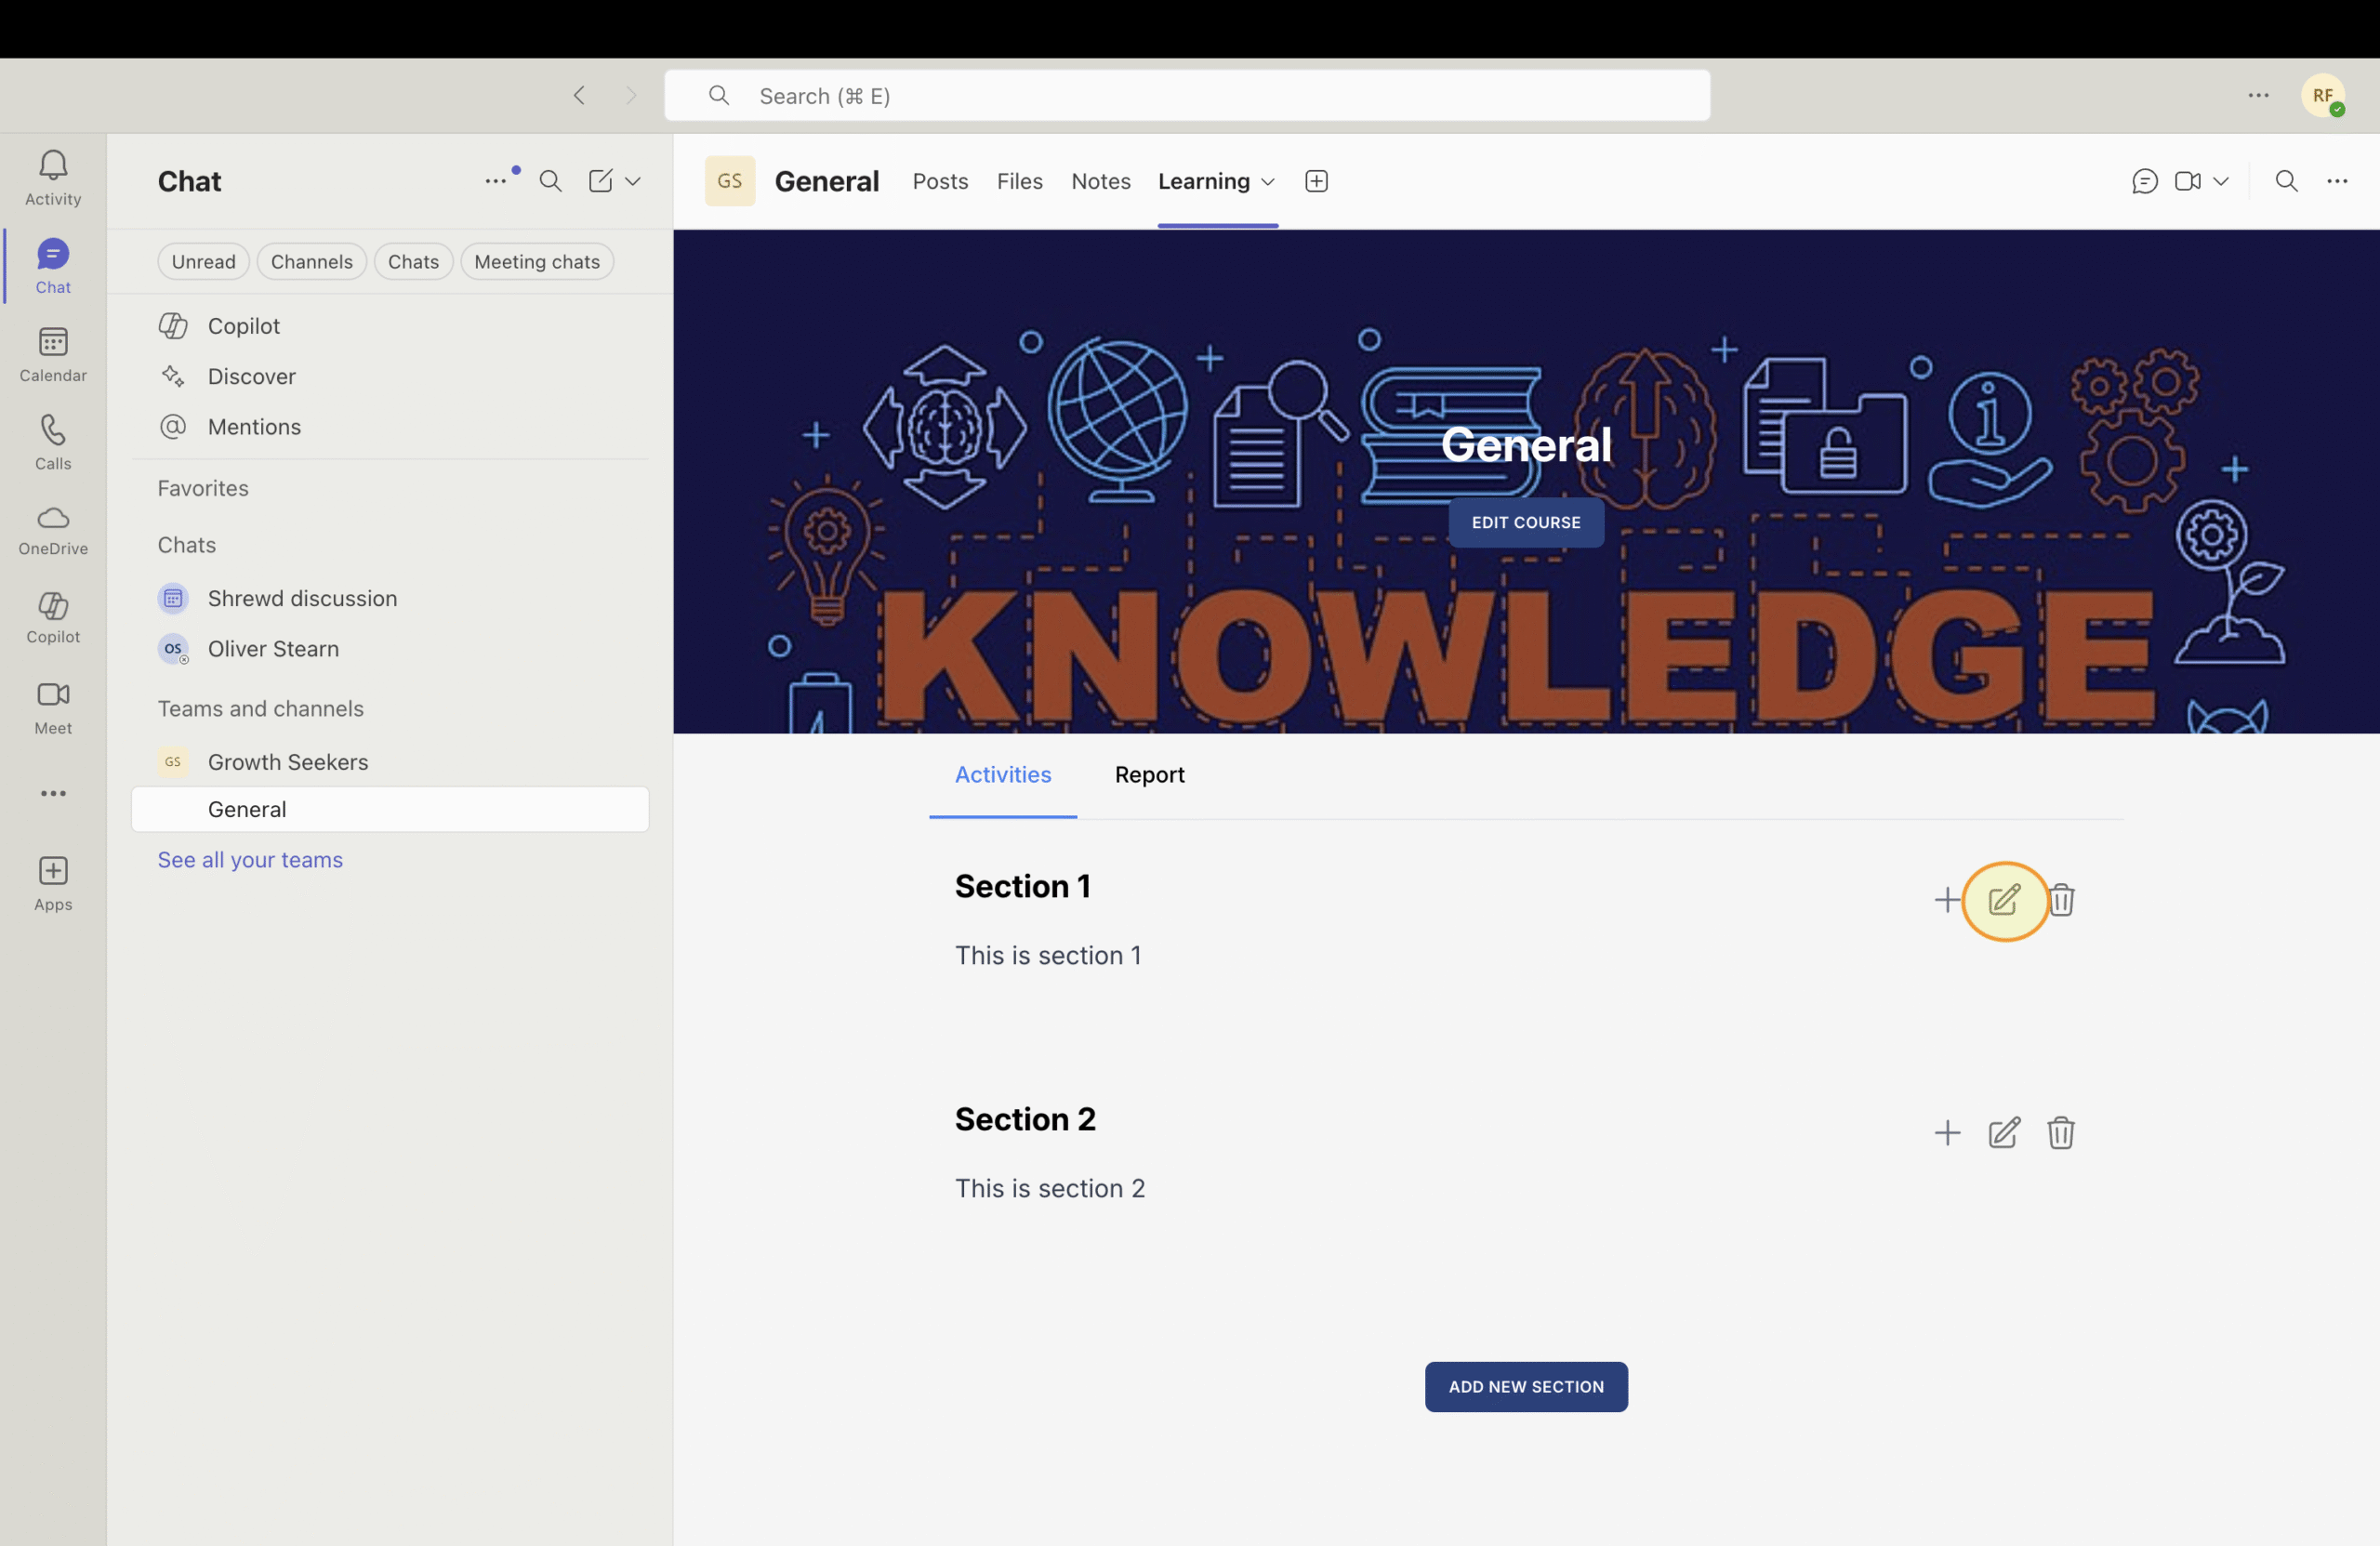
Click Save. Your section now appears in the course structure. To edit a section, click the edit button below it.
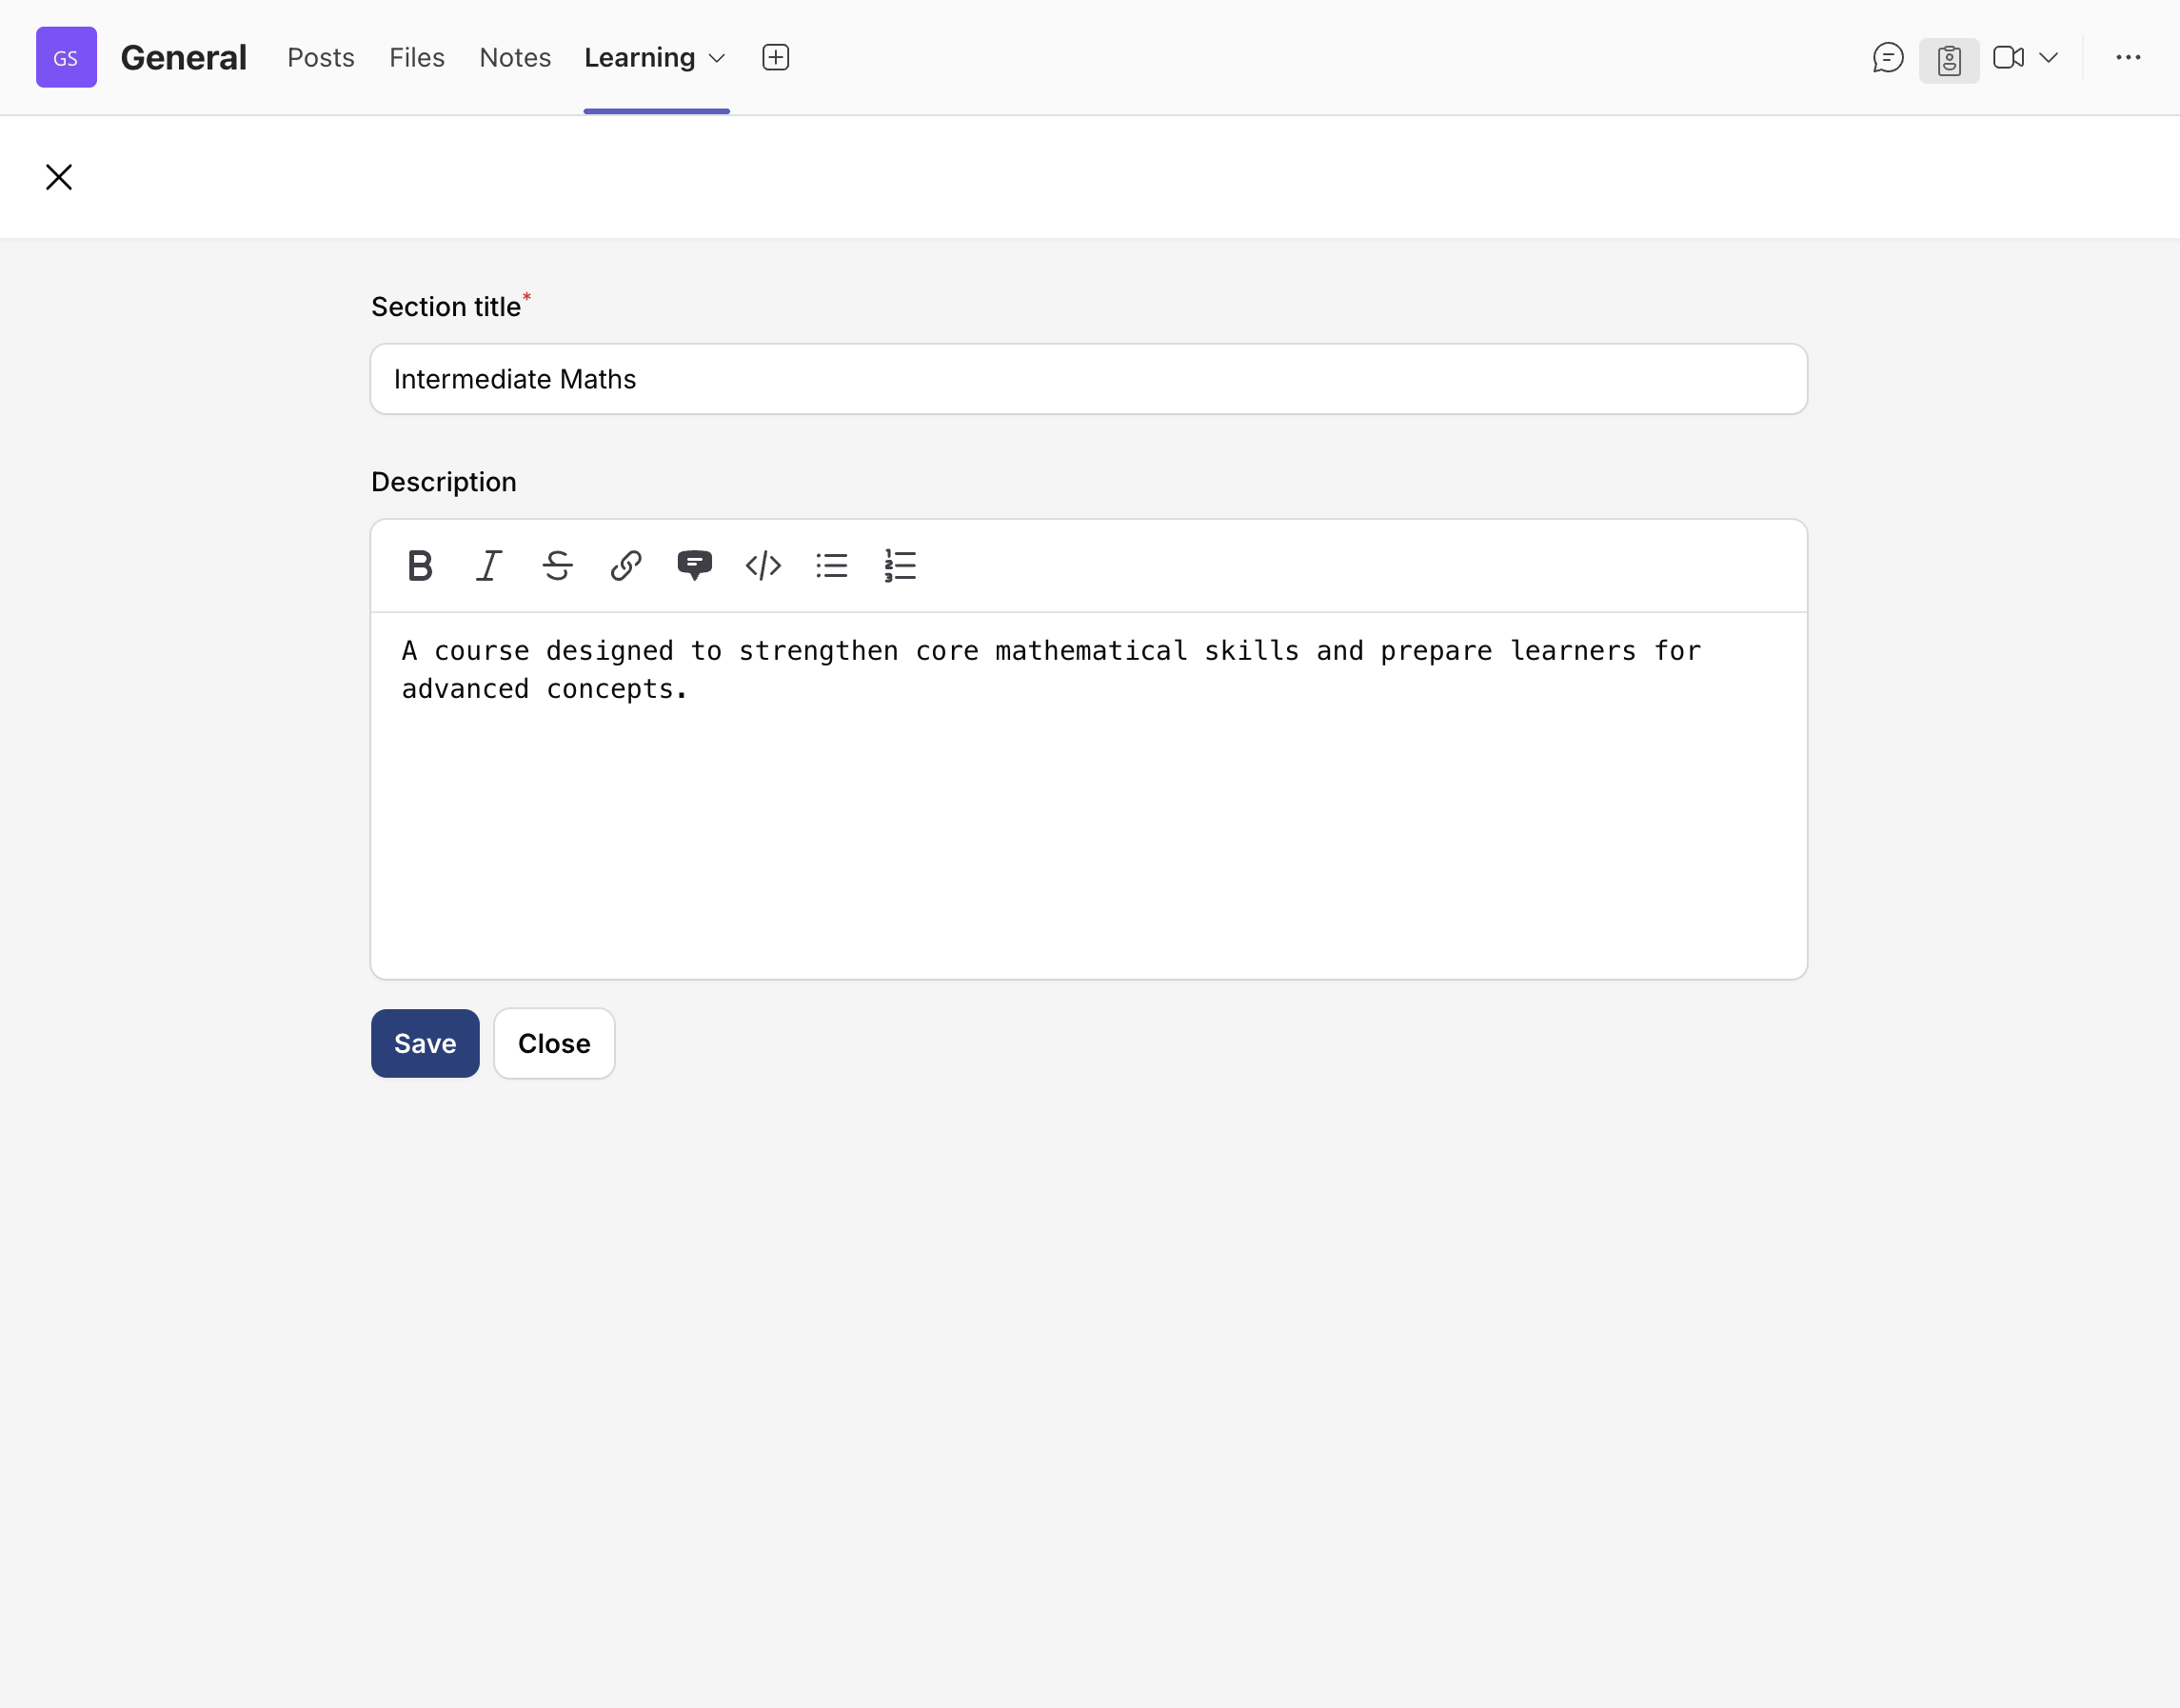
To edit a section, click the edit button
Activities - Text Activity
Add formatted text content using the built-in editor. Available formatting options include bold, italic, strikethrough, links, blockquotes, code blocks, bullet lists, and numbered lists.
Enter the title of your text activity
Add and format content
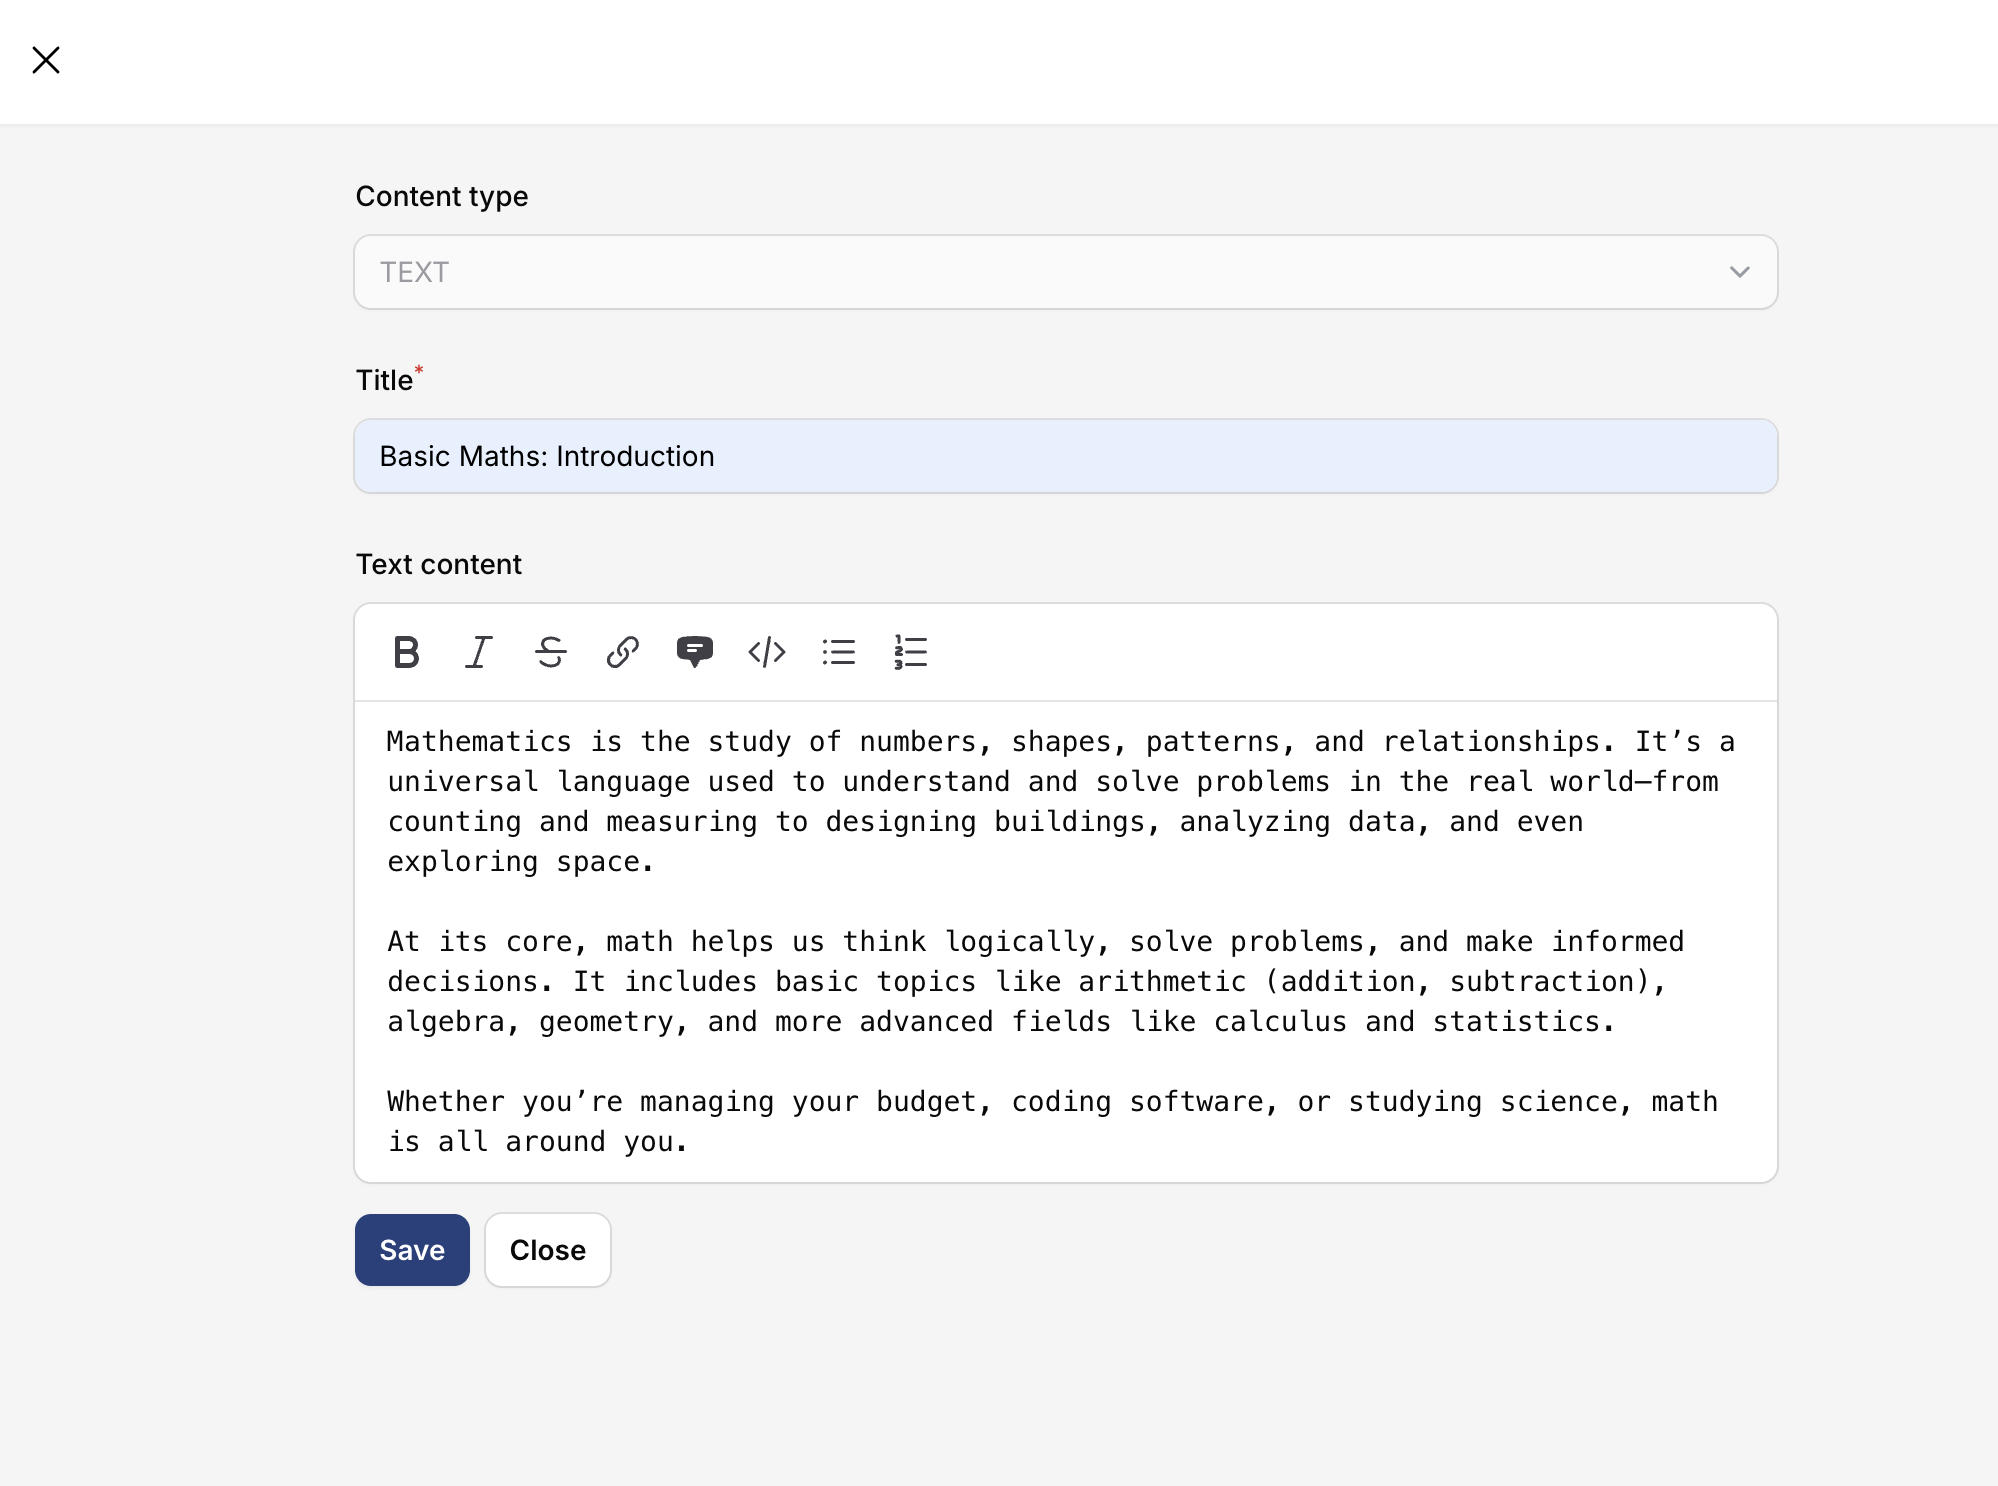
Click Save to save your changes.
Activities - Document Activity
Upload documents for students to view or download. Maximum file size: 3.1 MB.
Choose Document activity
Click + and choose Document from the activity menu.
Enter activity title
Enter the title for your document activity.
Upload document
Upload by clicking Browse or drag-and-drop your document. You can upload a document with a maximum file size of 3.1 MB.
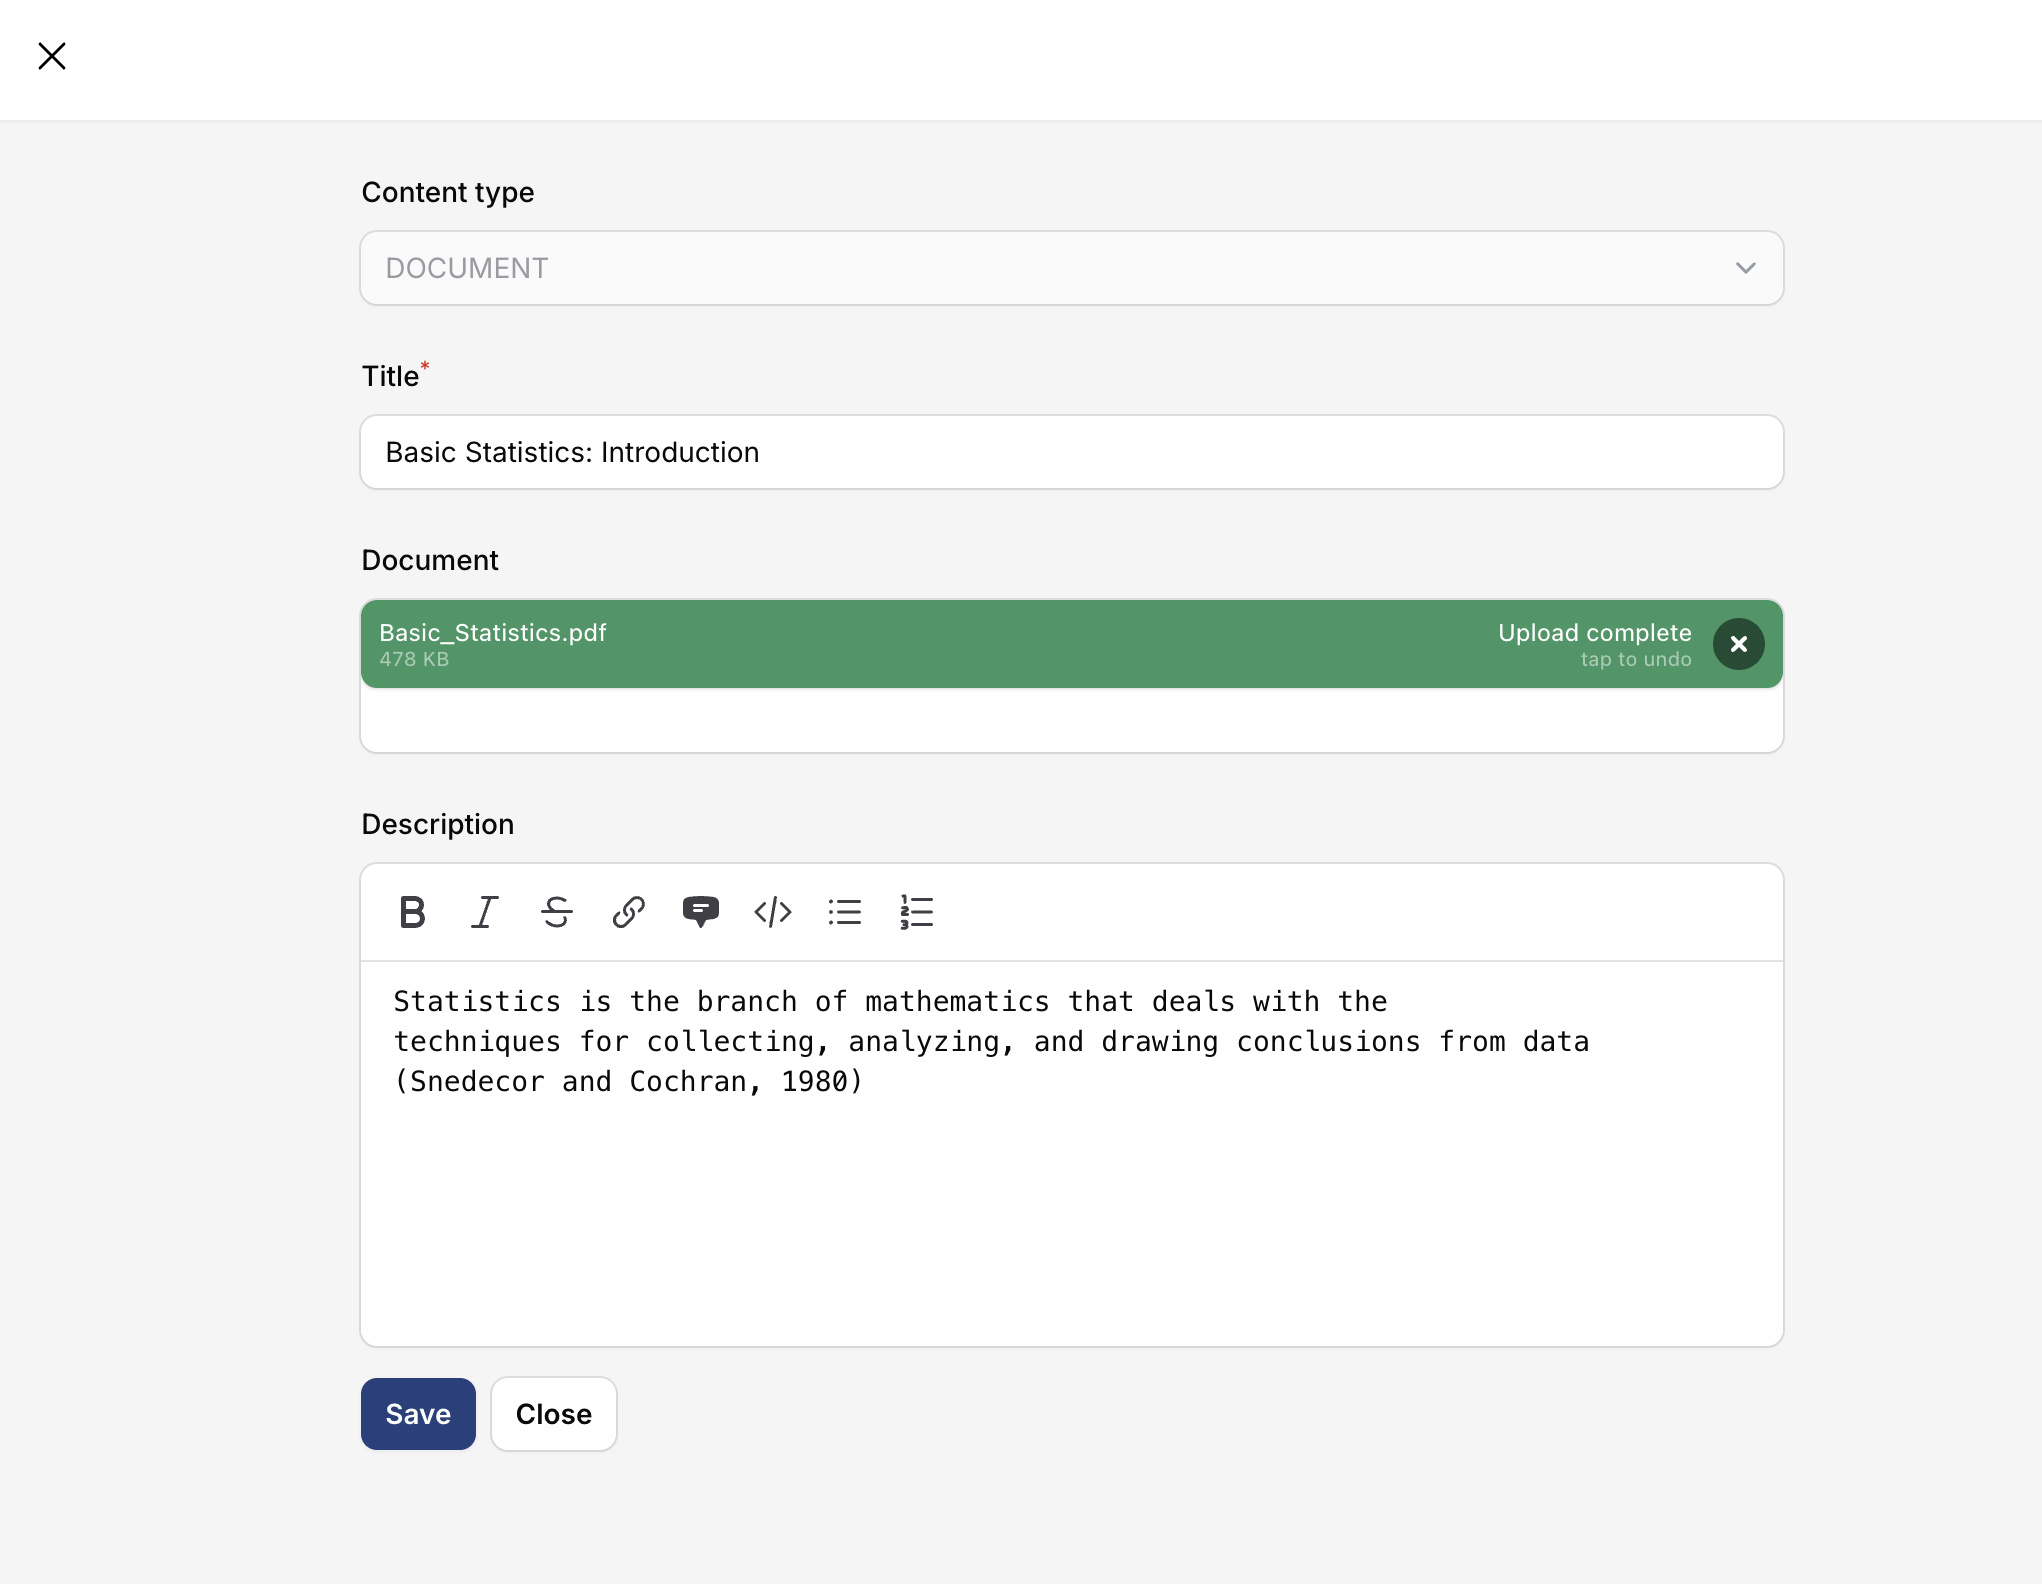
Click Save to save the activity.
Activities - Video Activity
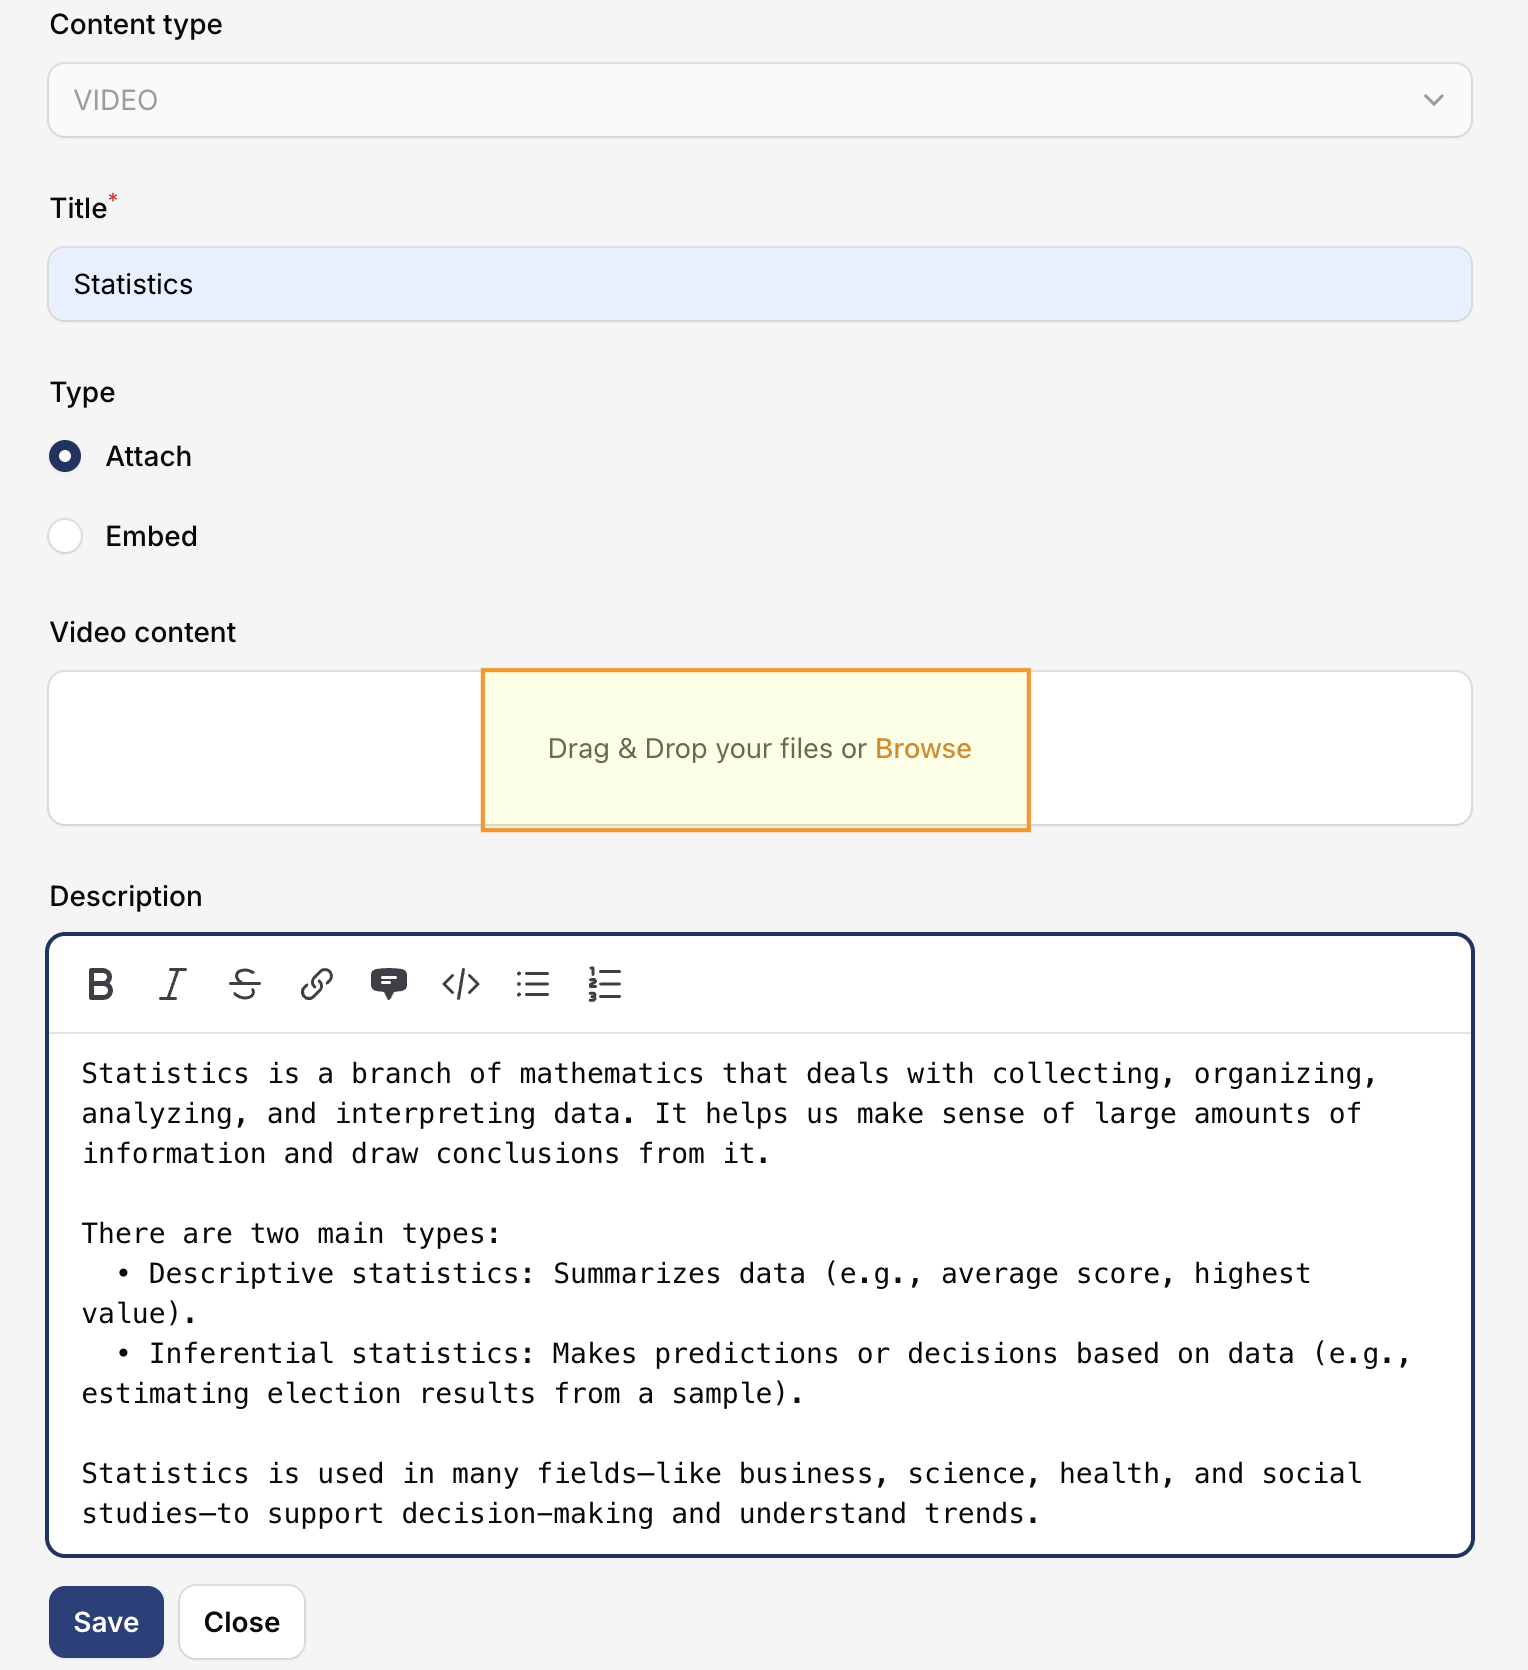
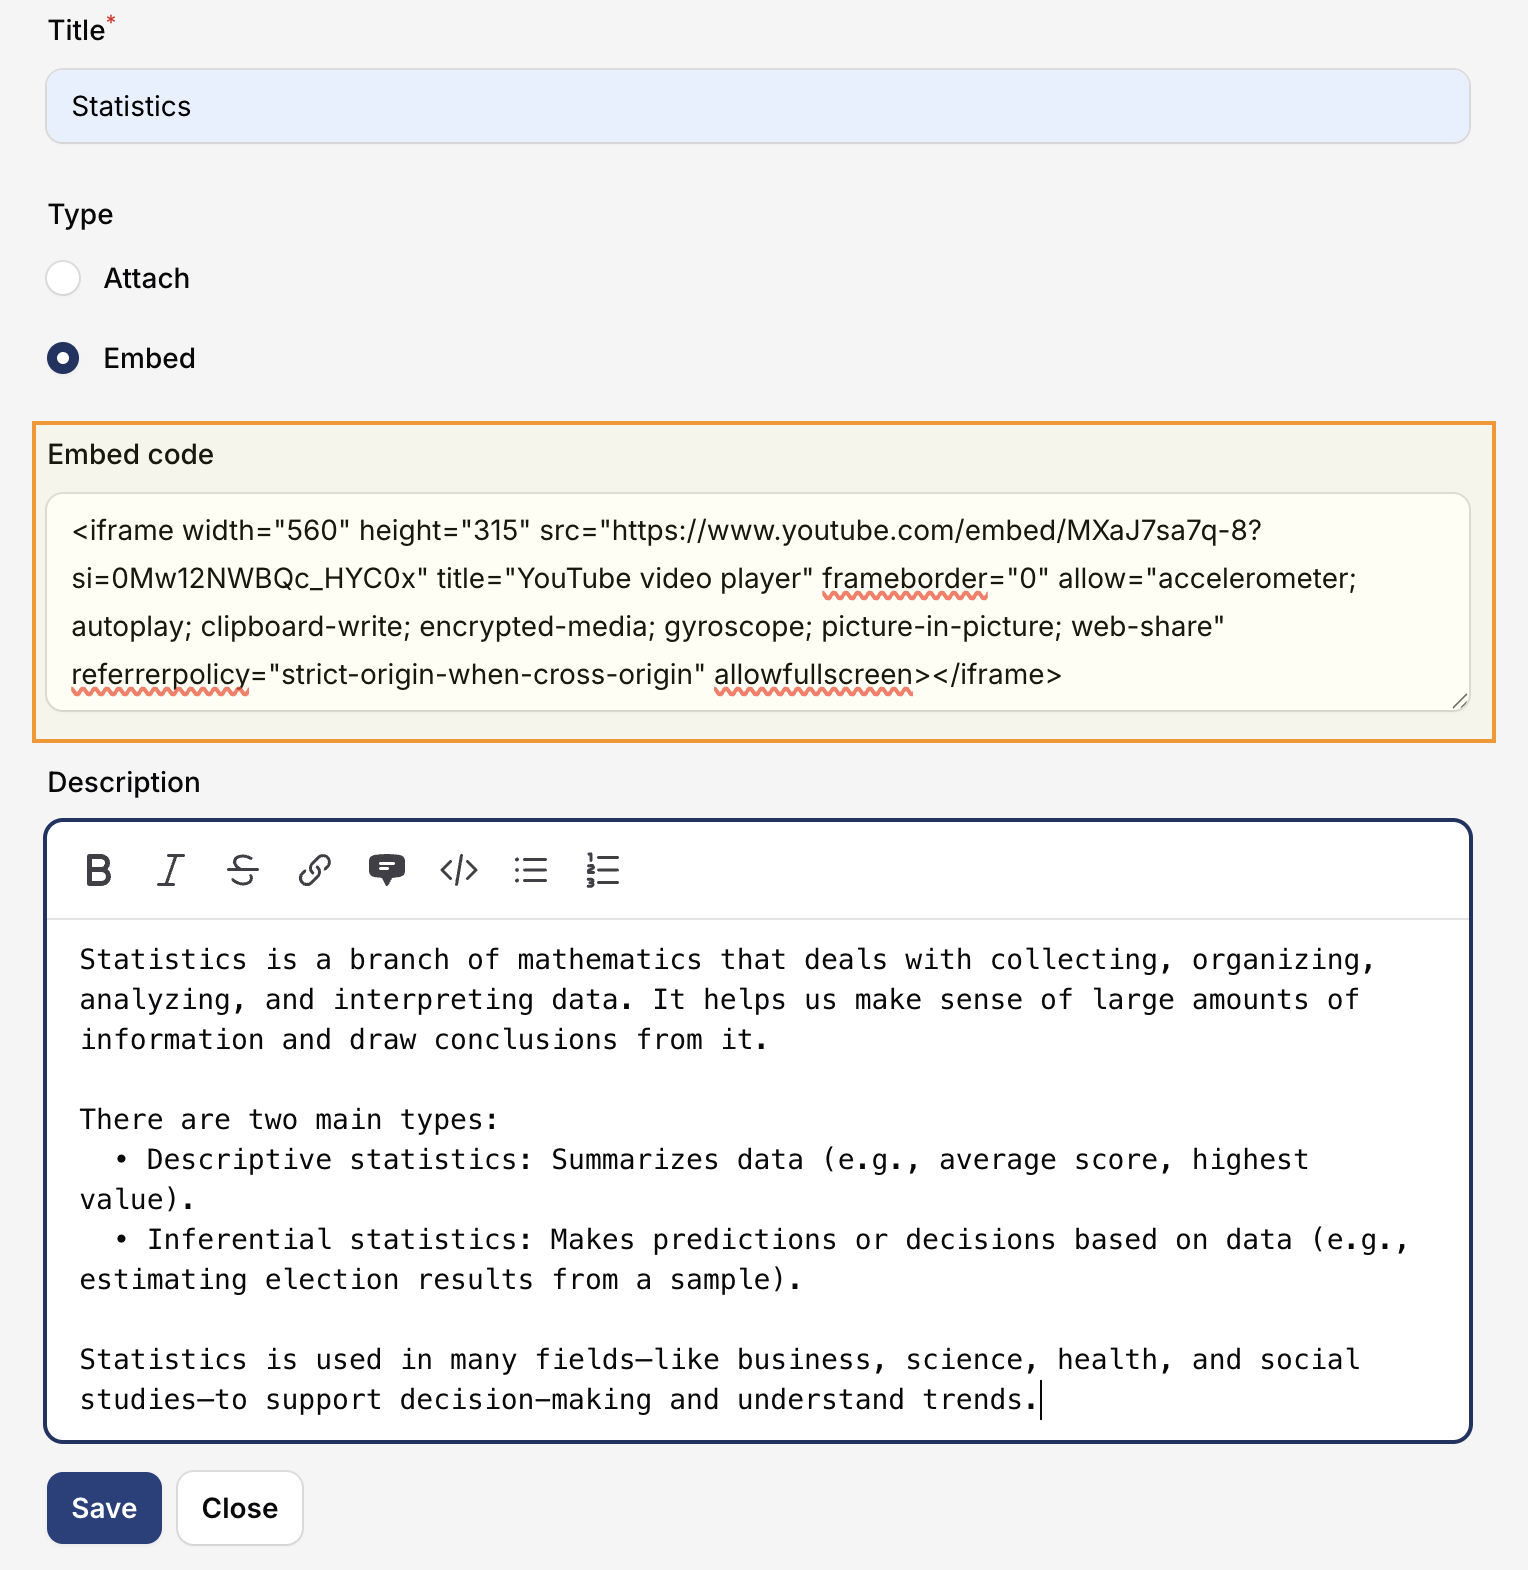
Embed video content from platforms like YouTube, Vimeo, or upload your own video file.
Choose Video activity
Click + and choose Video from the activity menu.
Enter activity title
Enter a title for your video activity.
Upload or embed video
Upload by clicking Browse, drag-and-drop your video file, or use an embed code from a video URL (e.g., YouTube, Vimeo).
Click Save
Click Save to save your changes.
Activities - Audio Activity
Upload audio files for students to listen to. Supports common audio formats.
Choose Audio activity
Click + and choose Audio from the activity menu.
Enter activity title
Enter a title for your audio activity.
Upload audio file
Upload your audio file by clicking Browse or Drag-and-Drop.
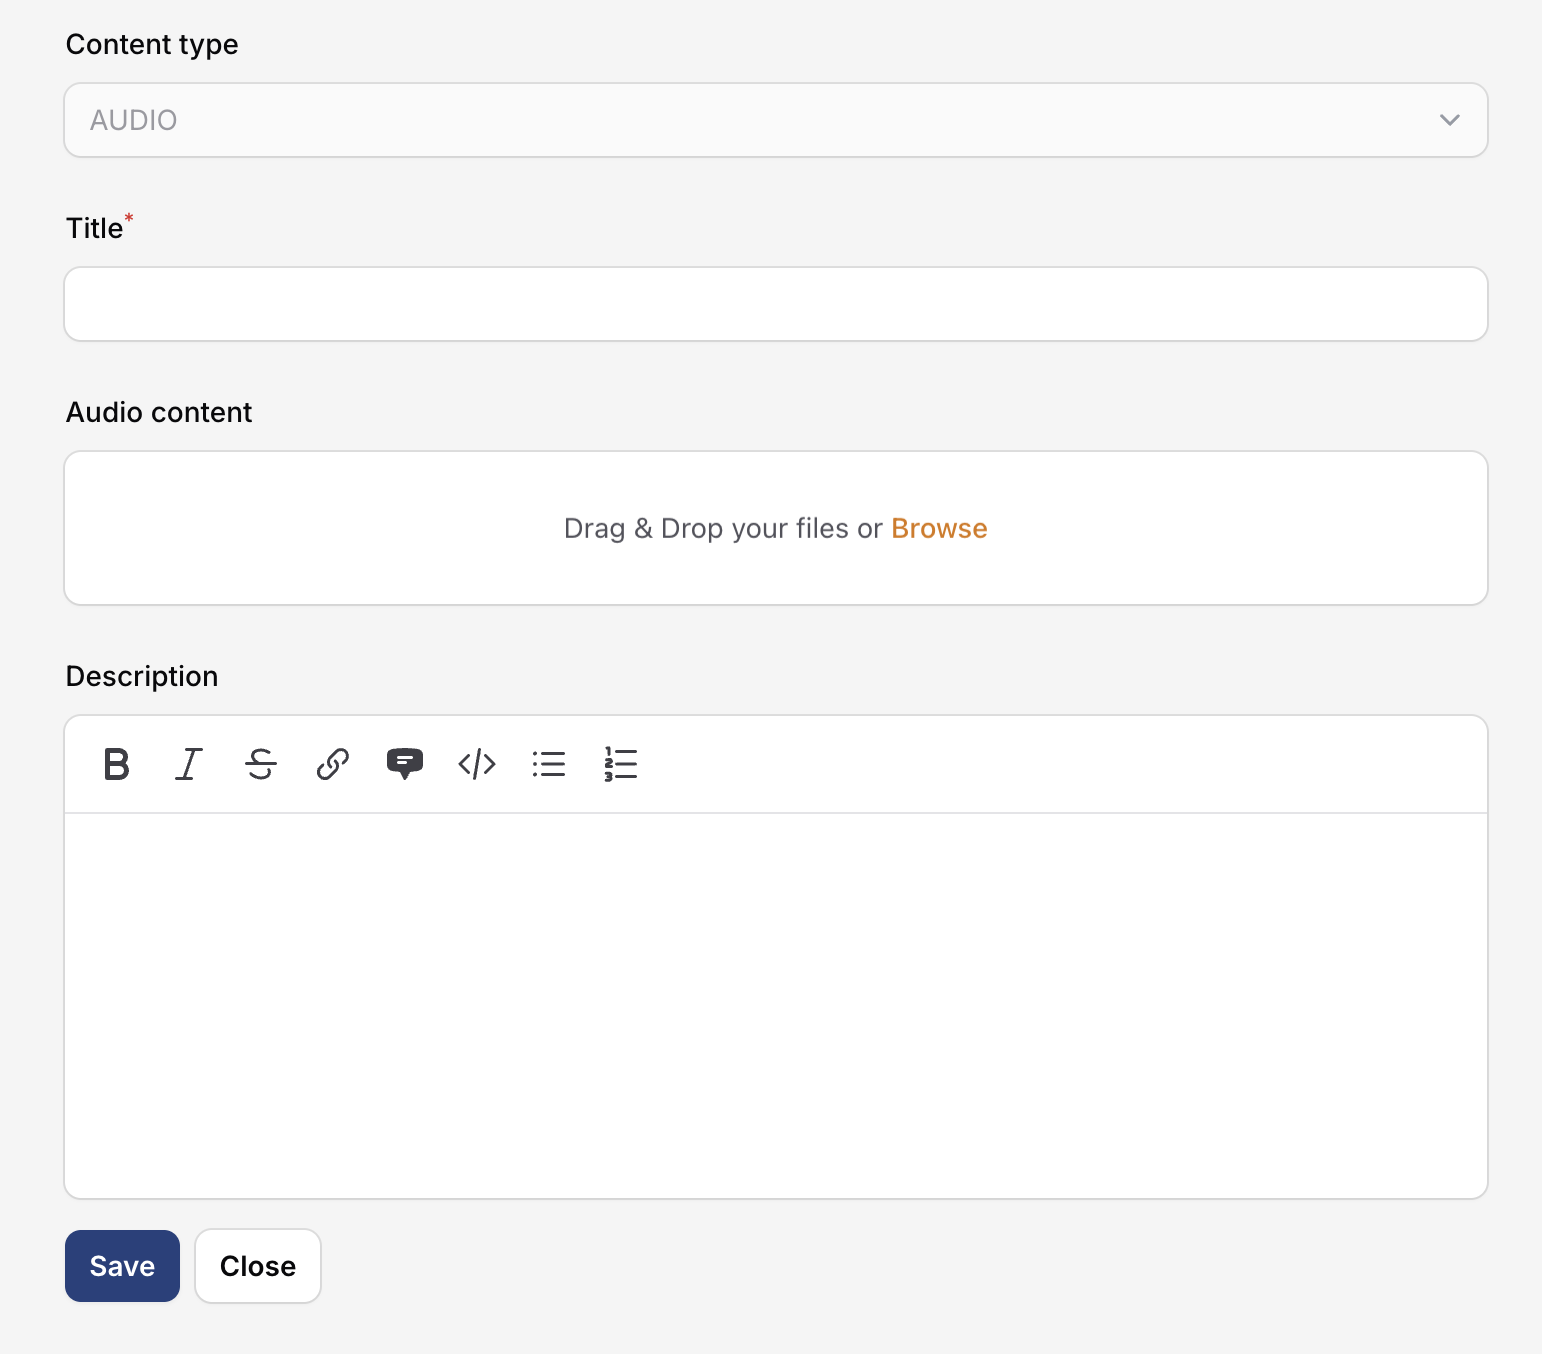
Add description
Add details or a description for your audio activity.
Click Save
Click Save to save your changes.
Activities - Link Activity
Add an external URL as a learning resource. Learners click the link to open it.
Choose Link activity
Click + and choose Link from the activity menu.
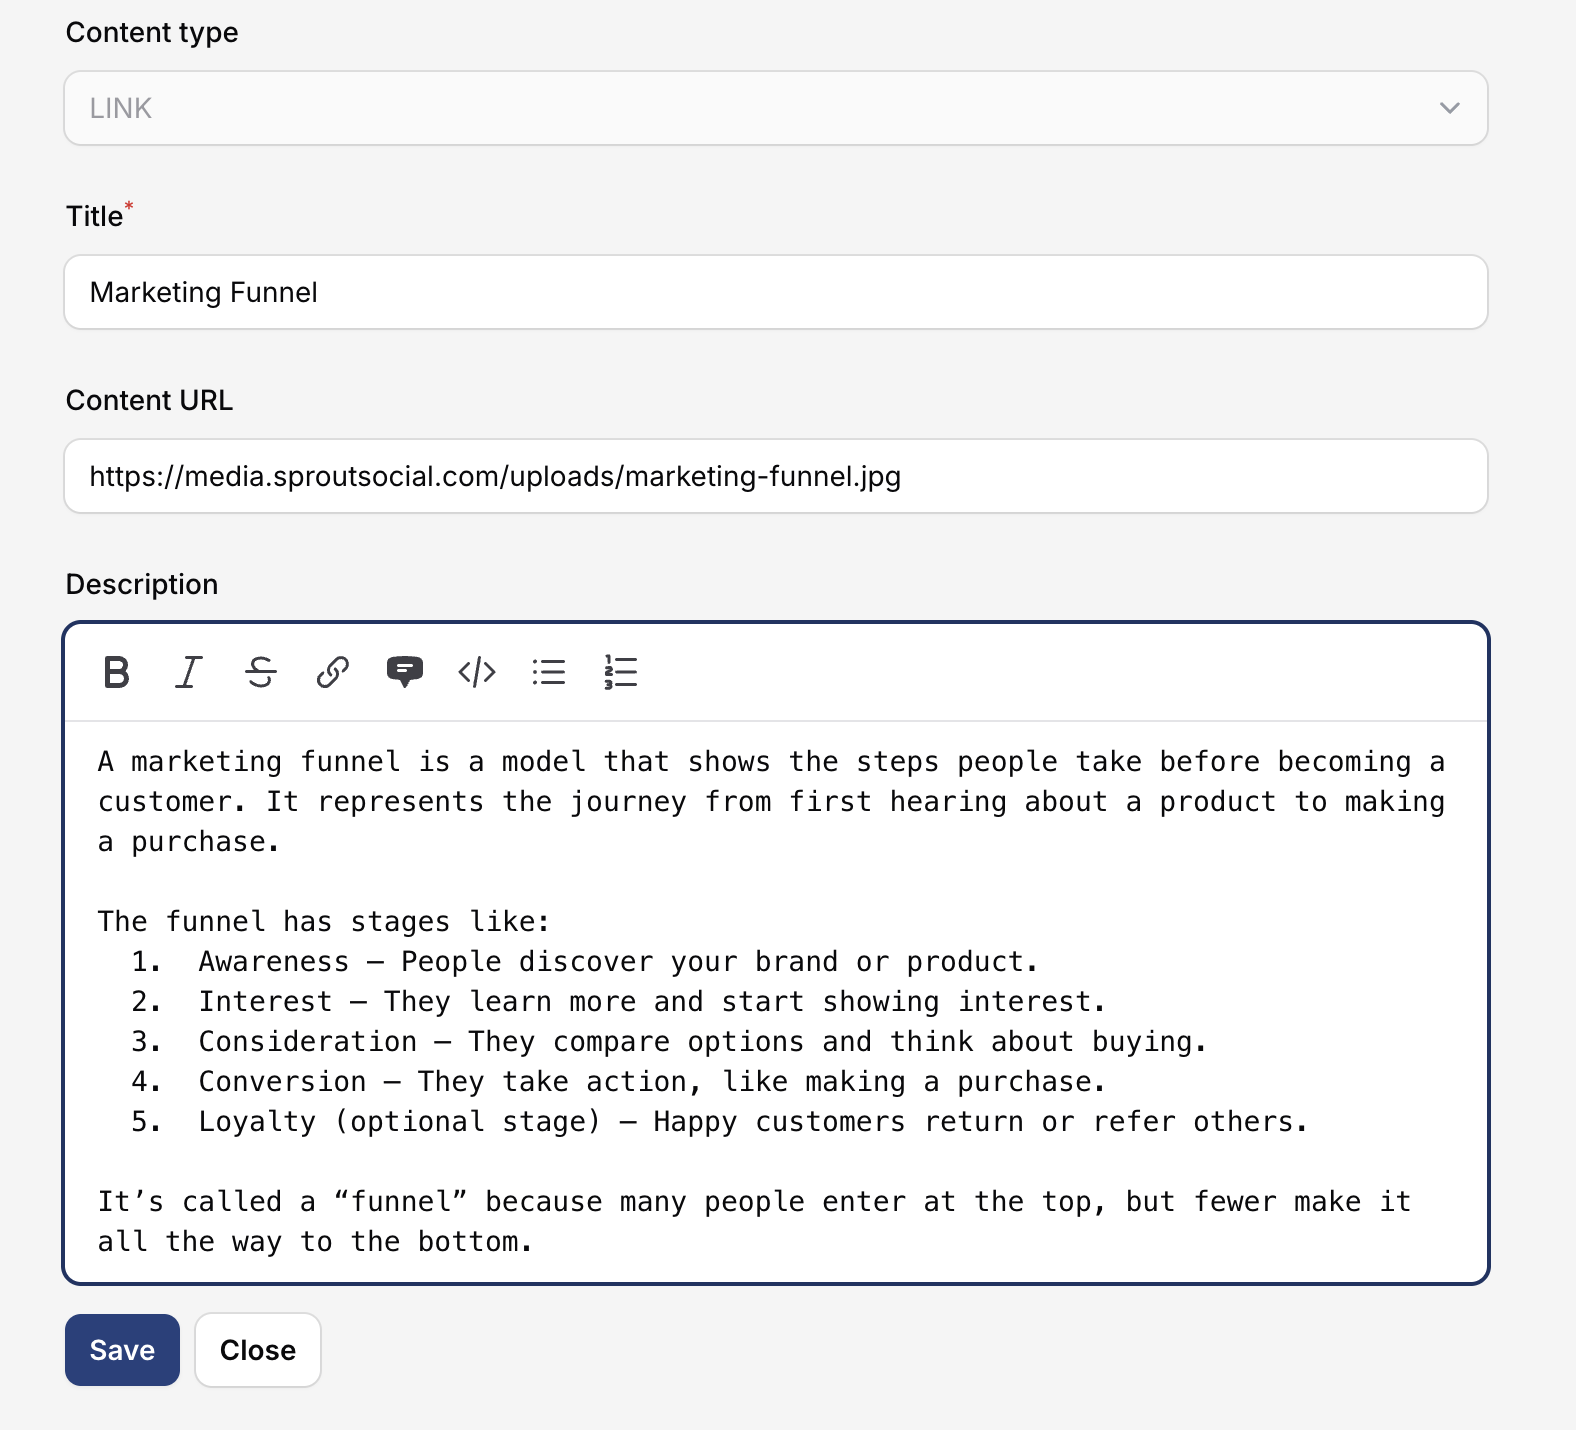
Enter activity title
Enter a title for your link activity.
Enter Content URL
Enter the URL that learners will visit when they open this activity.
Click Save
Add a description (optional) and click Save to save your changes.
Activities - Image Activity
Upload images for students to view. Choose between Activity image (original size) or Banner (Cover/Contain).
Choose Image activity
Click + and choose Image from the activity menu.
Enter activity title
Enter a title for the image activity.
Upload an image
Upload an image by clicking Browse or Drag-and-drop.
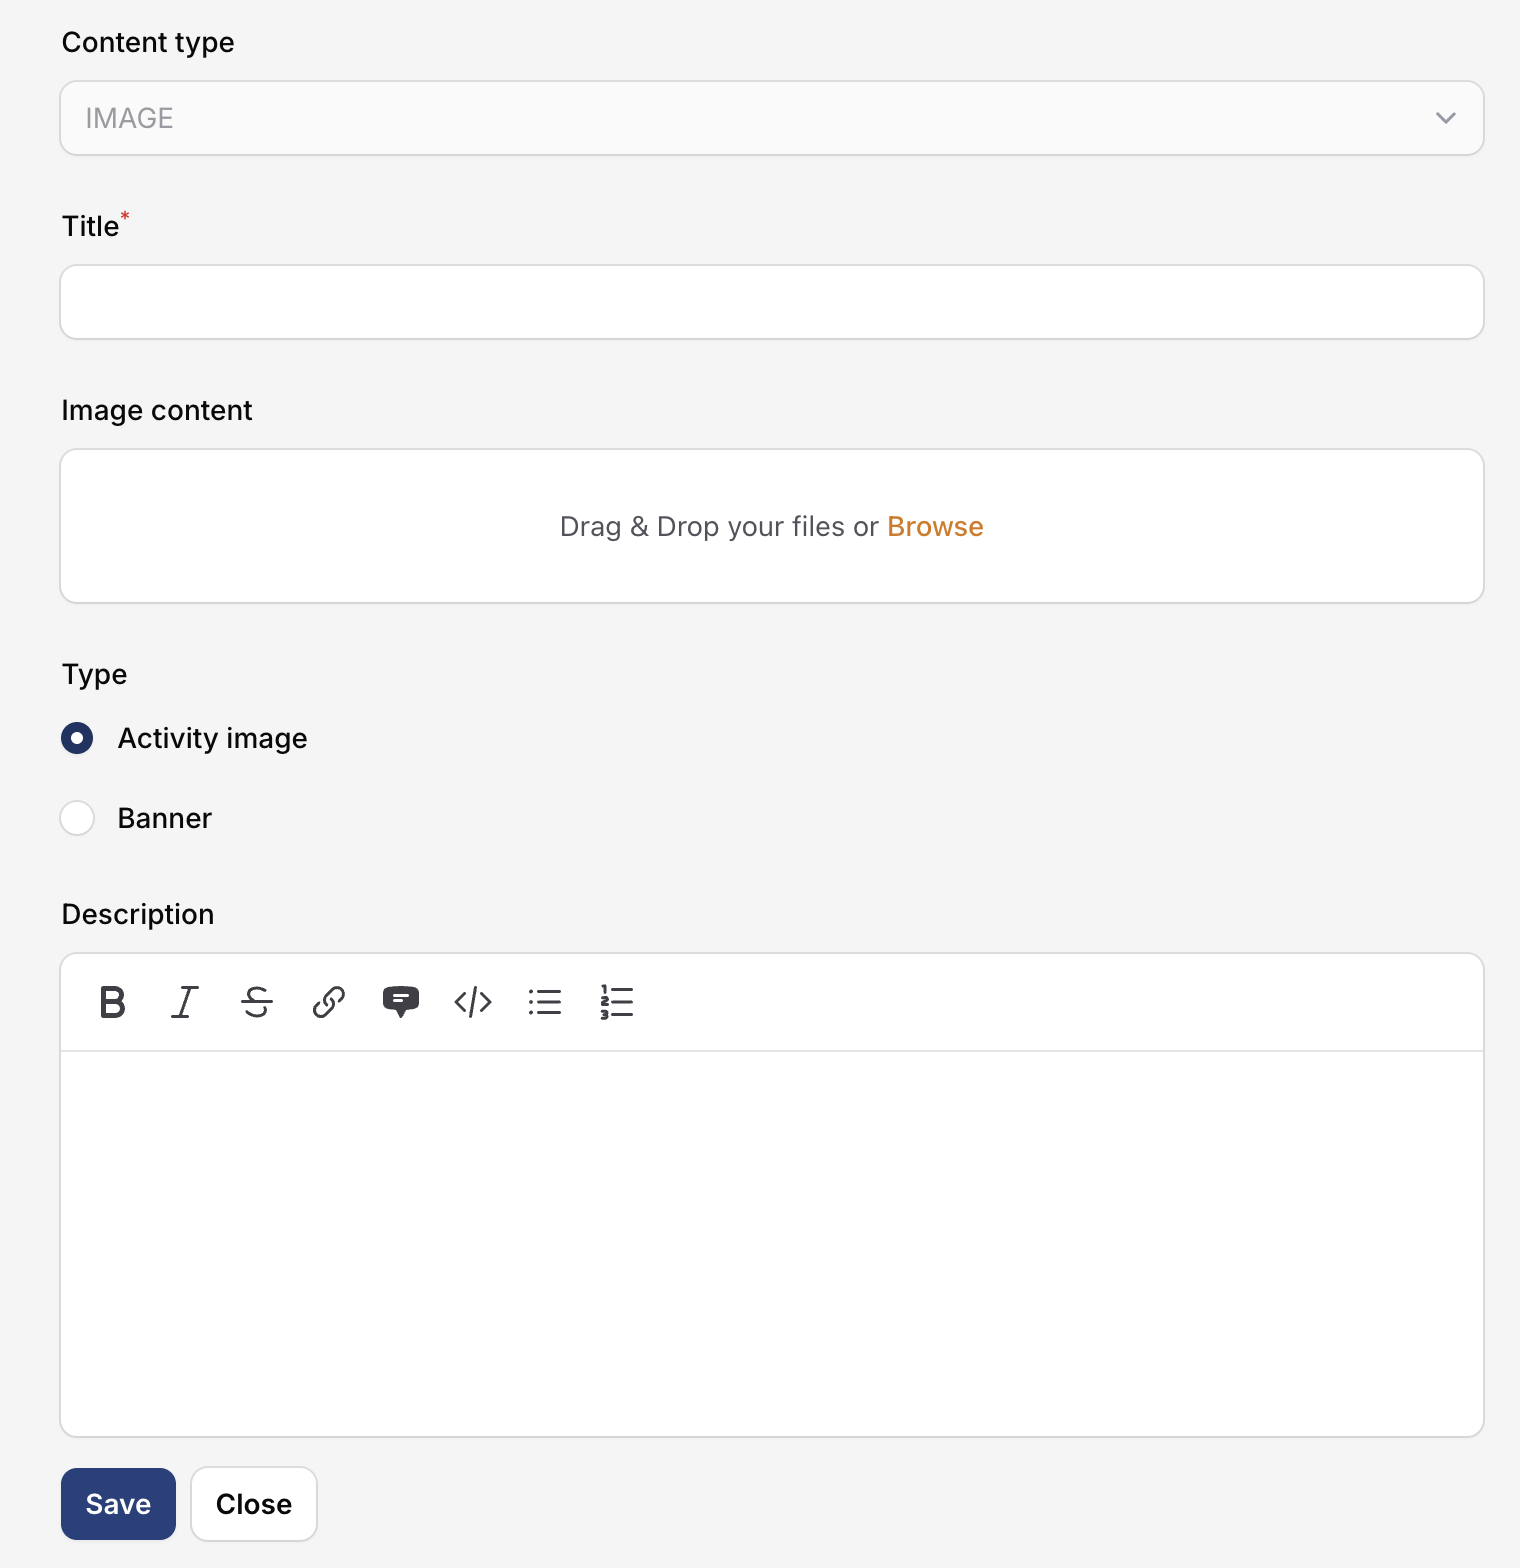
Choose image type
Activity image: upload at original size.
Banner: more control over height.
Click Save
Add a description and click Save to save your activity.
Activities - SCORM Activity
Upload SCORM-compliant e-learning packages (SCORM 1.2 or 2004). Shrewd LMS tracks completion status and scores.
SCORM packages configured to open in a new window do not work reliably inside Teams tabs (iframe restrictions). Publish SCORM to open in the same window.
Input activity Title
Enter the title for your SCORM activity.
Upload SCORM File
Upload your .zip SCORM package by clicking Browse or drag-and-drop.
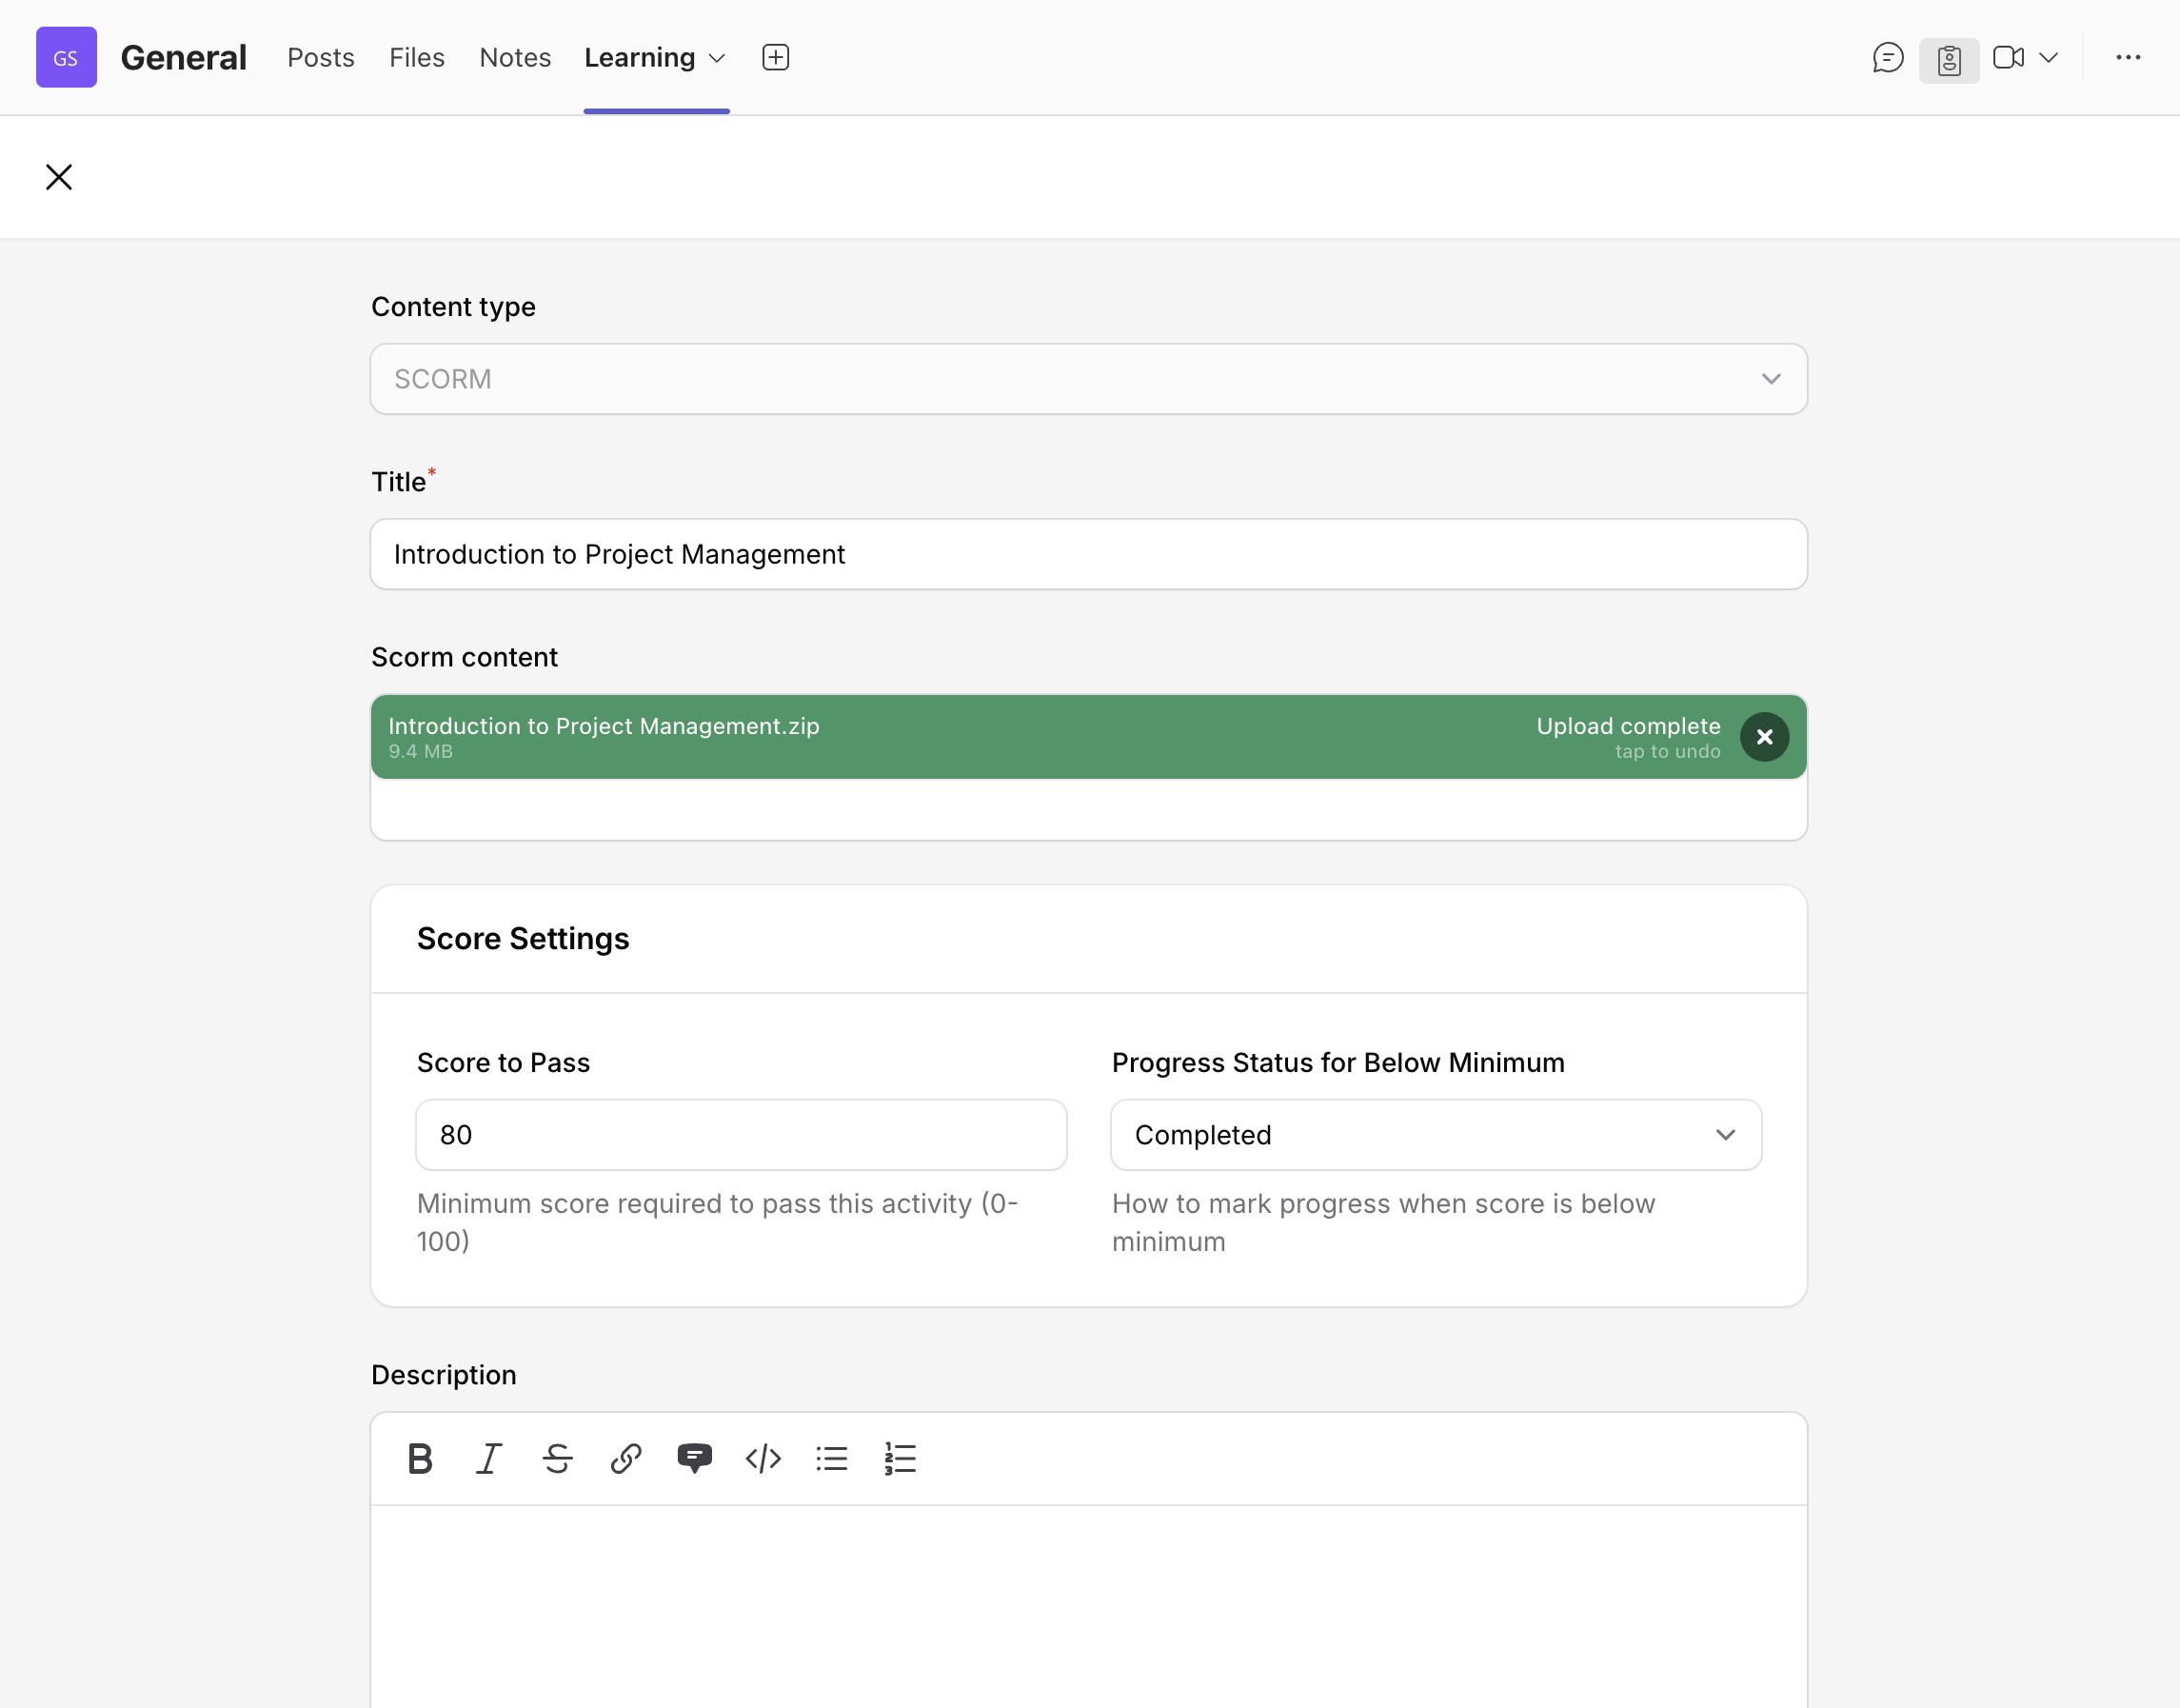
Set passing score
Set the passing score for students (optional).
Set completion behaviour
Specify whether a score below the passing threshold will mark the activity progress as Completed or Incomplete (optional).
Add description
Add a description for your SCORM activity (optional).
Click Save
Click Save or Update to finalize the SCORM activity.
Activities - Quiz Activity
Create assessments directly in Shrewd LMS with multiple question types, randomization, time limits, and automatic grading.
Add Quiz activity
Open your course, click Add Activity, and choose Quiz.
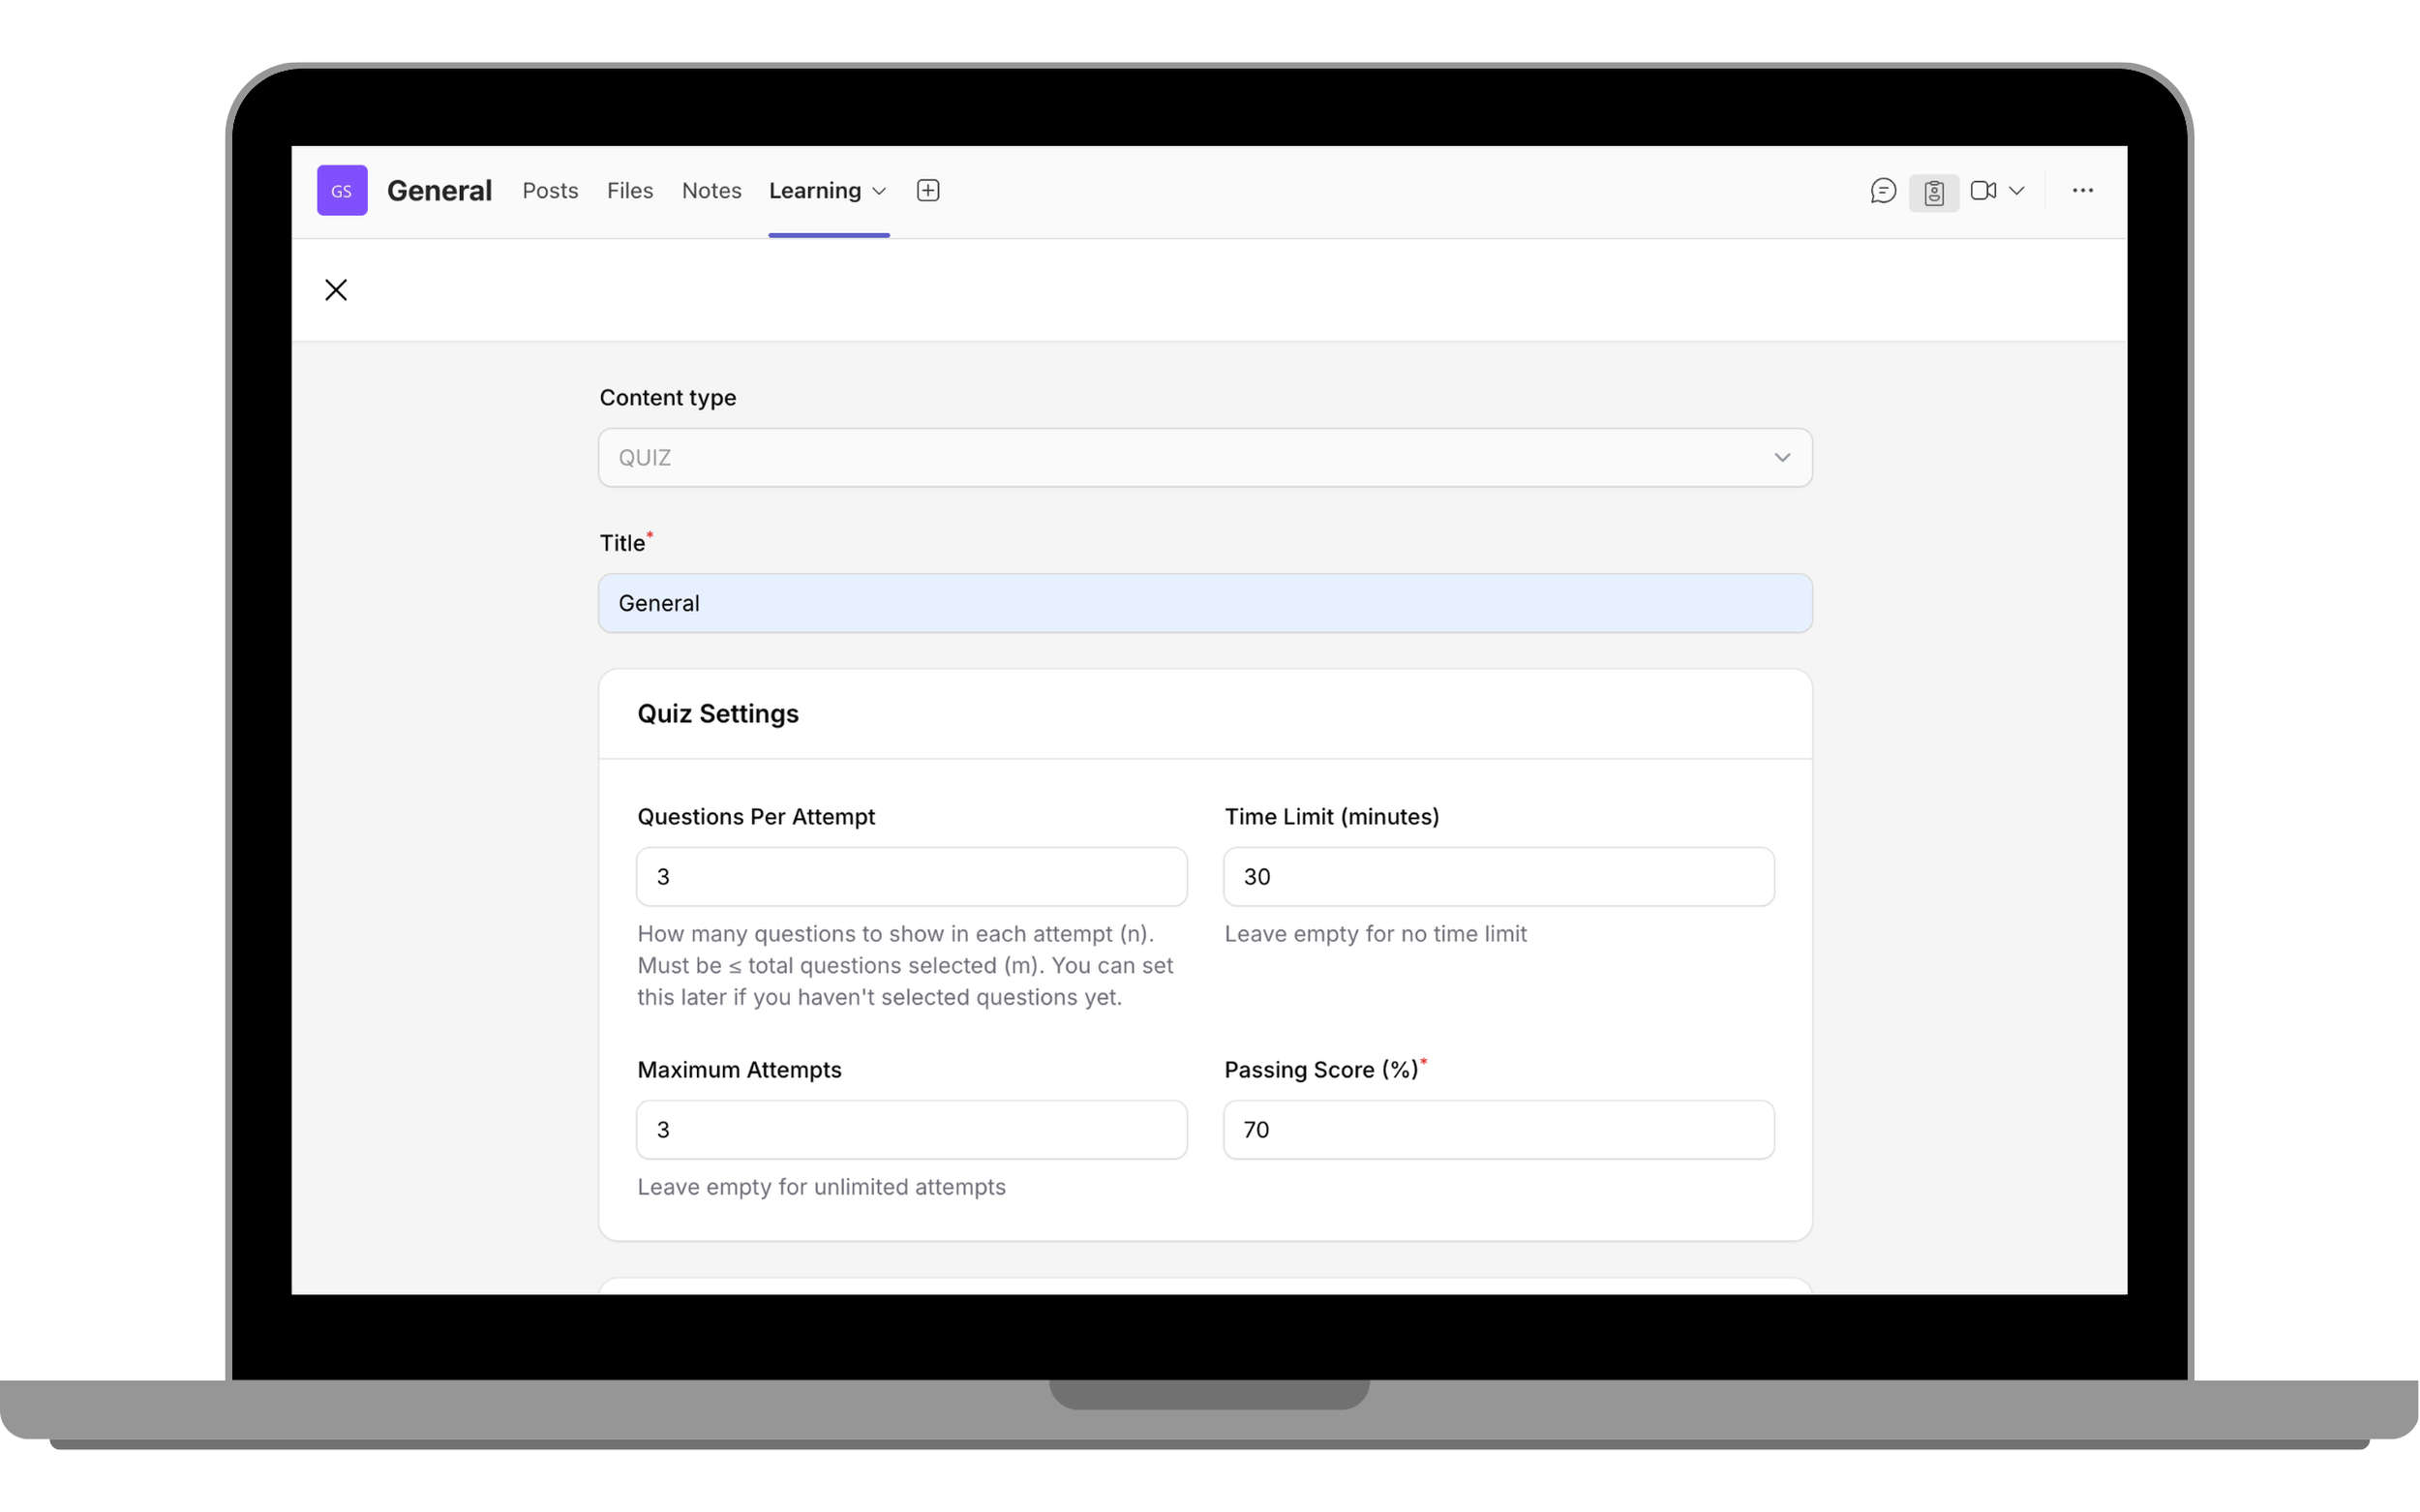
Set title and settings
Enter the Quiz Title. Configure settings: questions per attempt, time limit, maximum attempts, and passing score.
Set Randomization Options
Choose whether to randomize questions and randomize answer option order.
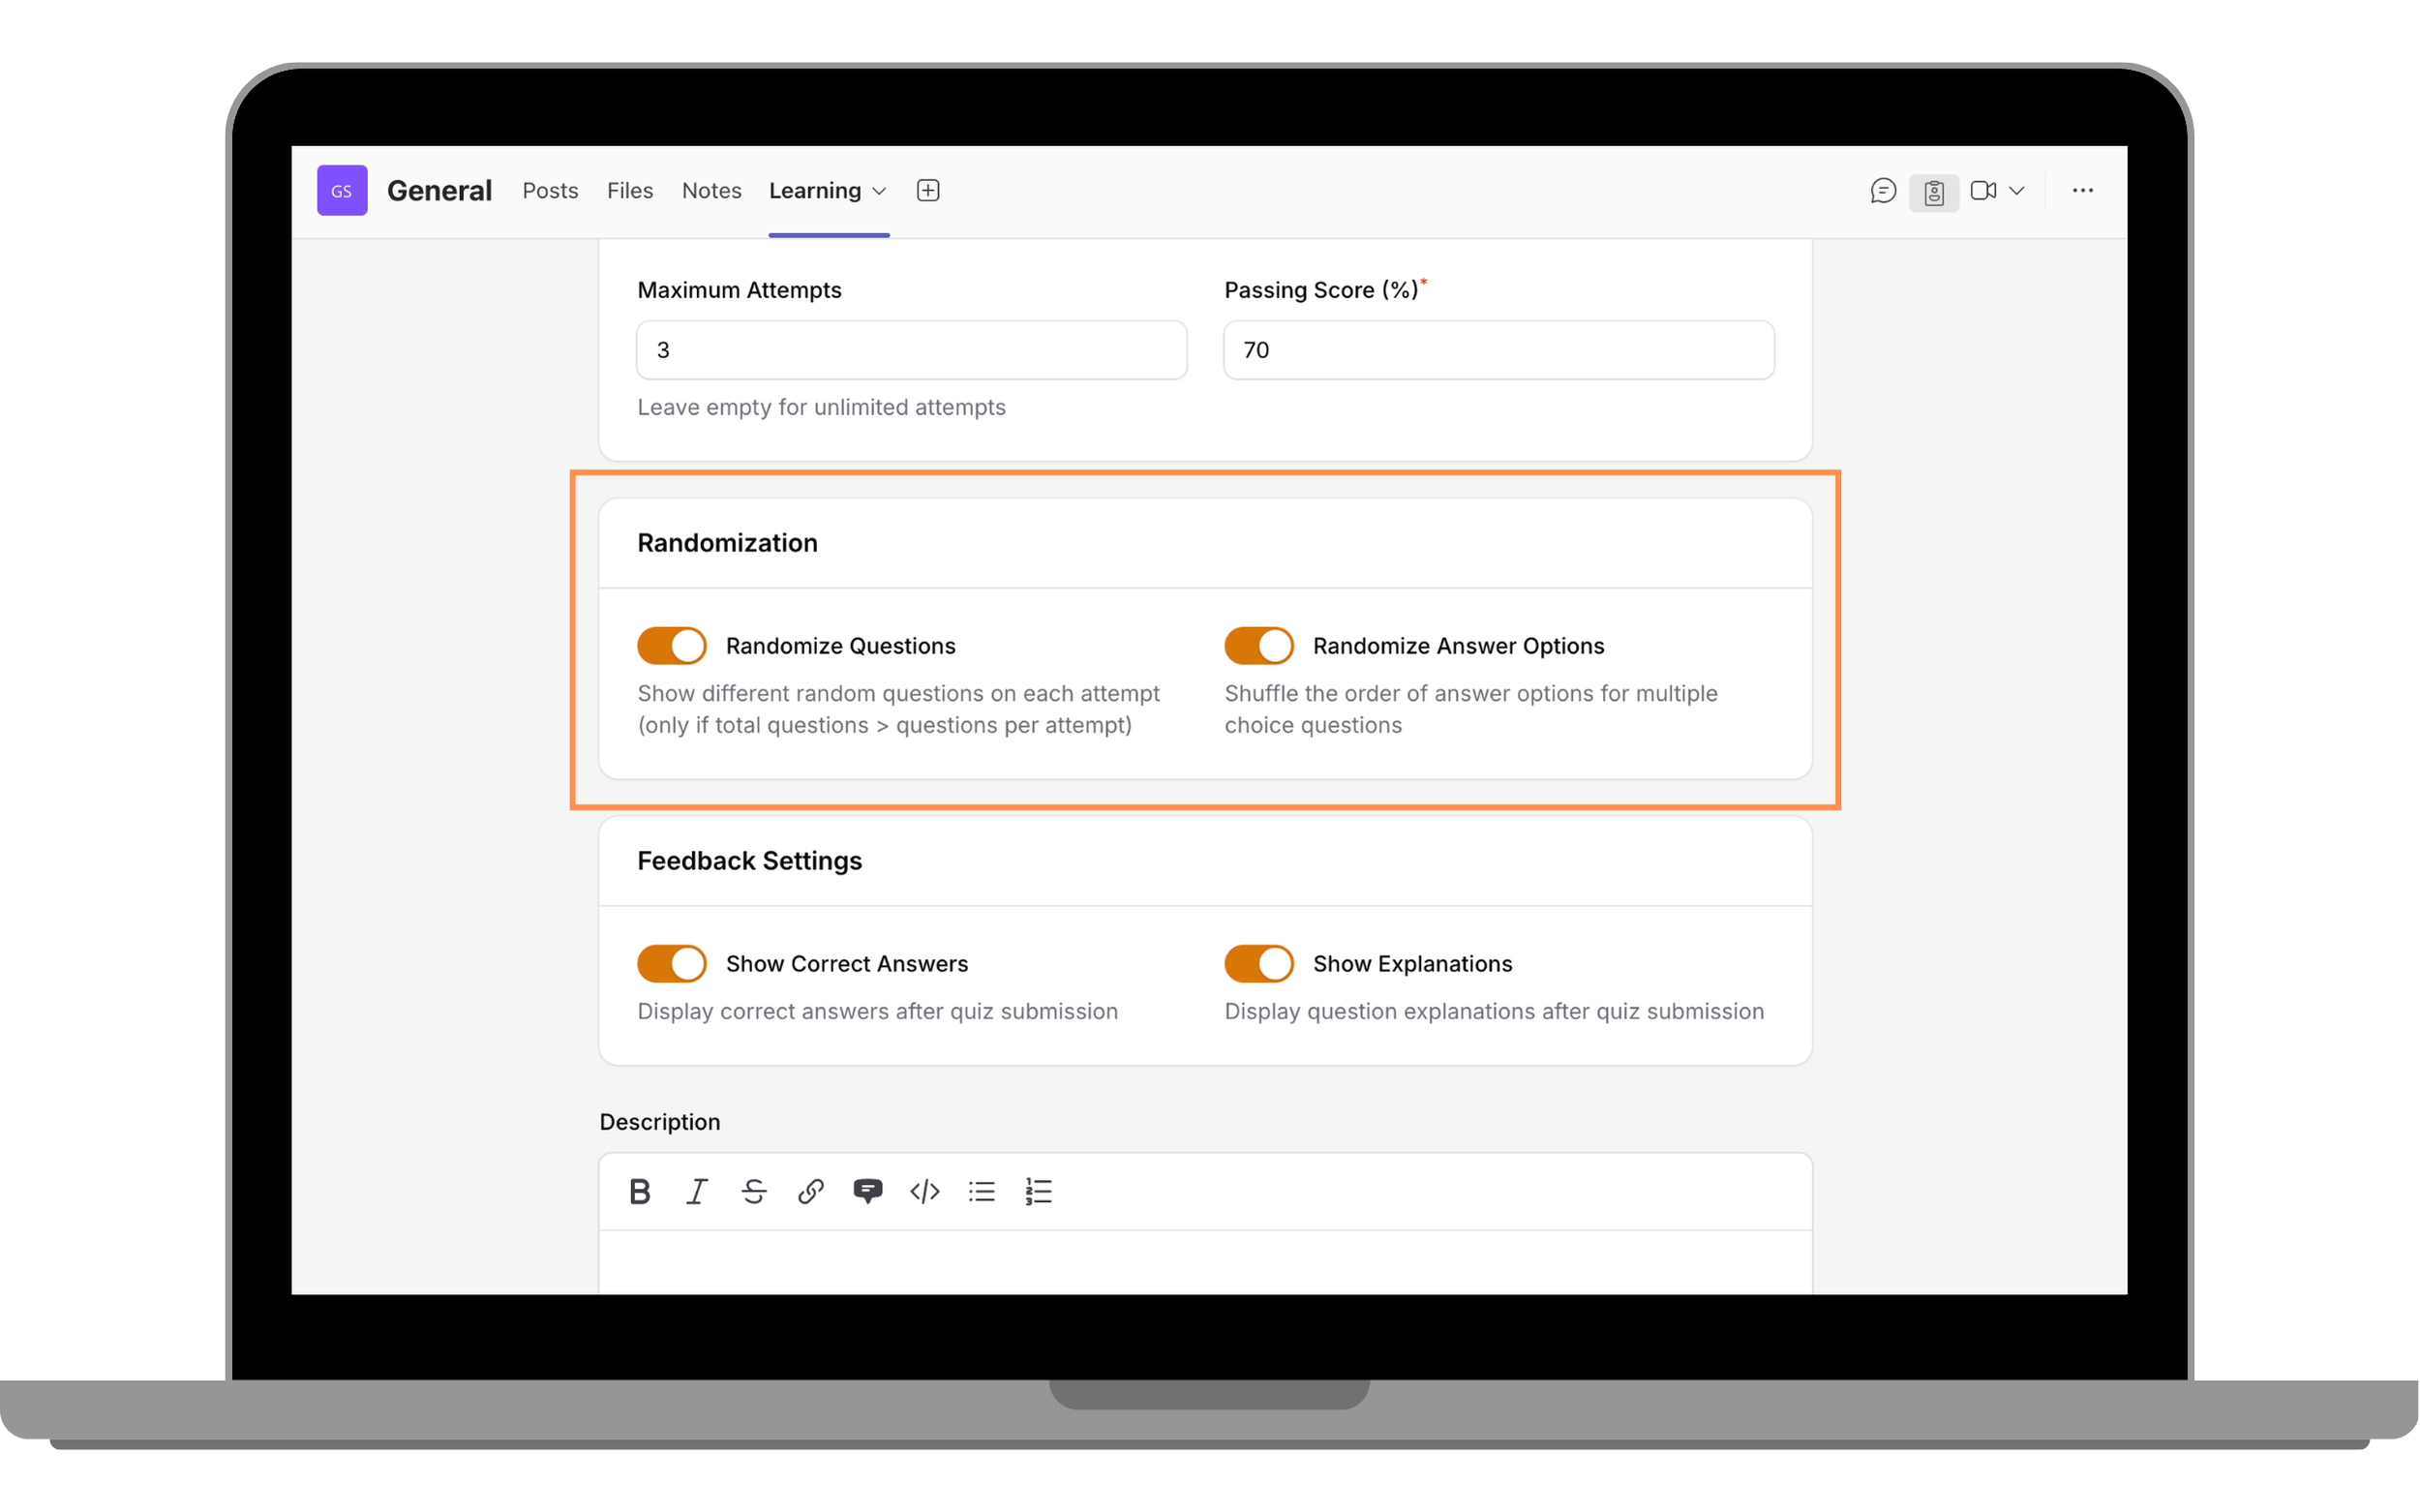
Configure Feedback Settings
Choose whether to show correct answers and explanations after submission. Turn on Include in course progress.
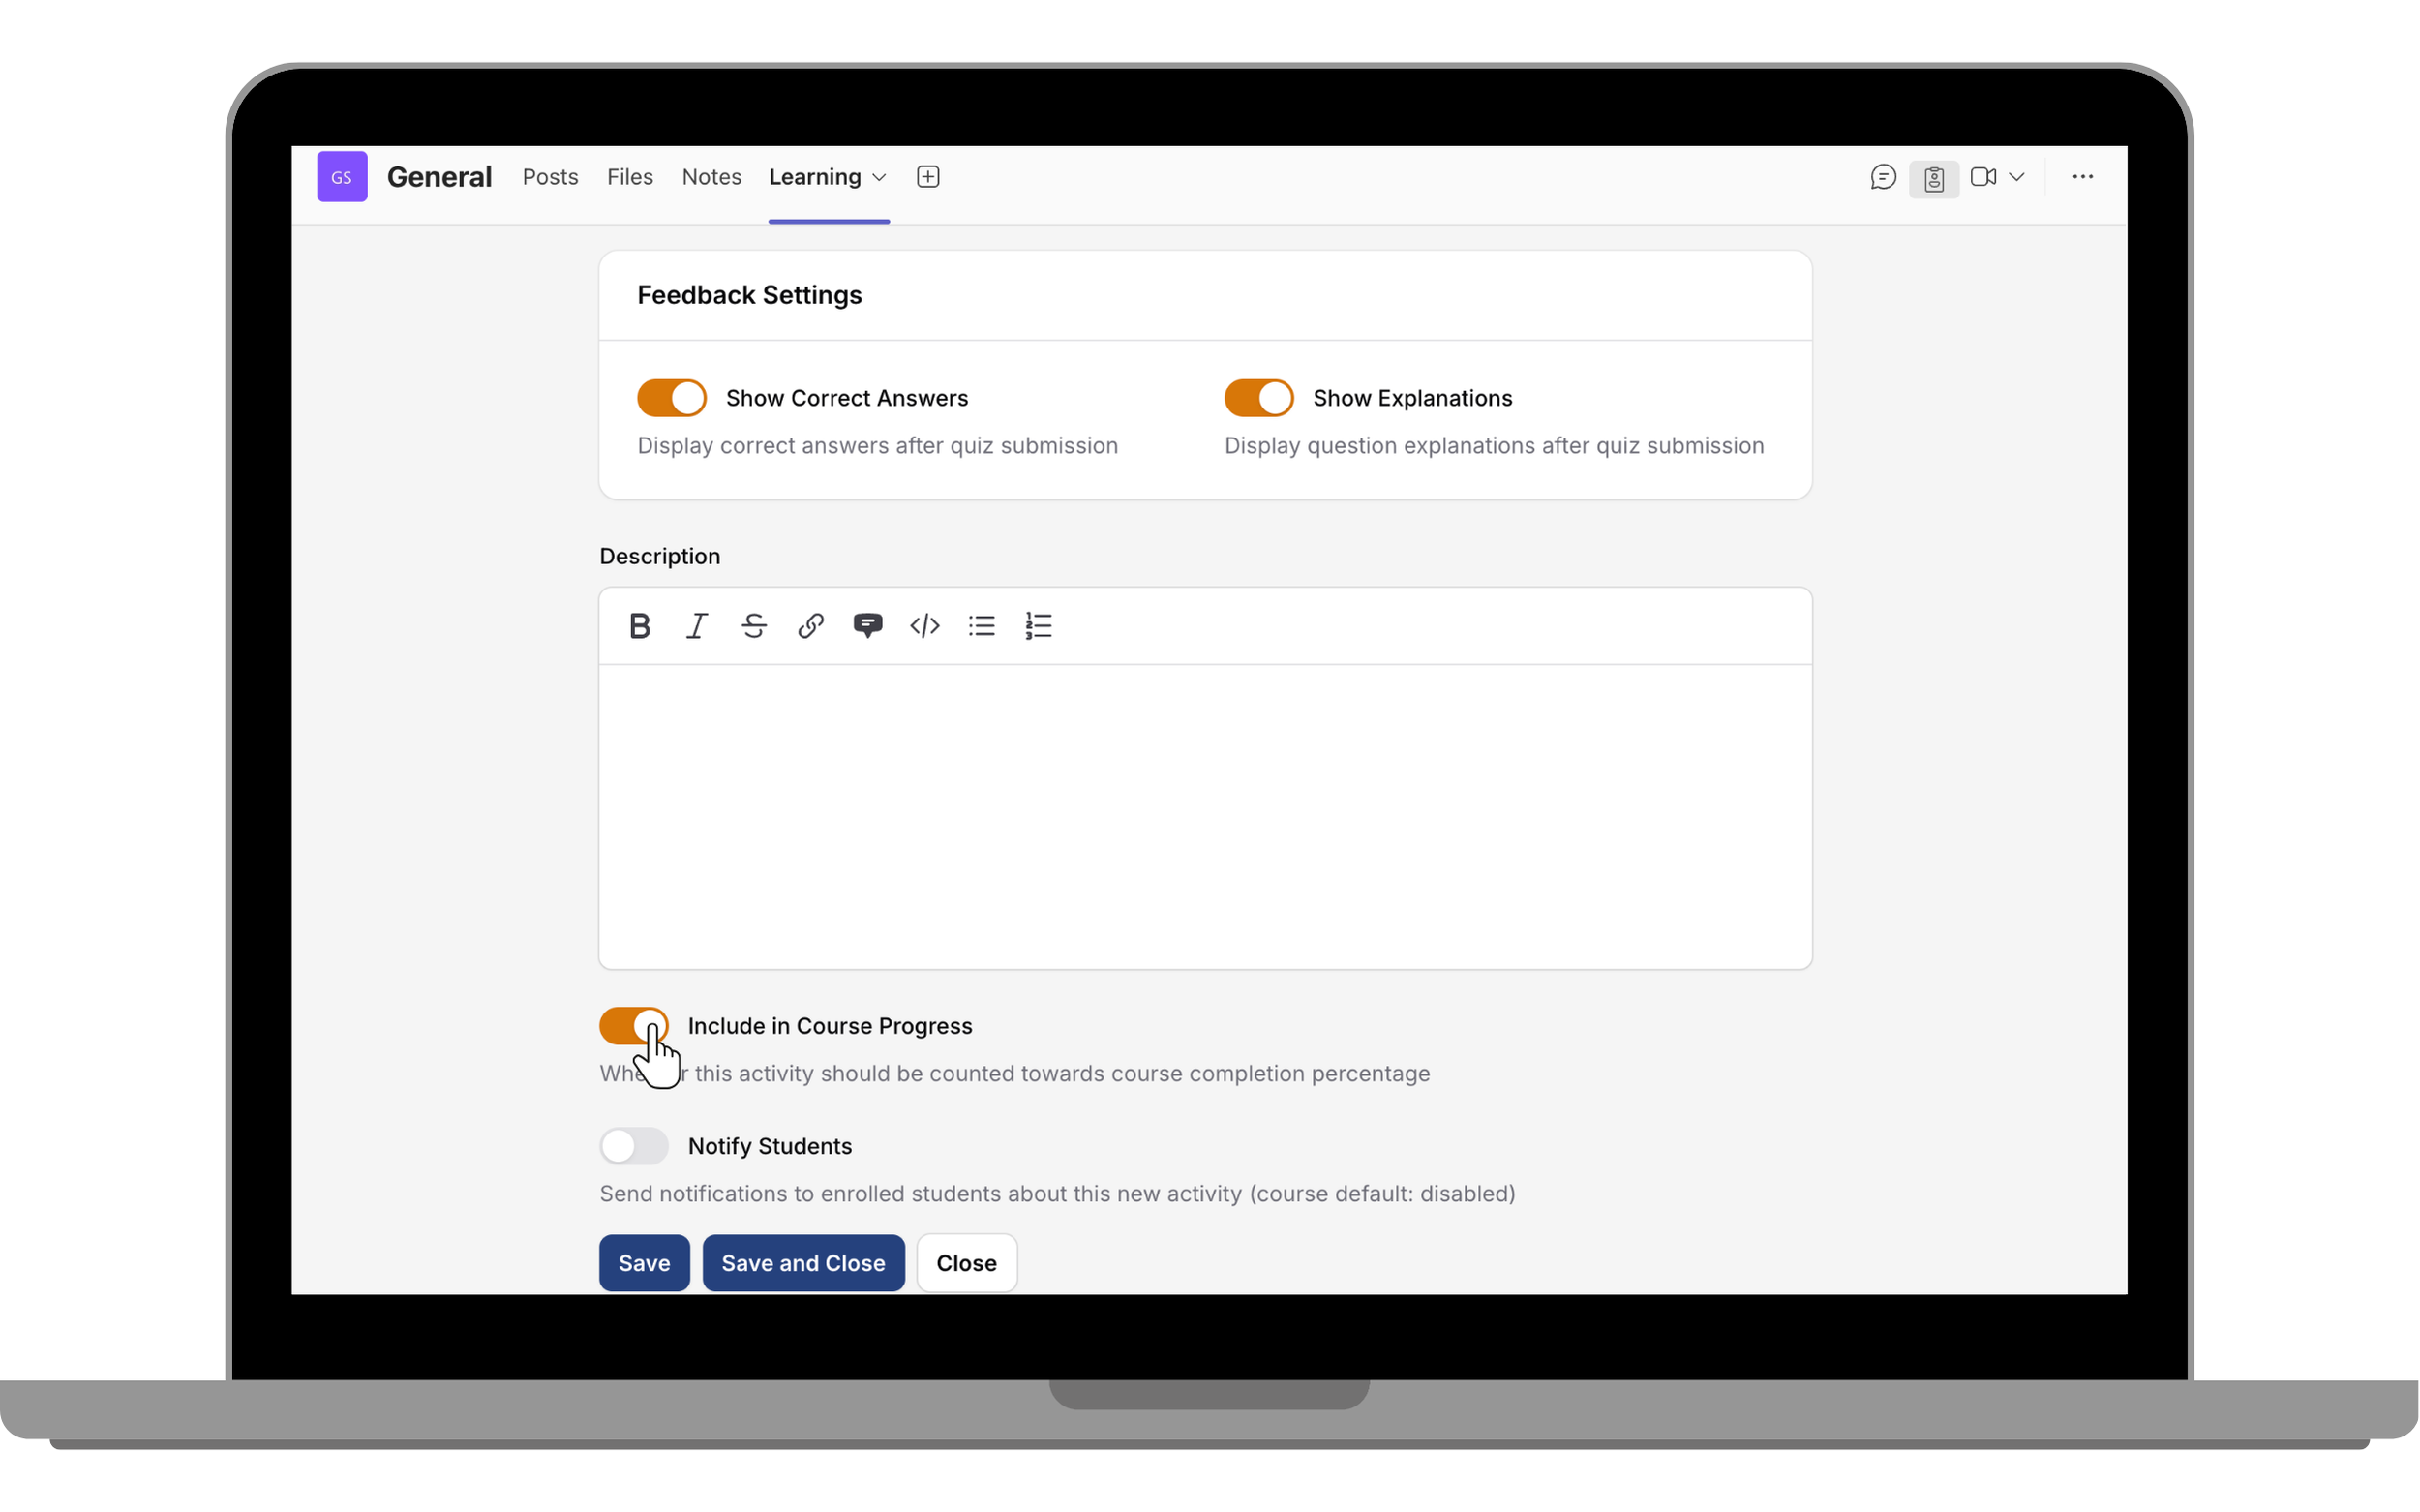
Click Save
Click Save to create the quiz.
Manage question bank
Scroll to Question Bank Statistics and click Manage questions in question bank.
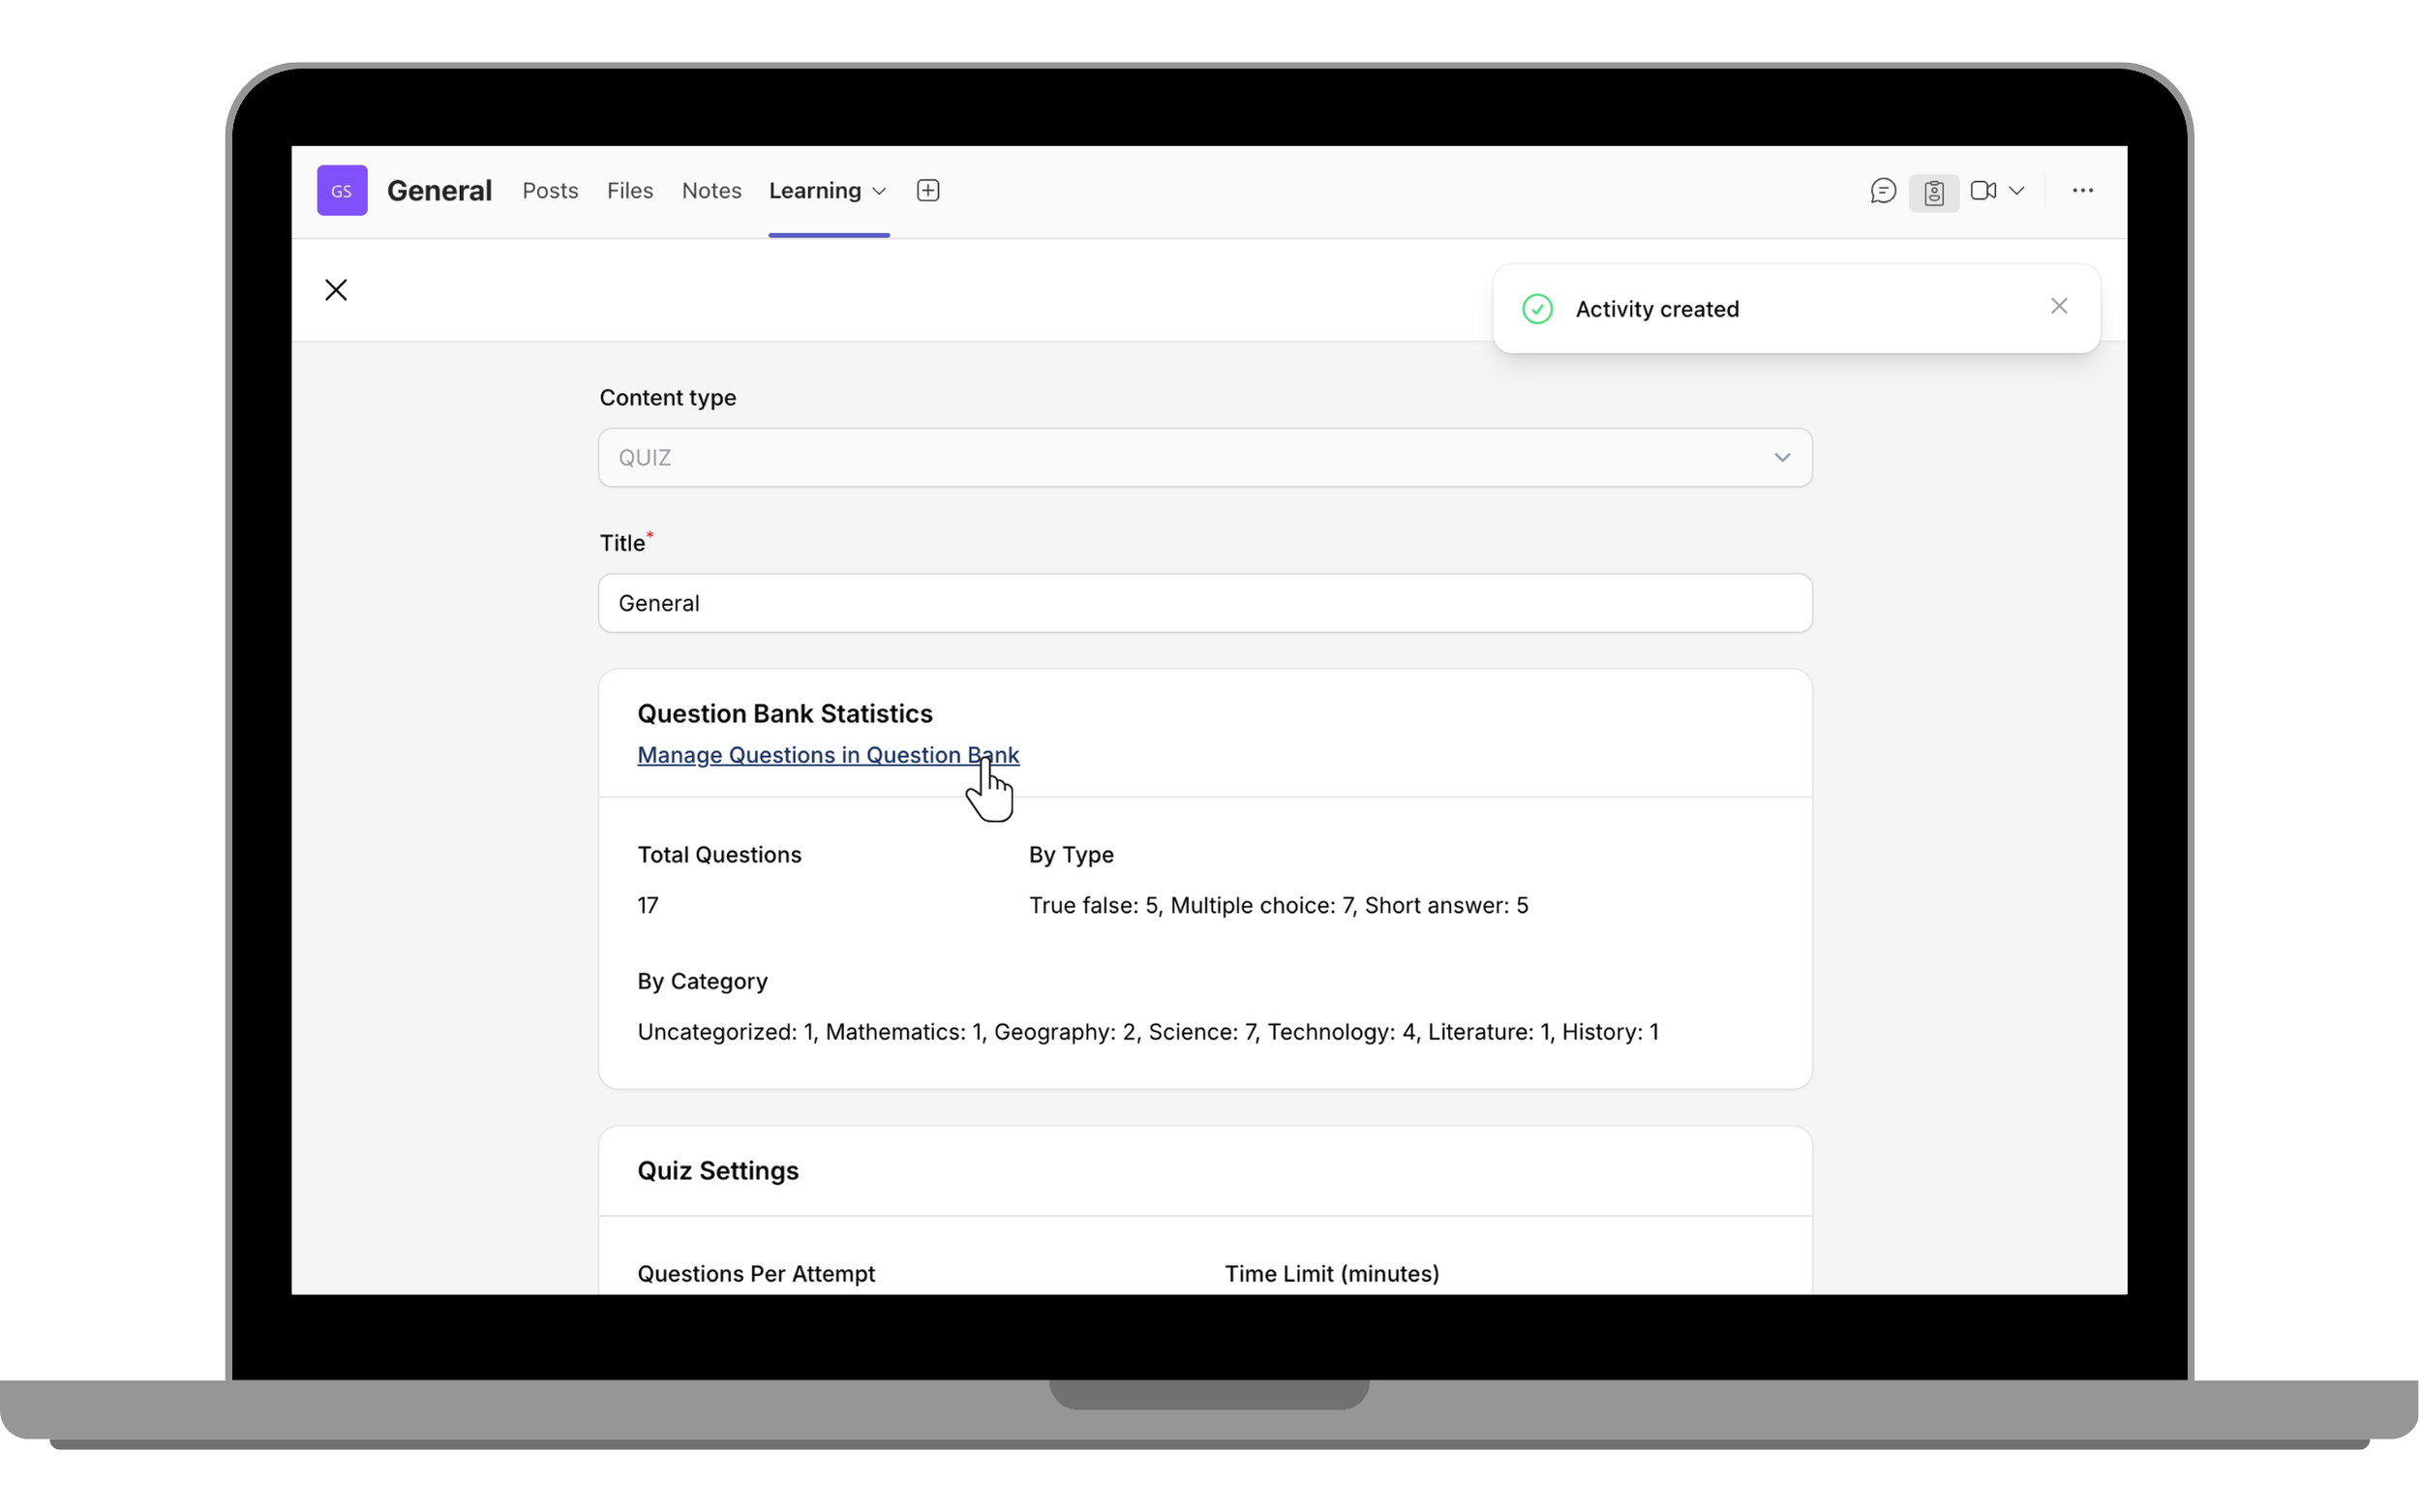
Create or import questions
Create new questions (multiple choice, true/false, short answer) or import from a file (CSV/GIFT) or other activities.
Update quiz to save
Return to the quiz activity page and click Update to save your question bank changes.
Activities - Panorama Activity
Create immersive 360-degree interactive experiences with hotspots for information and scene navigation.
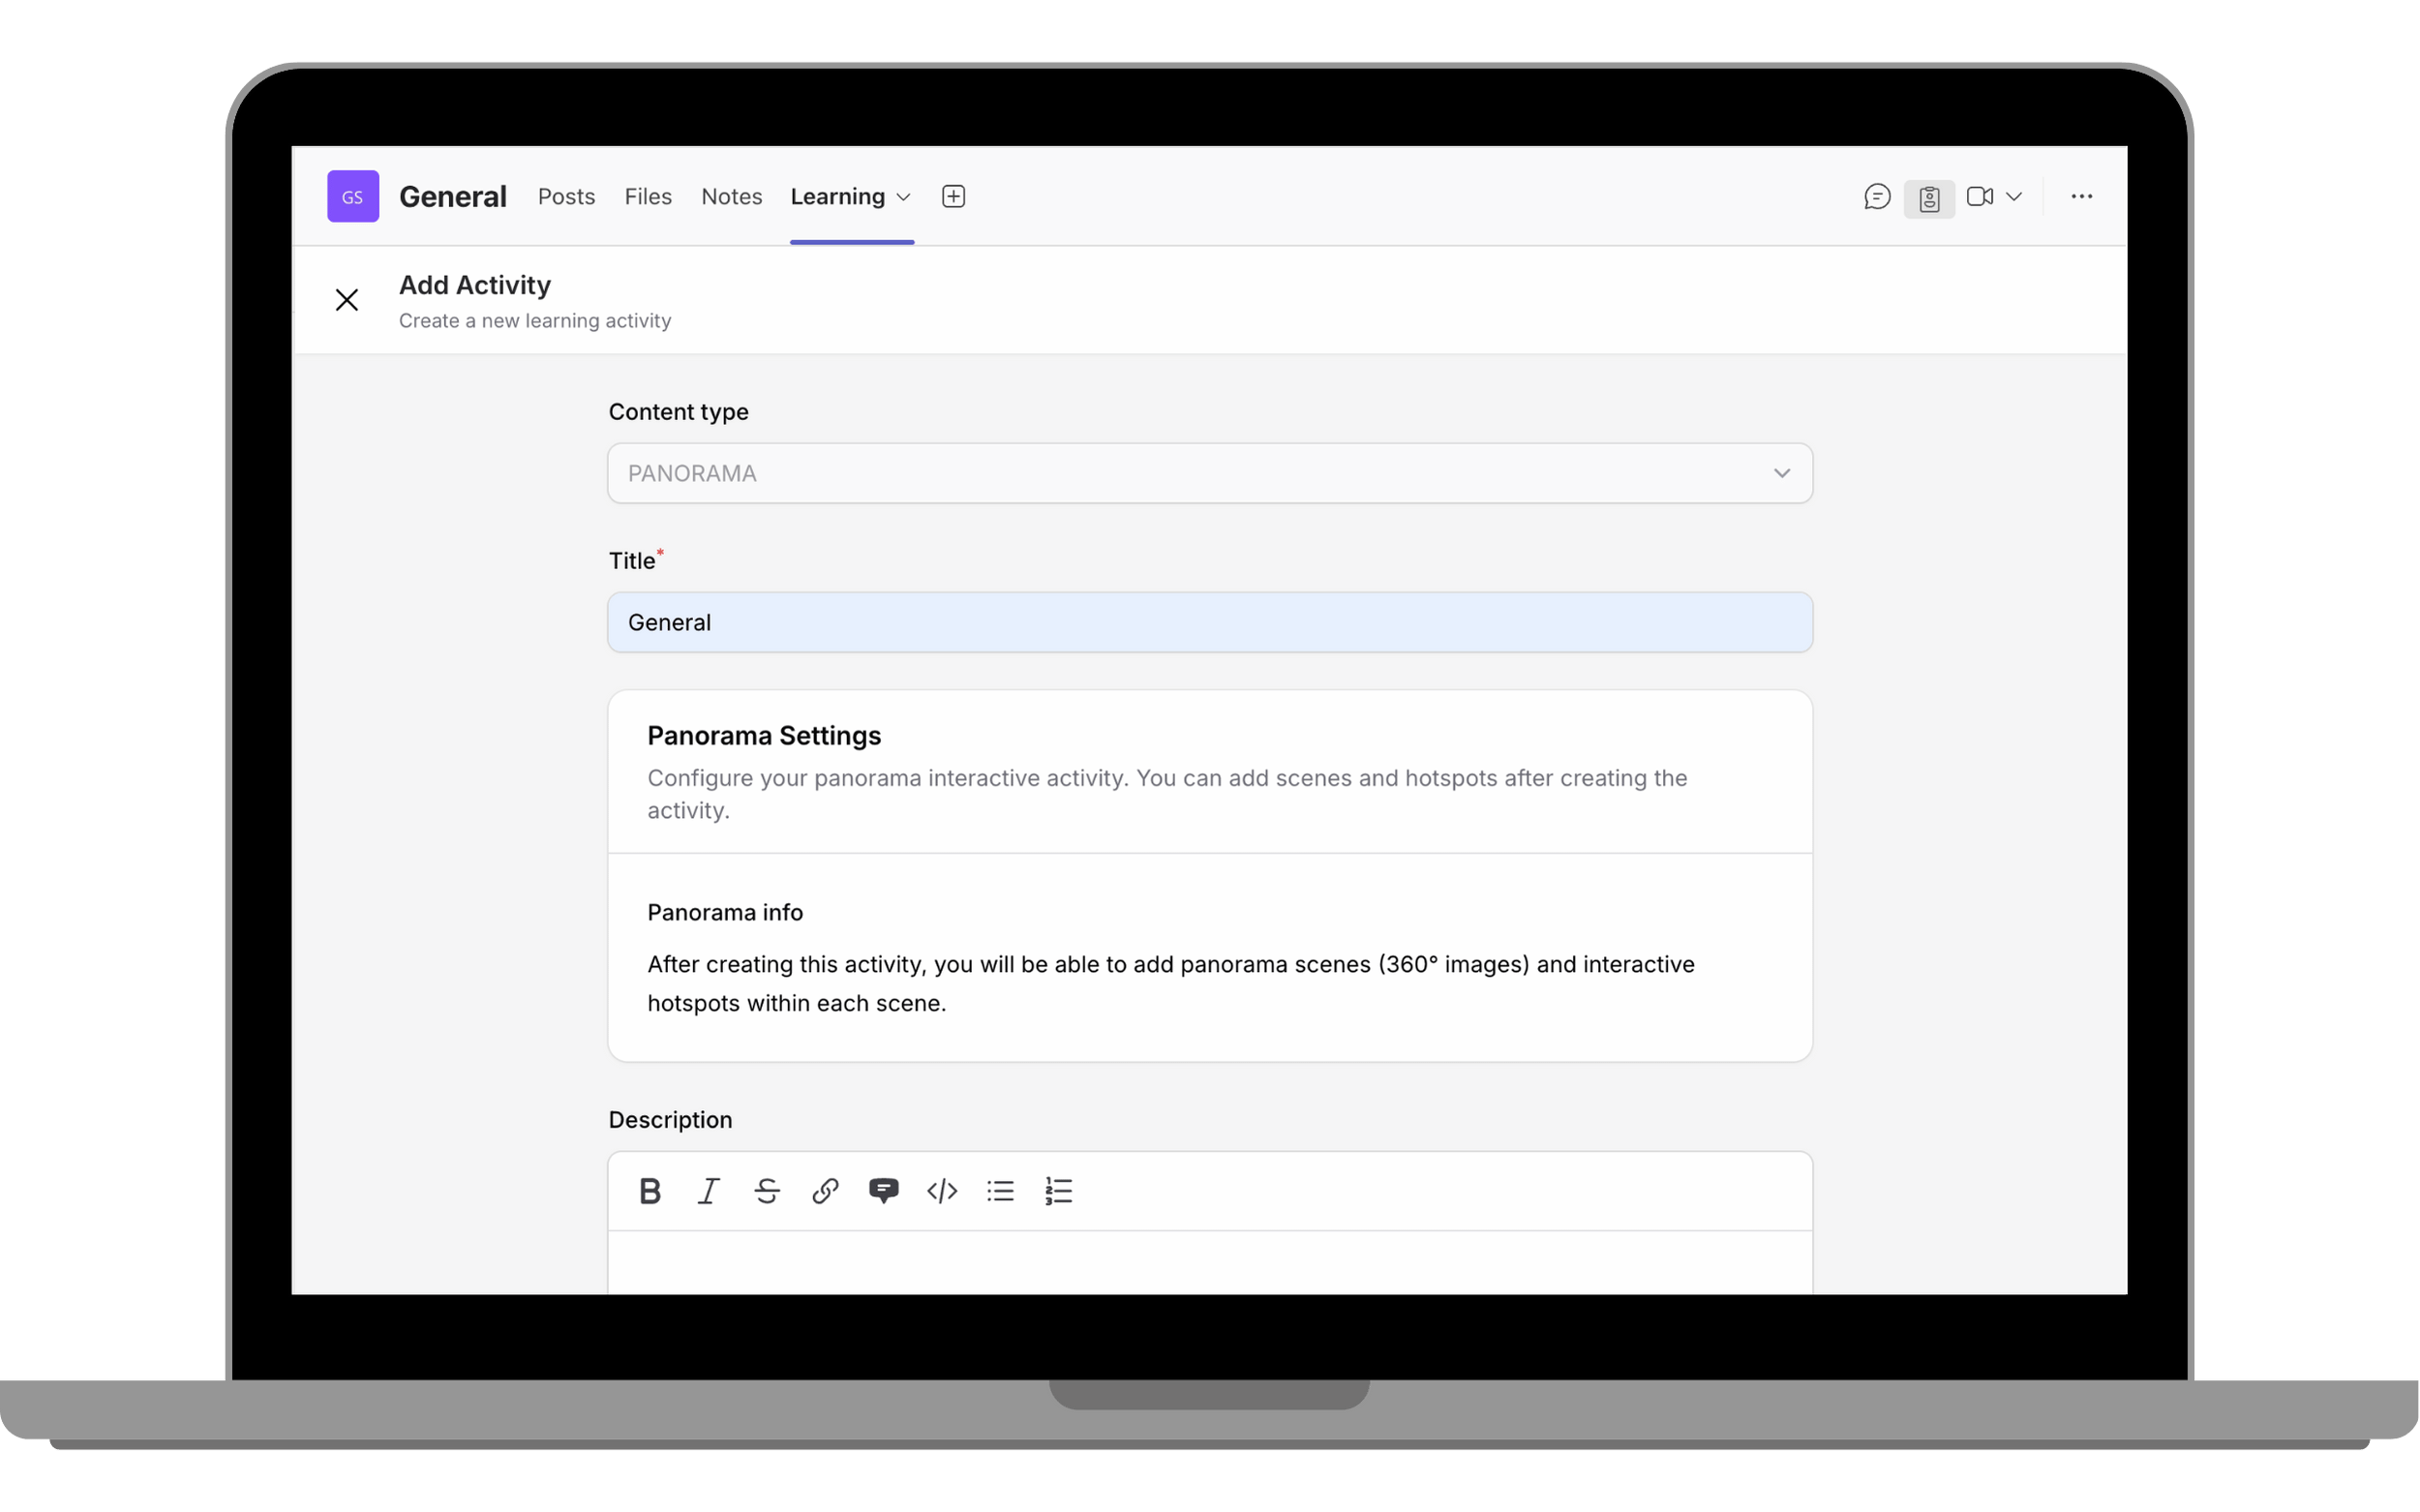
Add Panorama activity
Add a Panorama Activity to your course. Enter a title and description (optional). Click Save.
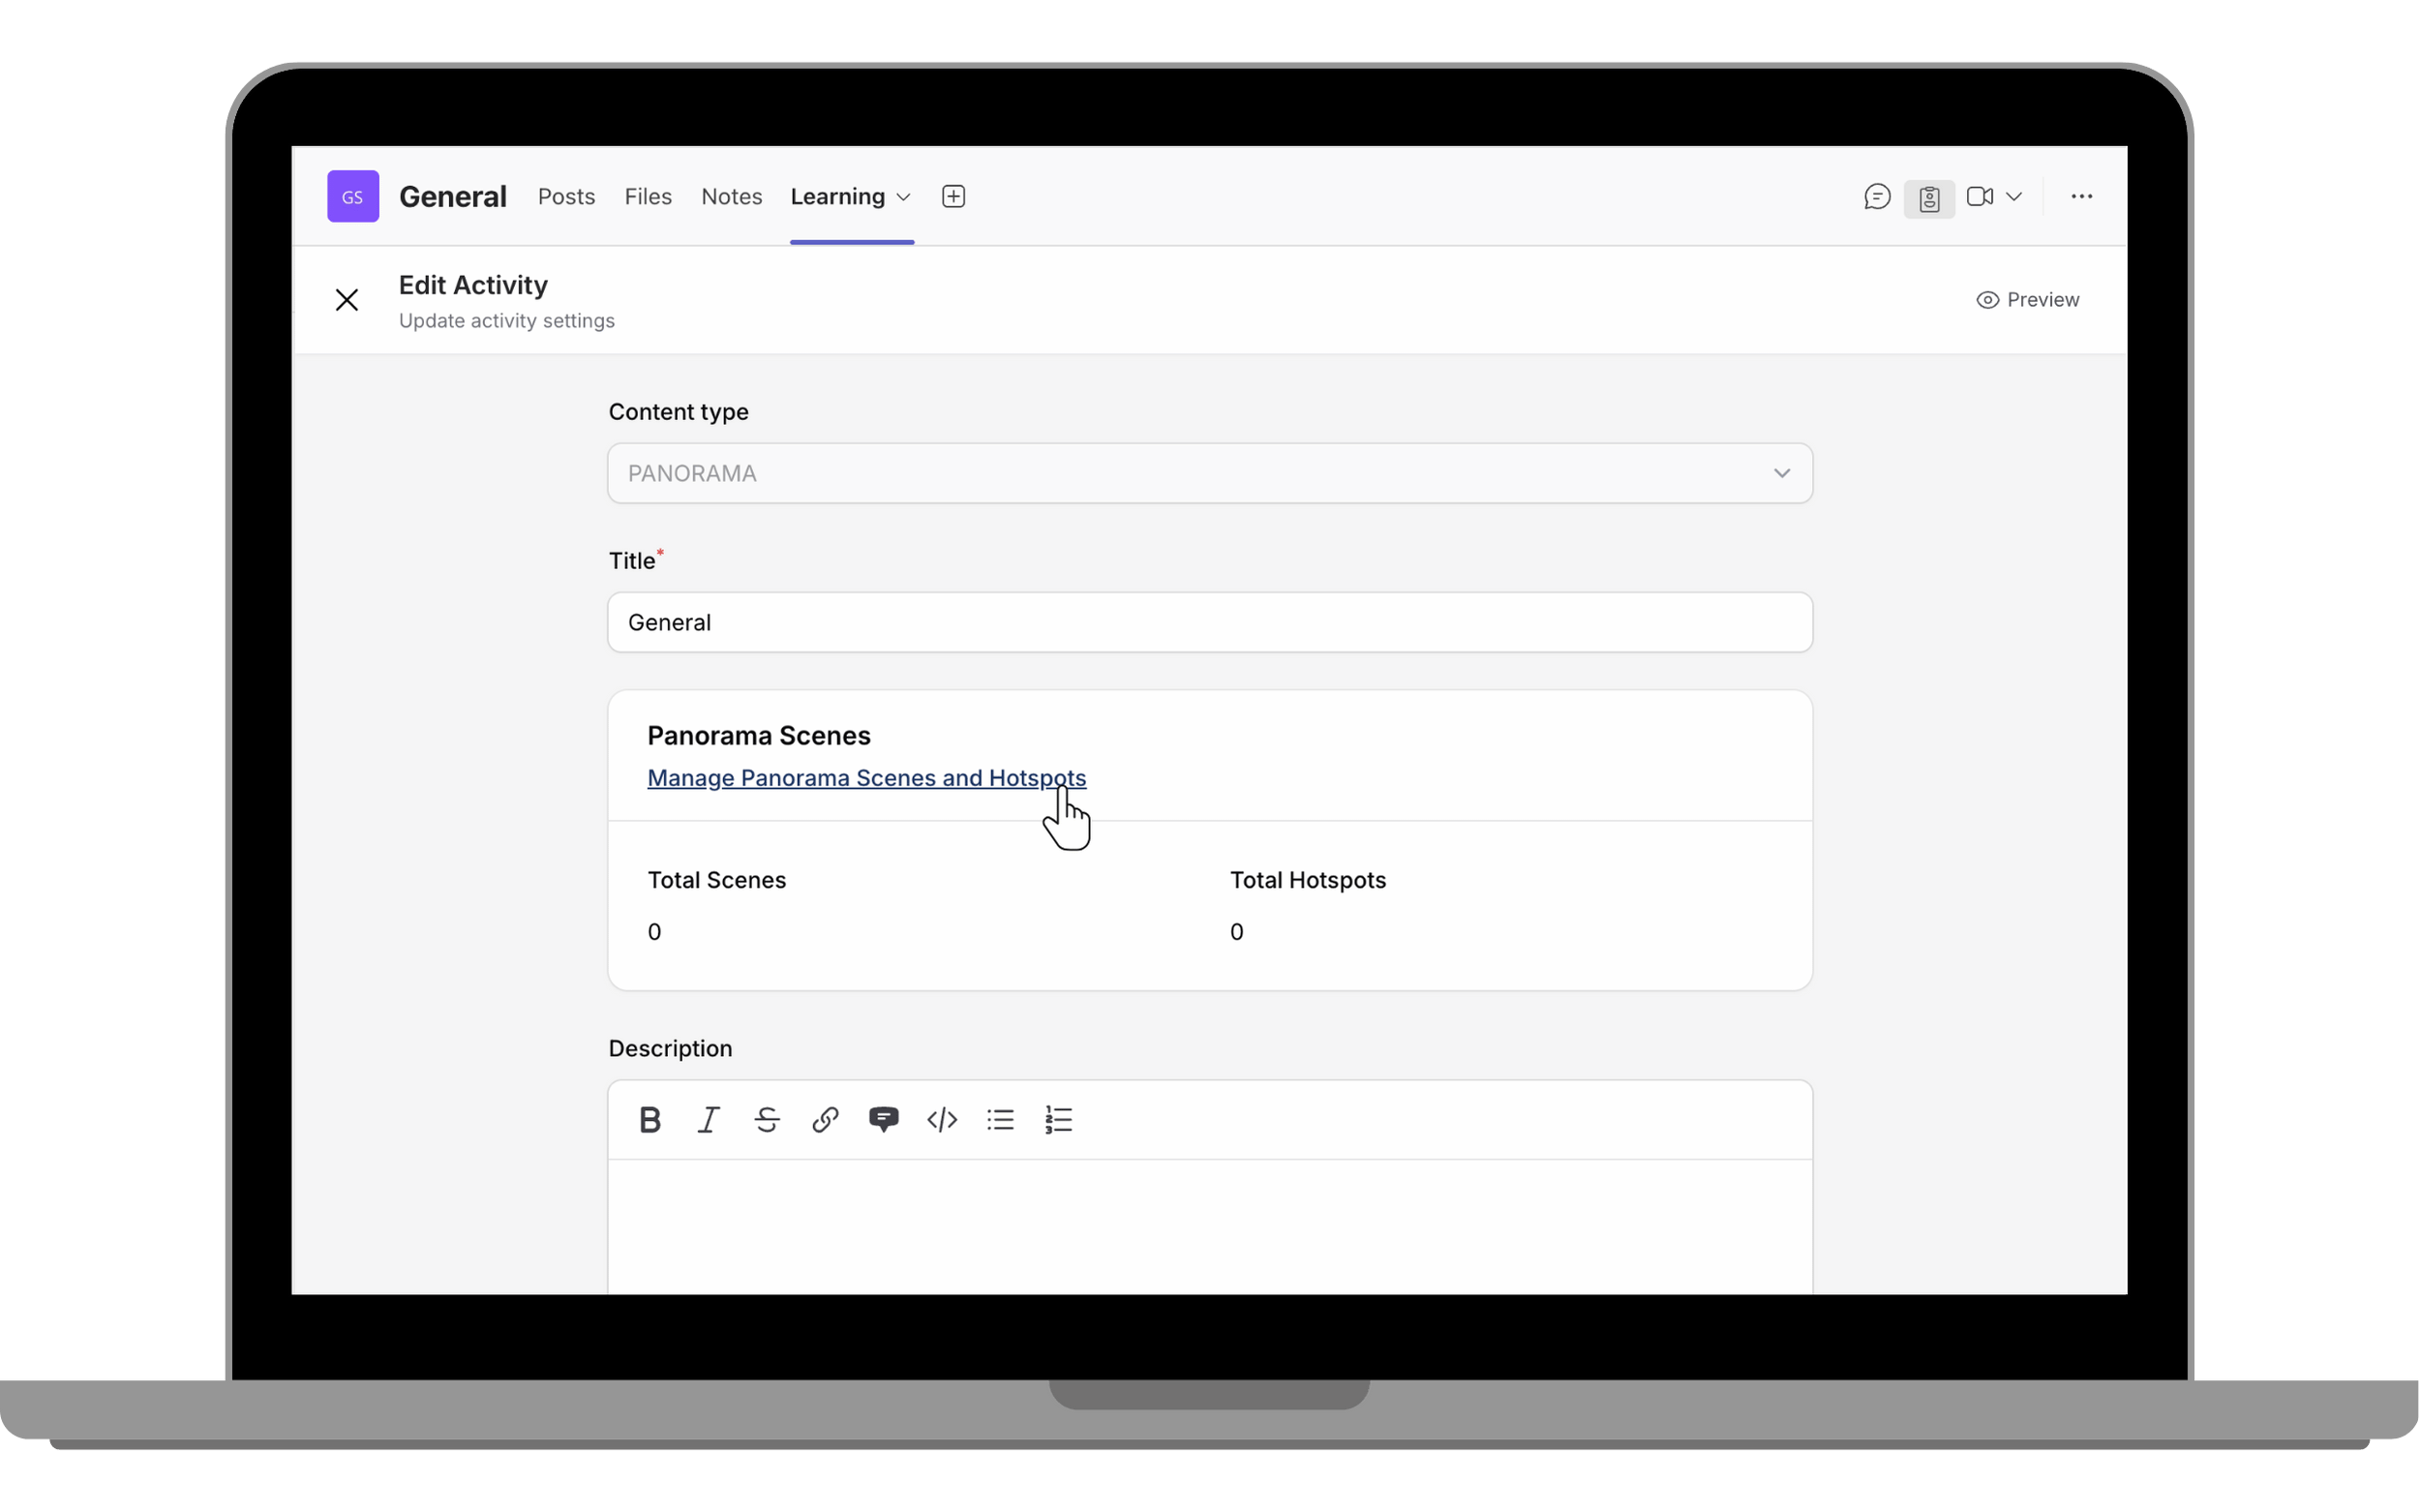
Manage scenes and hotspots
Click Manage Panorama Scenes and Hotspots to begin setup.
Add a Scene
Click Add Scene. Enter a scene title and description, upload your 360° image. Enable Set as Default Scene if this should appear first.
Click Create
Click Create to add the scene, or Create and Create Another to add more scenes.
Add hotspots to scene
Click Hotspots in the Panorama Scene Manager for the selected scene, then click Add Hotspot.
Choose hotspot type
Choose a hotspot type:
- Information: displays text-based information.
- Link to Scene: links to another panorama scene.
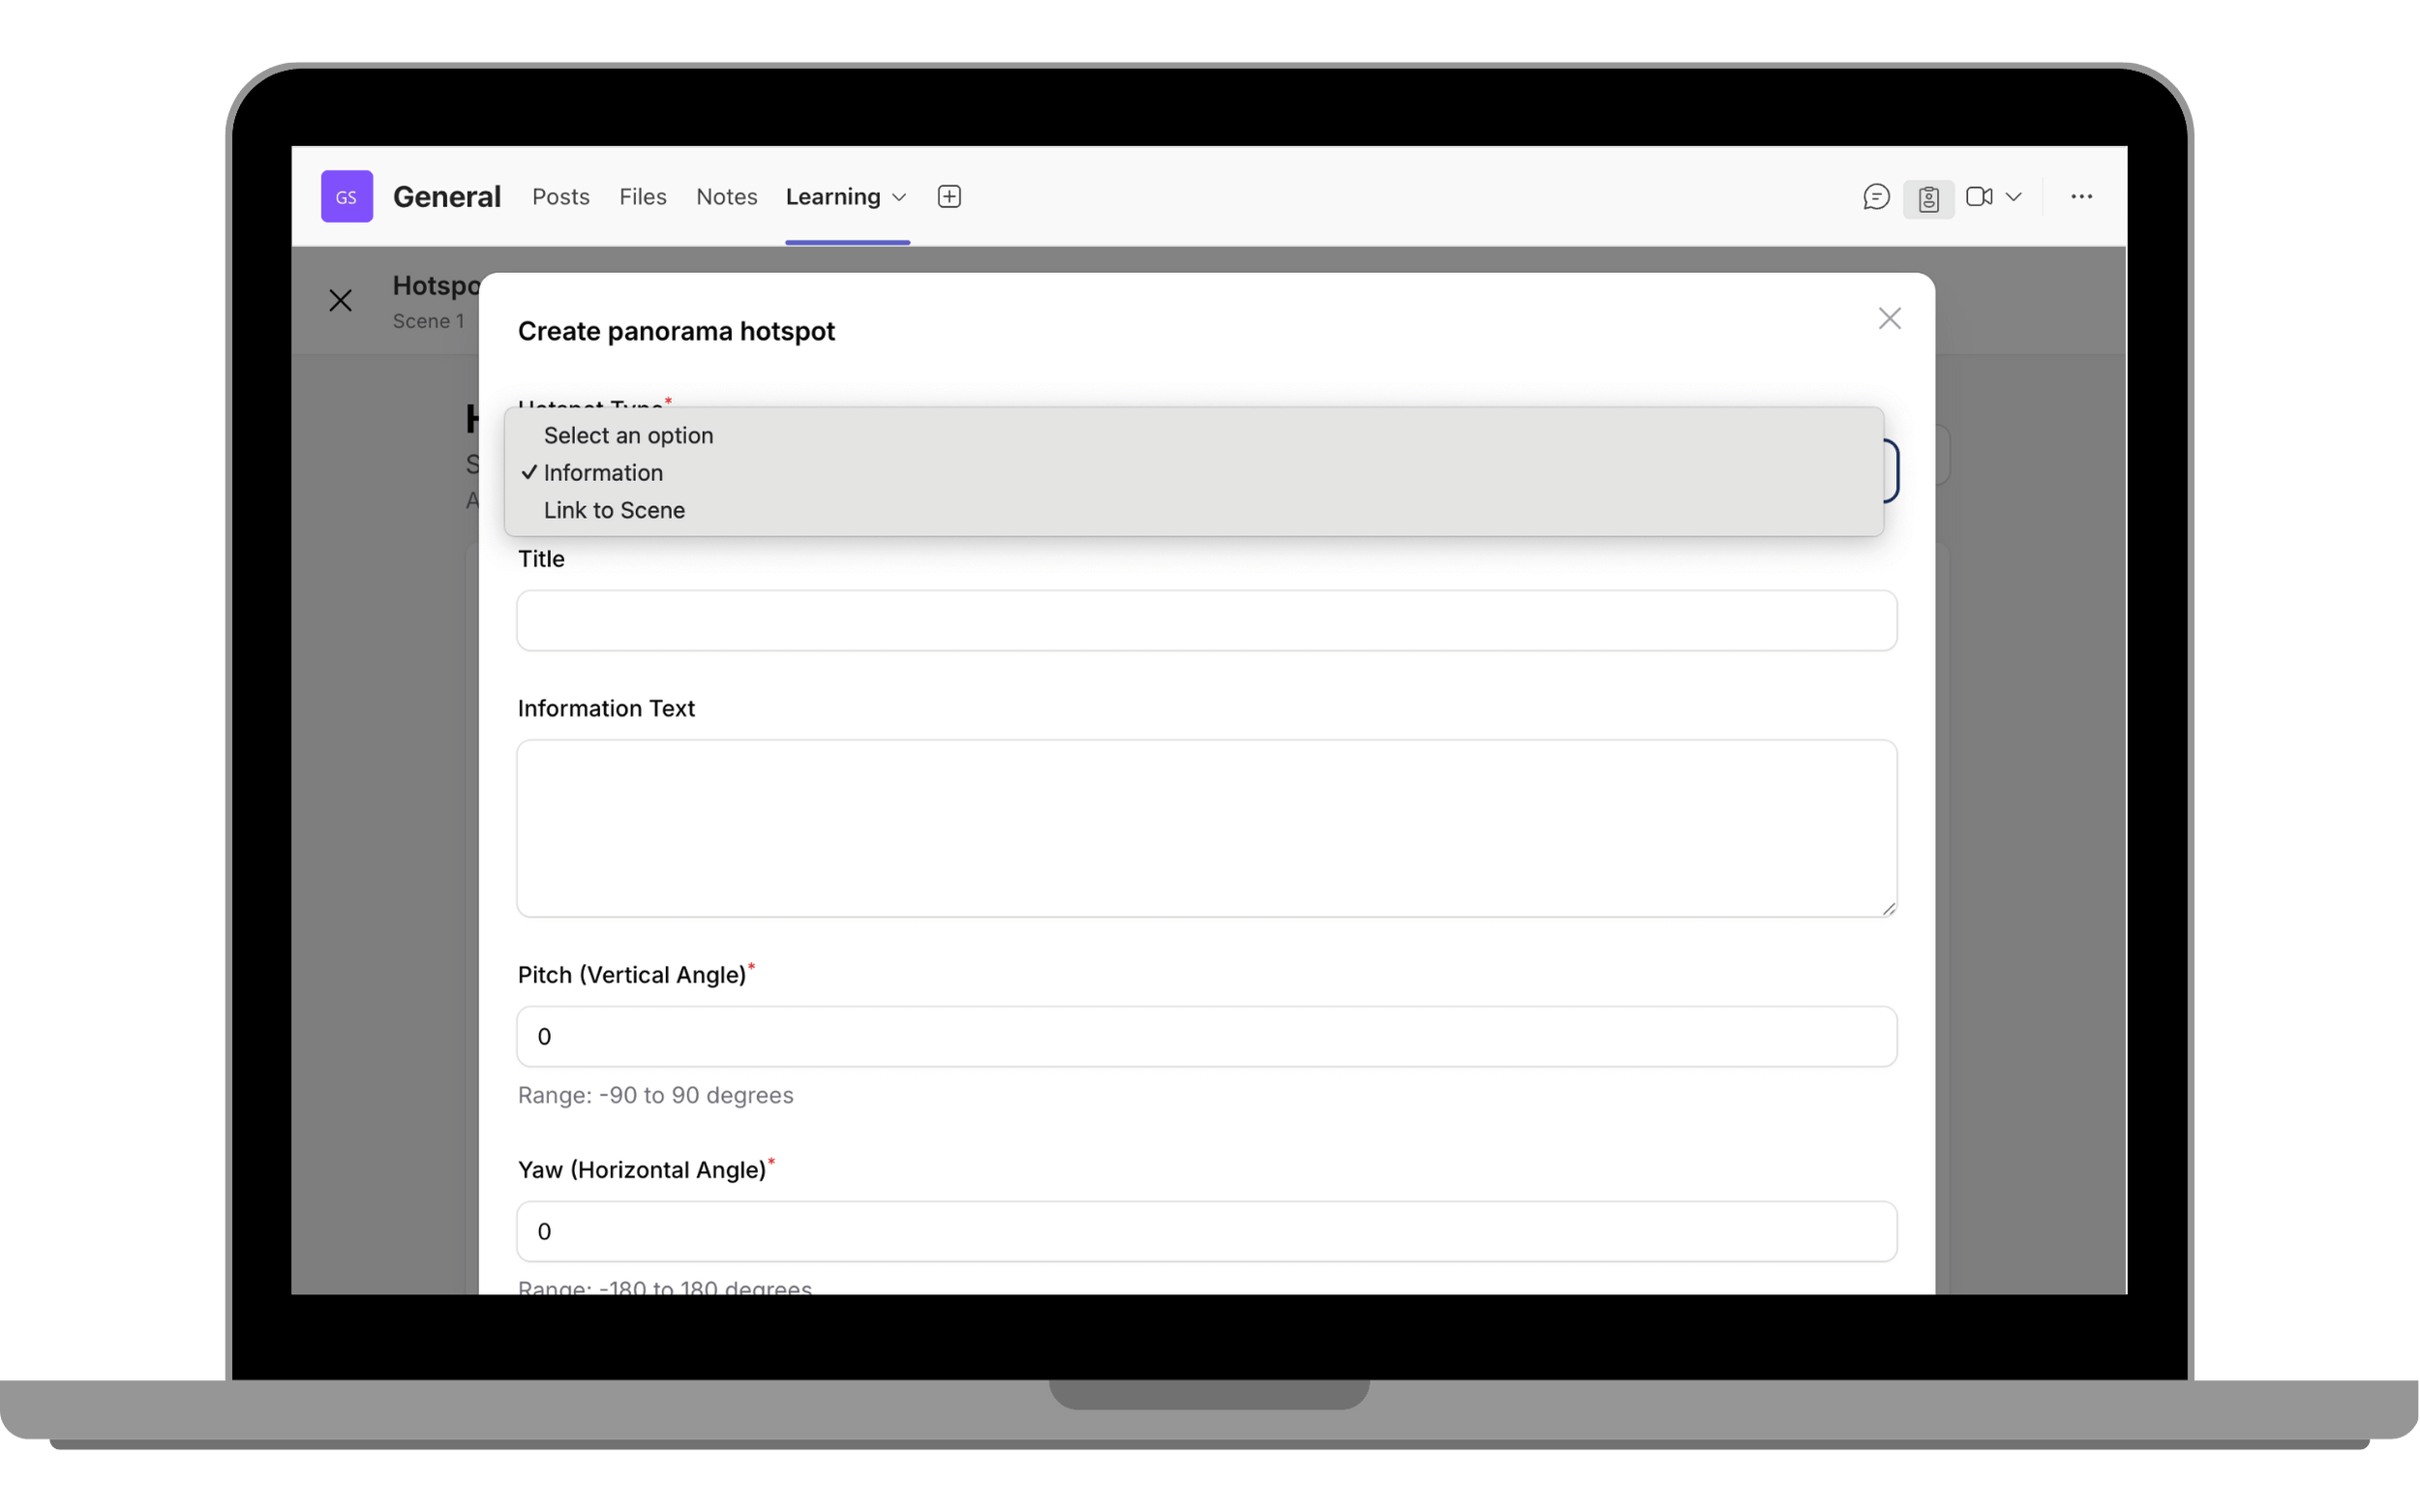
Set hotspot position
Enter title and information text. Set pitch and yaw values, or use Set Position to click-to-place the hotspot in the preview image.
Activities - Interactive Image Activity
Create interactive learning experiences by adding clickable hotspots to any image. Hotspots can display text or link to other scenes.
Add Interactive Image
Select Add Activity, choose Interactive Image, and enter an Activity Title.
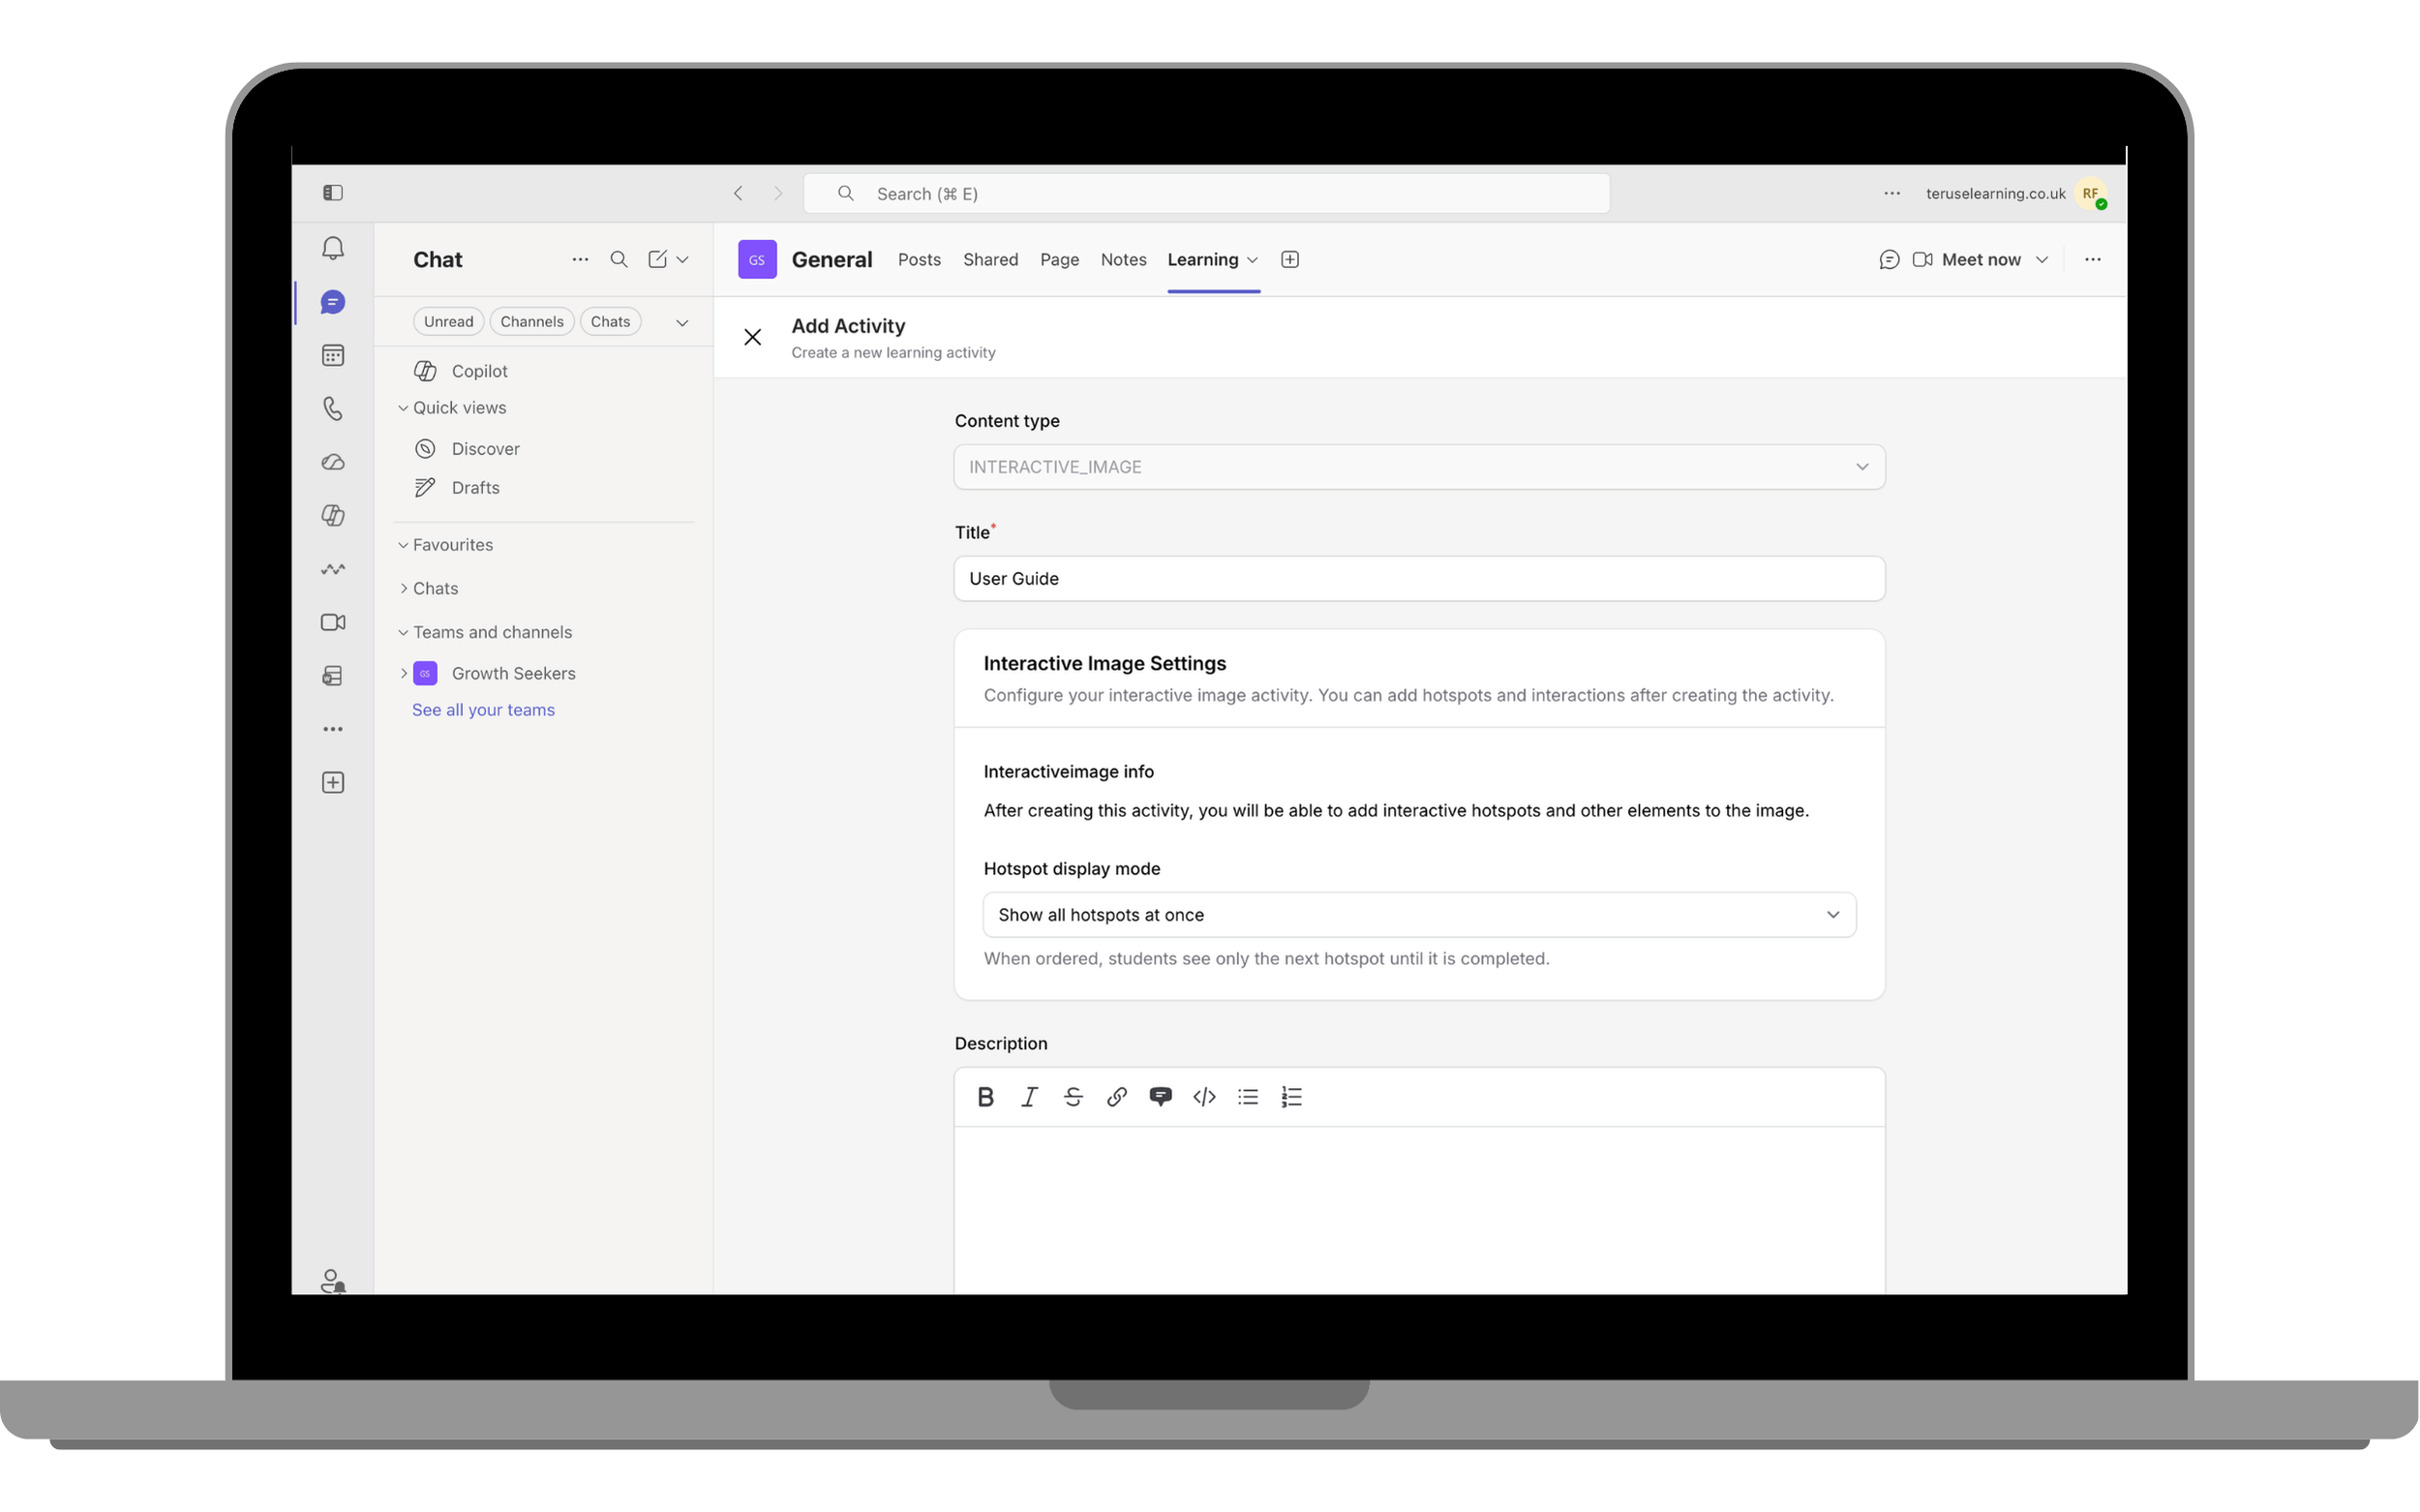
Select Hotspot Display
Select how hotspots display: Show all hotspots or Show hotspots one-by-one in order.
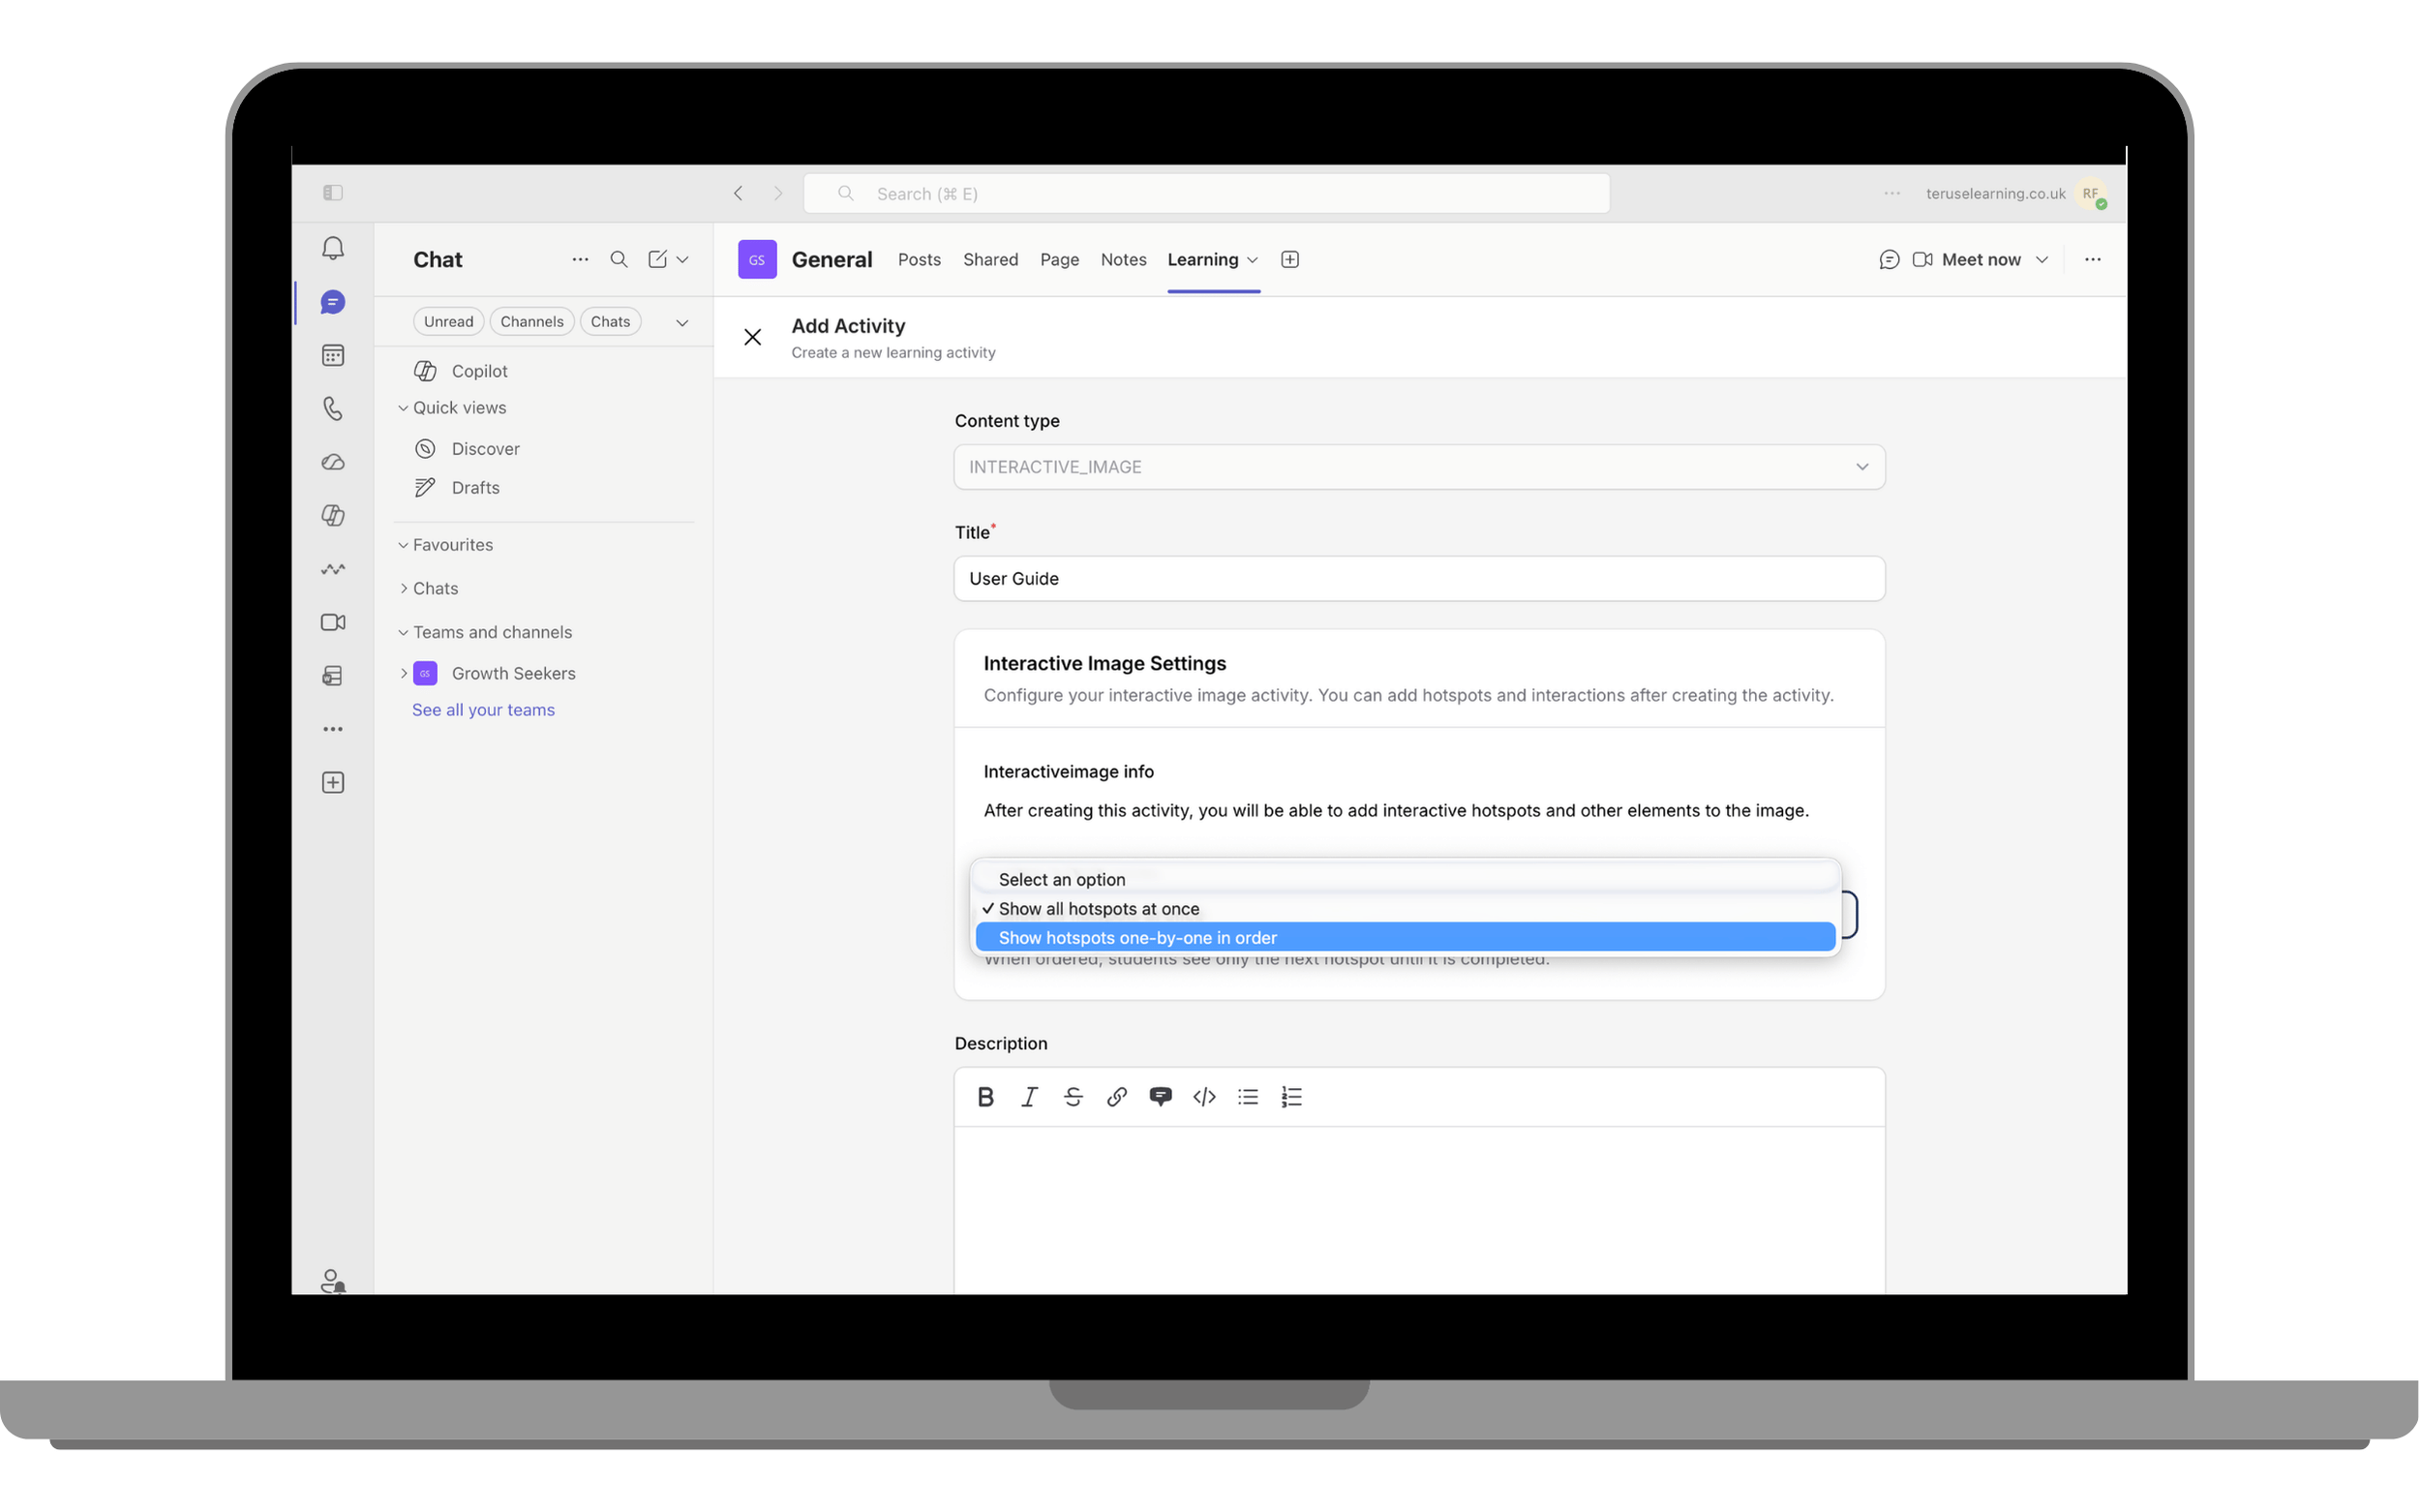
Click Save
Click Save to create the activity. Open Manage Interactive Image Scenes and Hotspots.
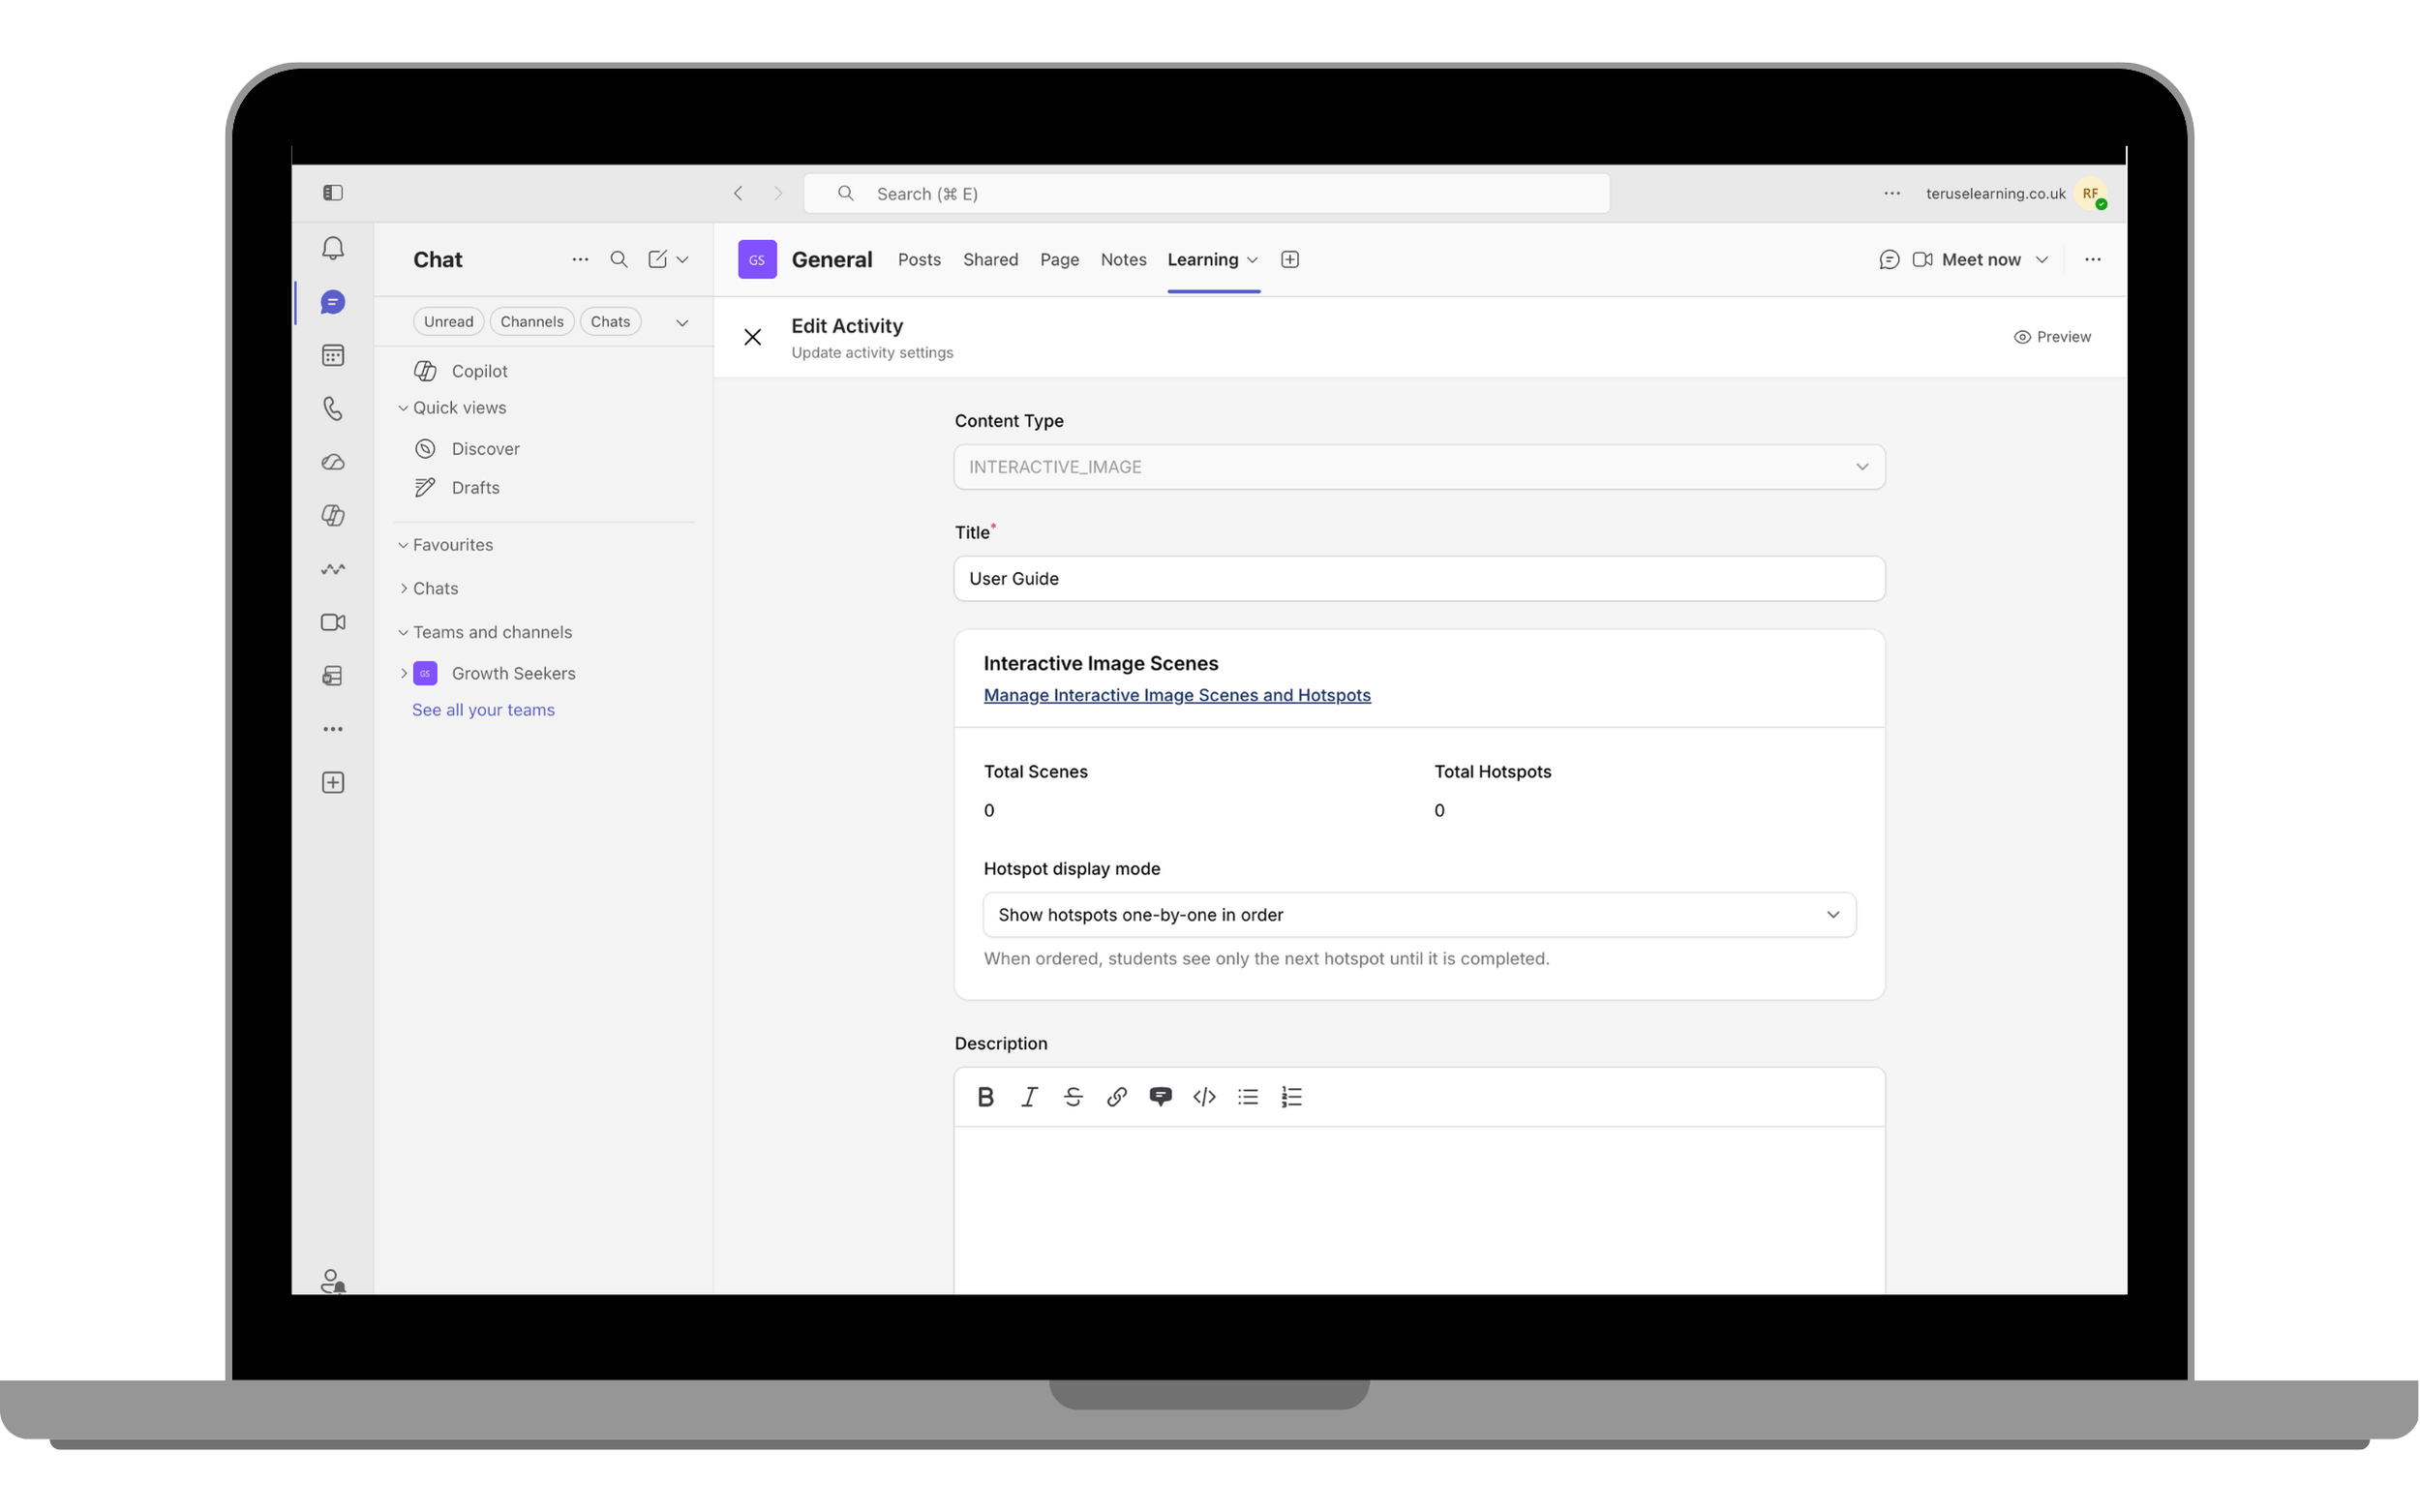
Add a Scene
Click Add Interactive Image, enter a Scene Title, upload an image, and save.
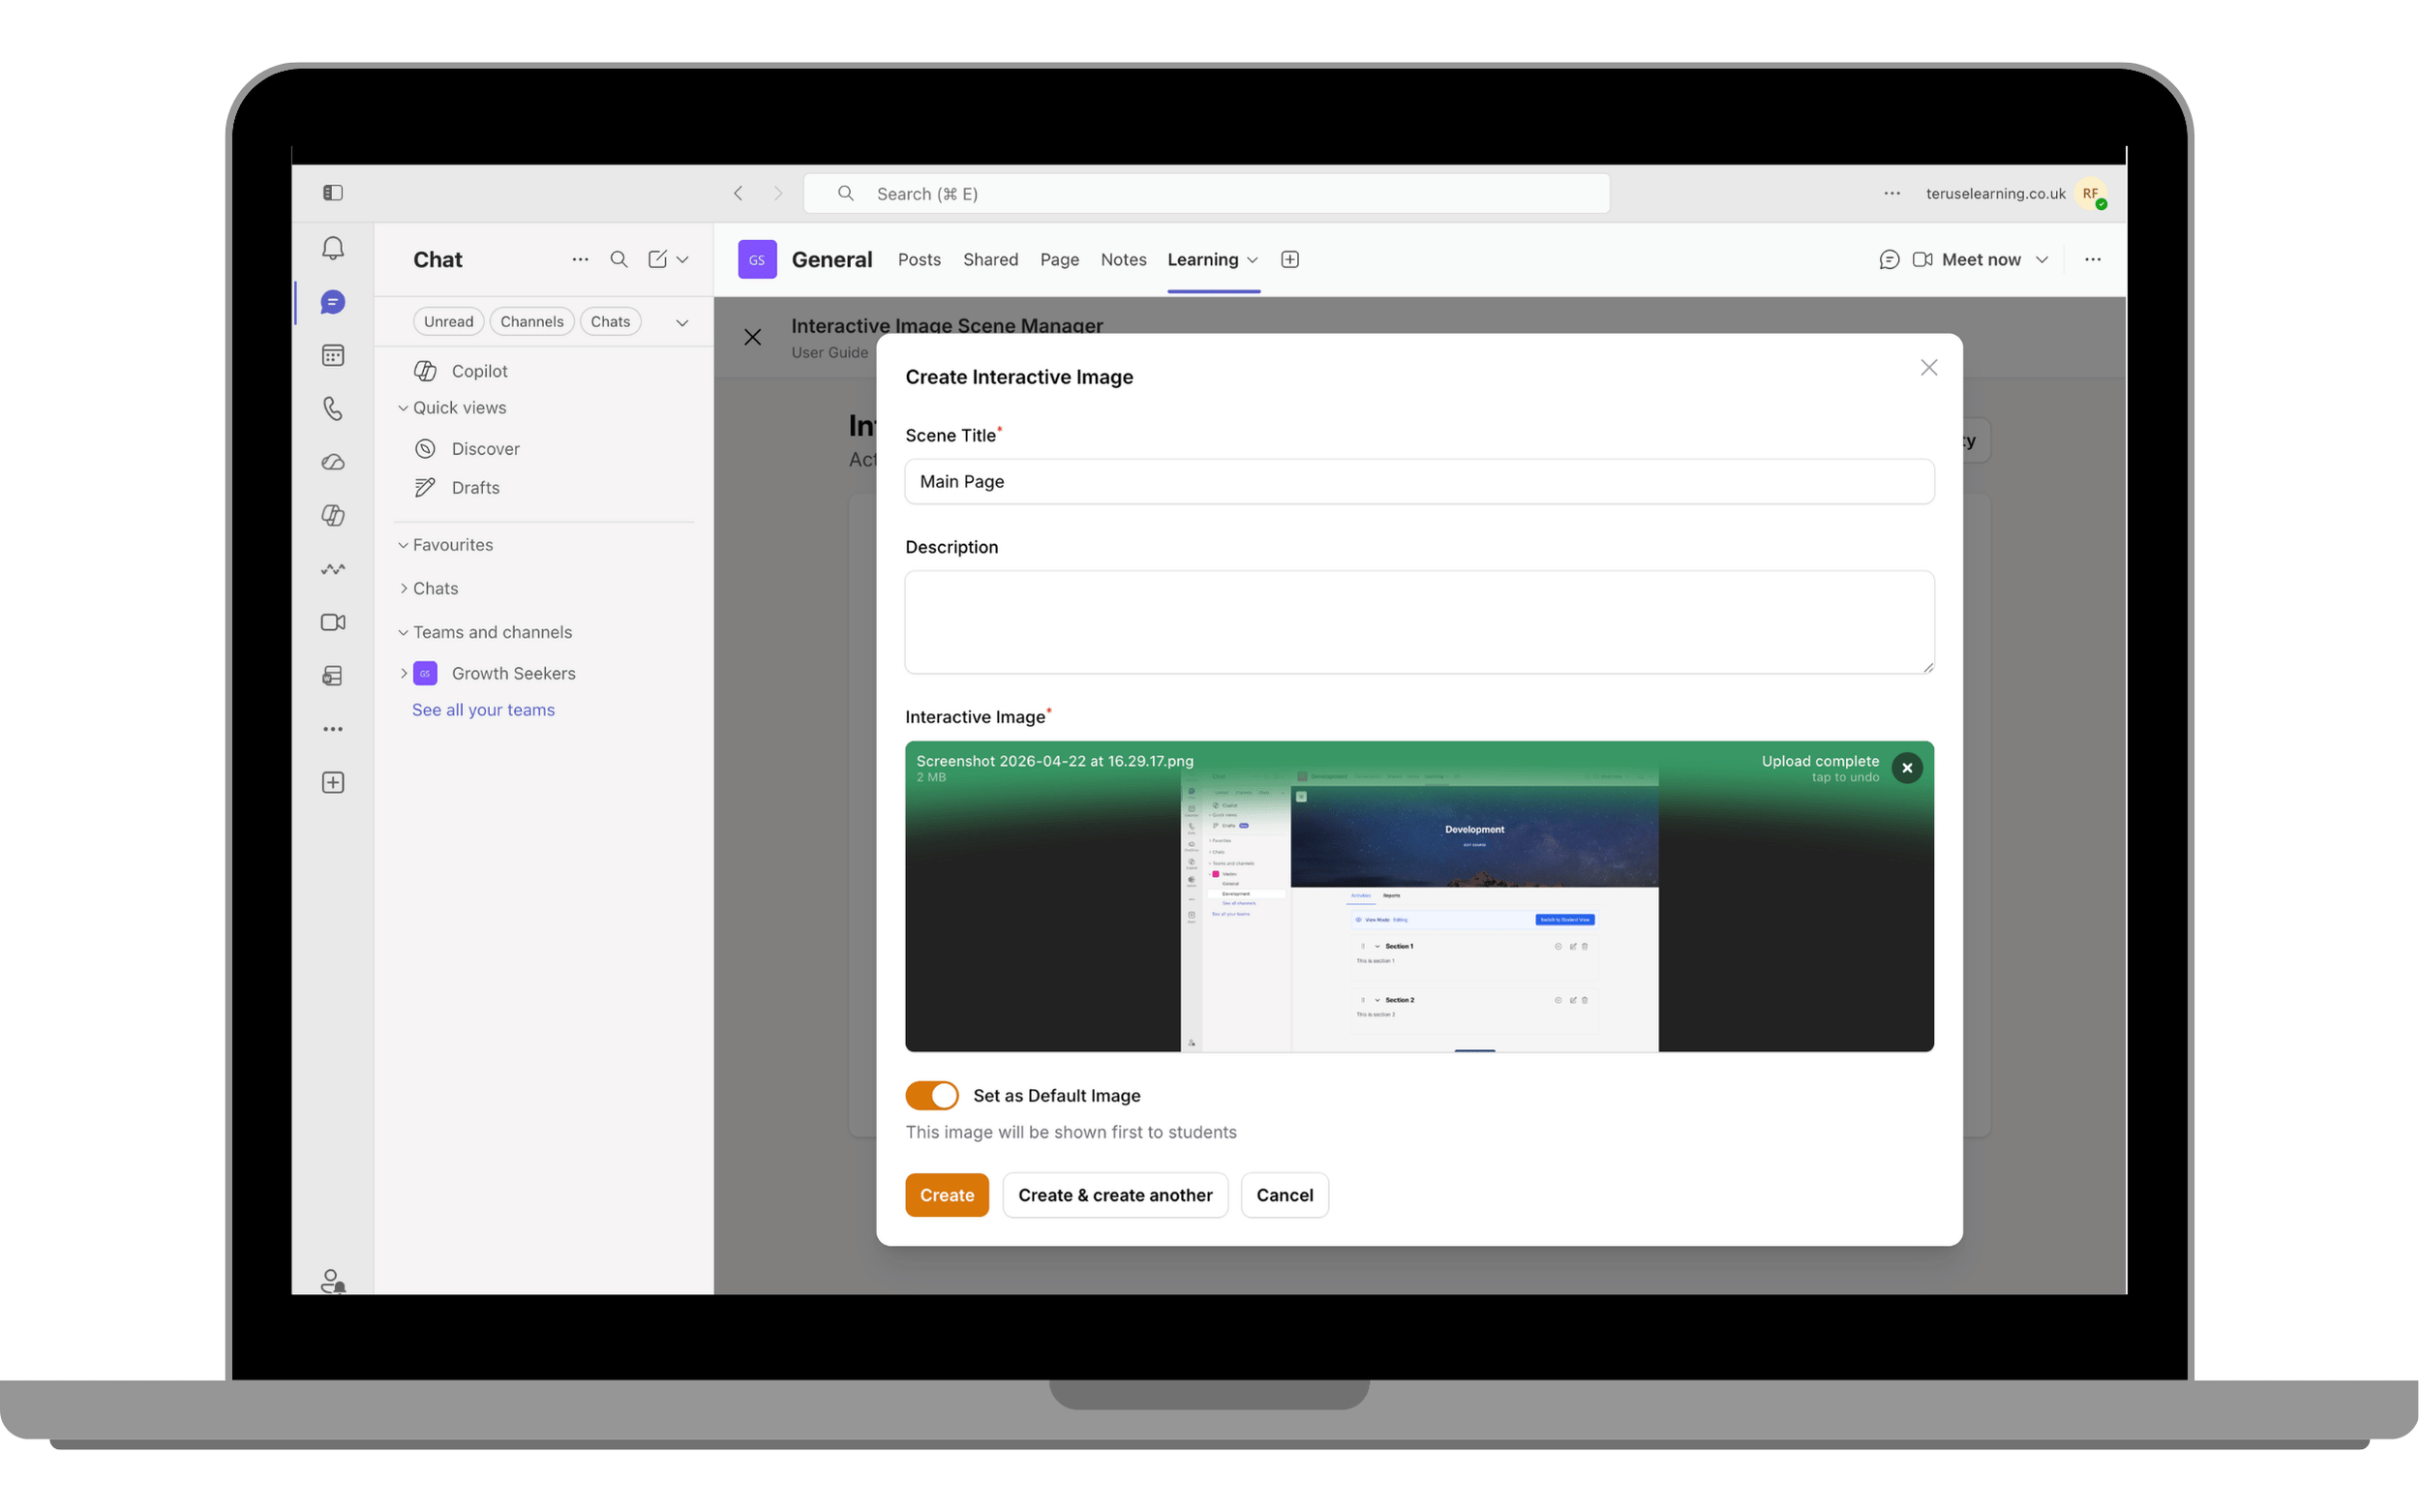
Create a hotspot
Click Manage Hotspots. Create a hotspot and choose its Type: Information or Link to Scene.
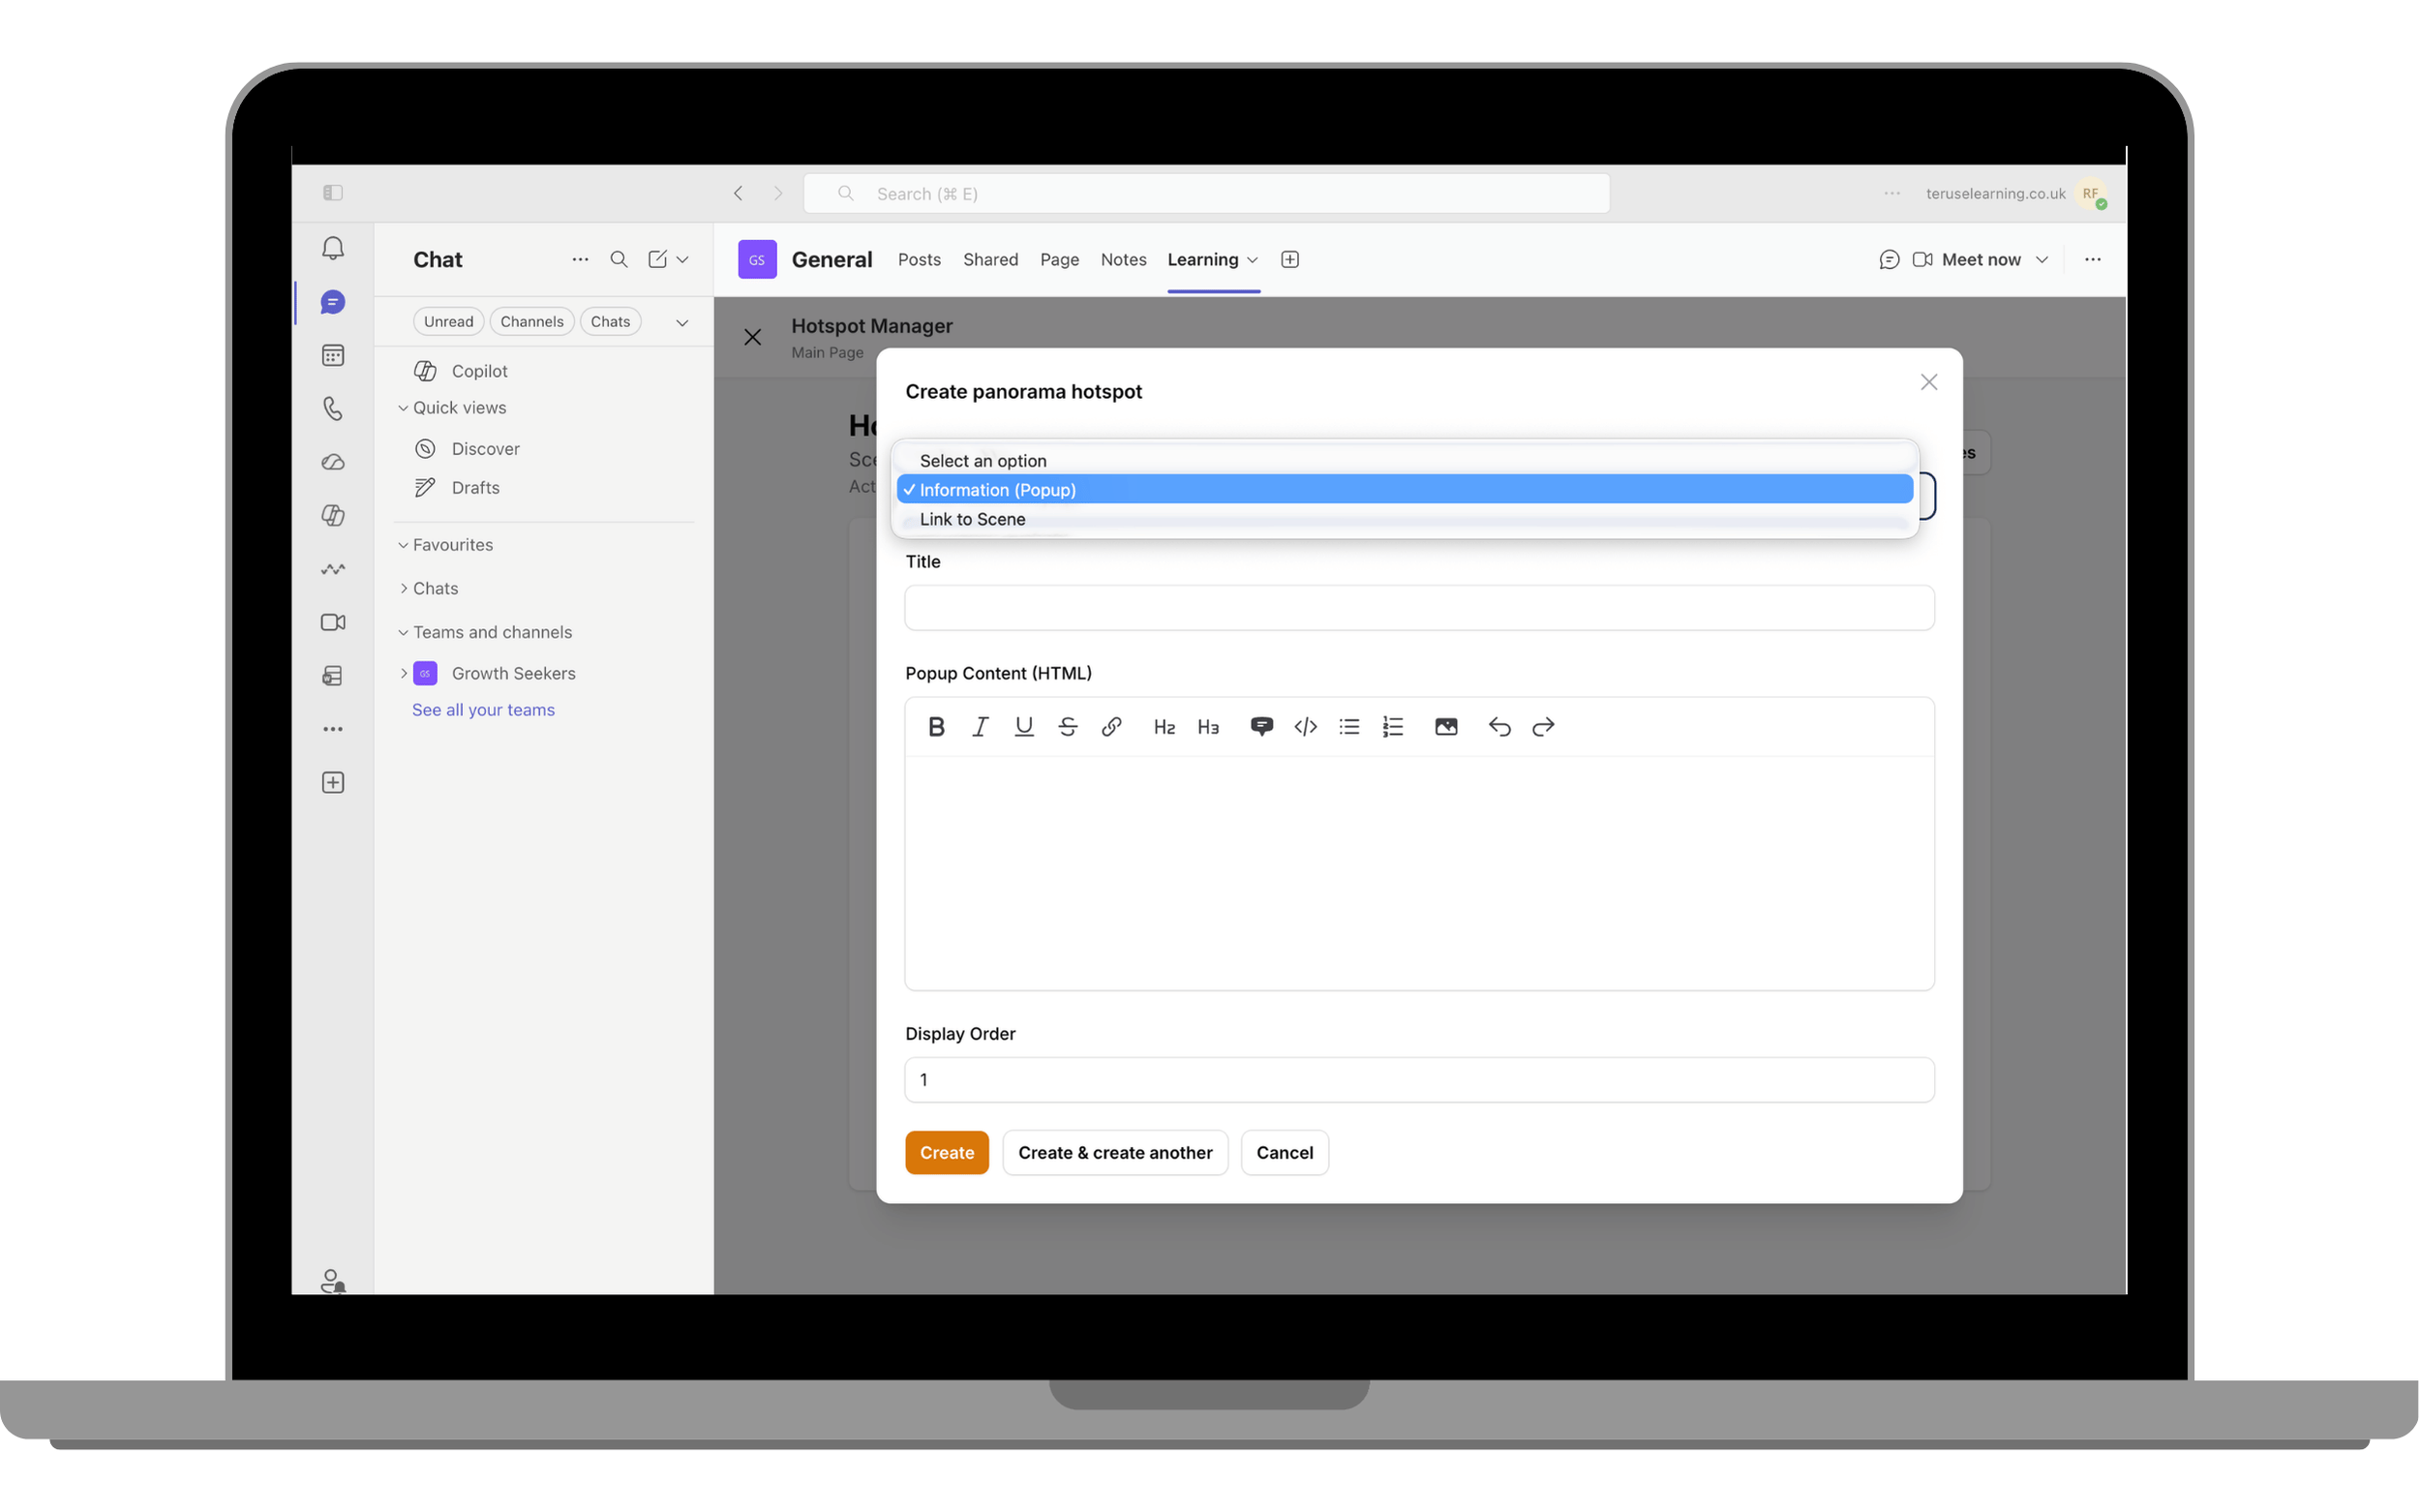
Enter hotspot details
Enter a Hotspot Title and, if using an Information hotspot, add the Popup Content. Save the hotspot.
Position hotspots
Position each hotspot using the Set Position tool by placing it on the image.
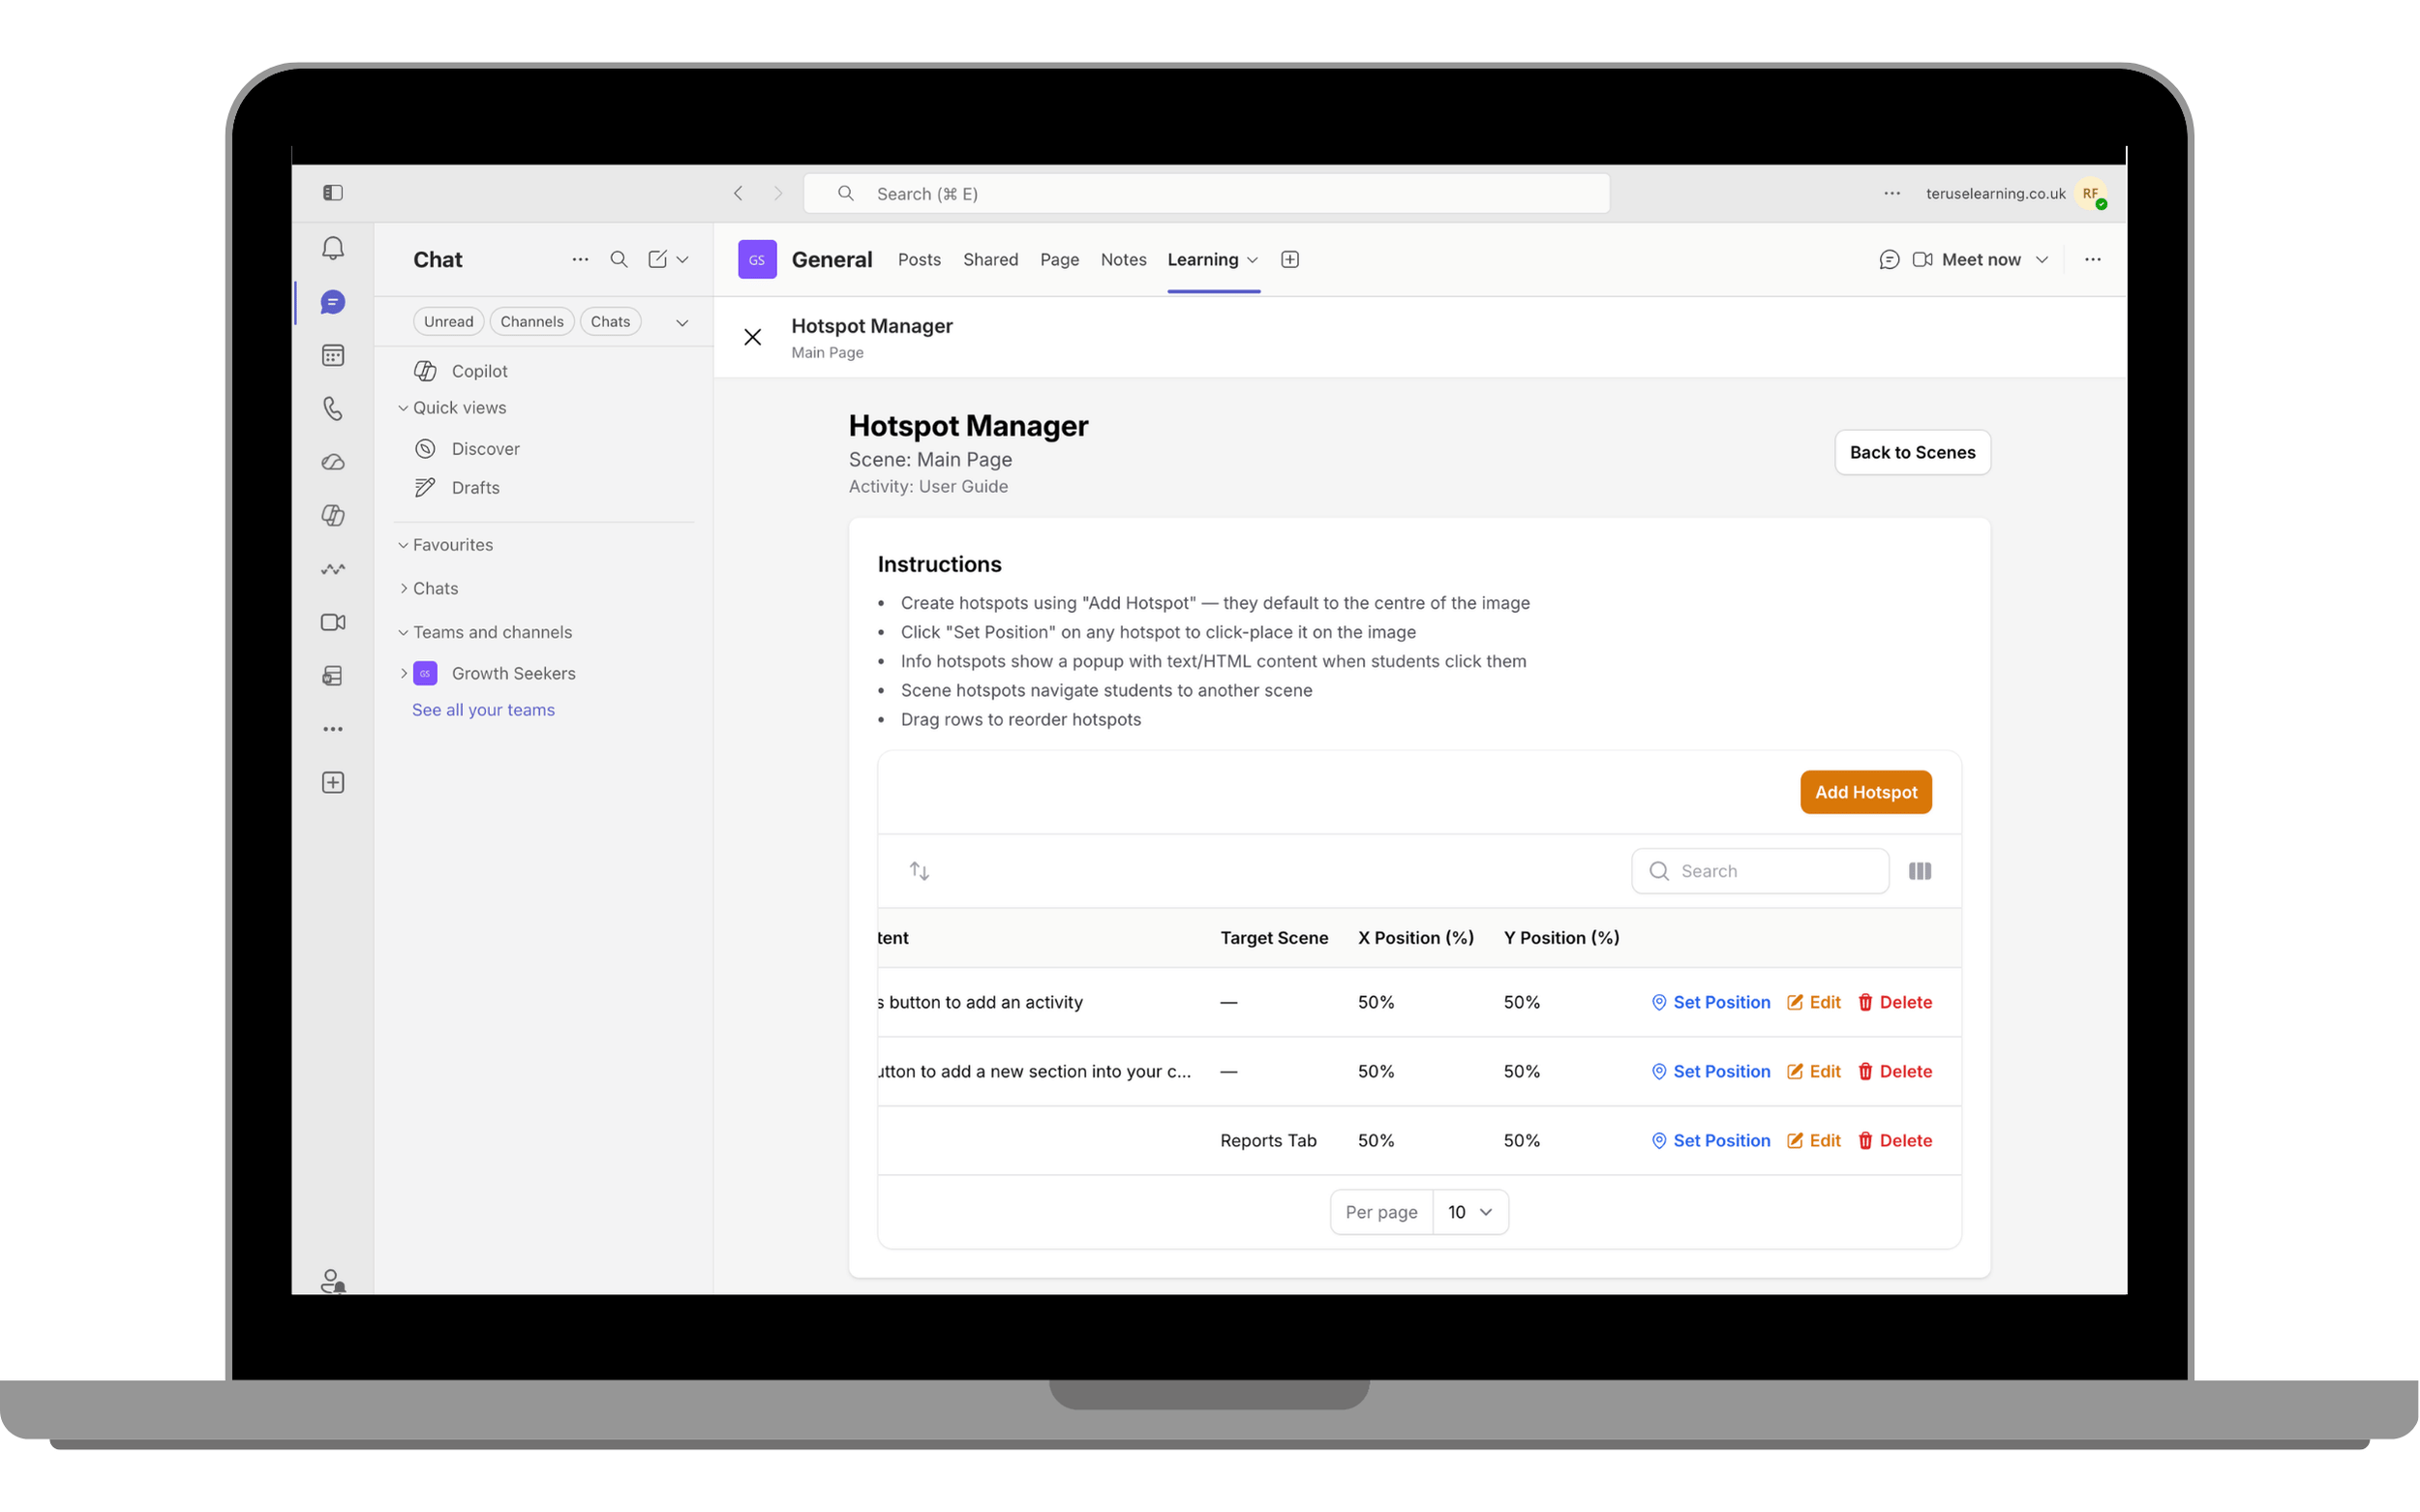
Preview
Preview the activity to verify hotspots display correctly based on the selected display mode.
Activities - Assignment Activity
The Assignment activity allows learners to submit files for evaluation. Instructors can provide feedback and grades.
Configure assignment
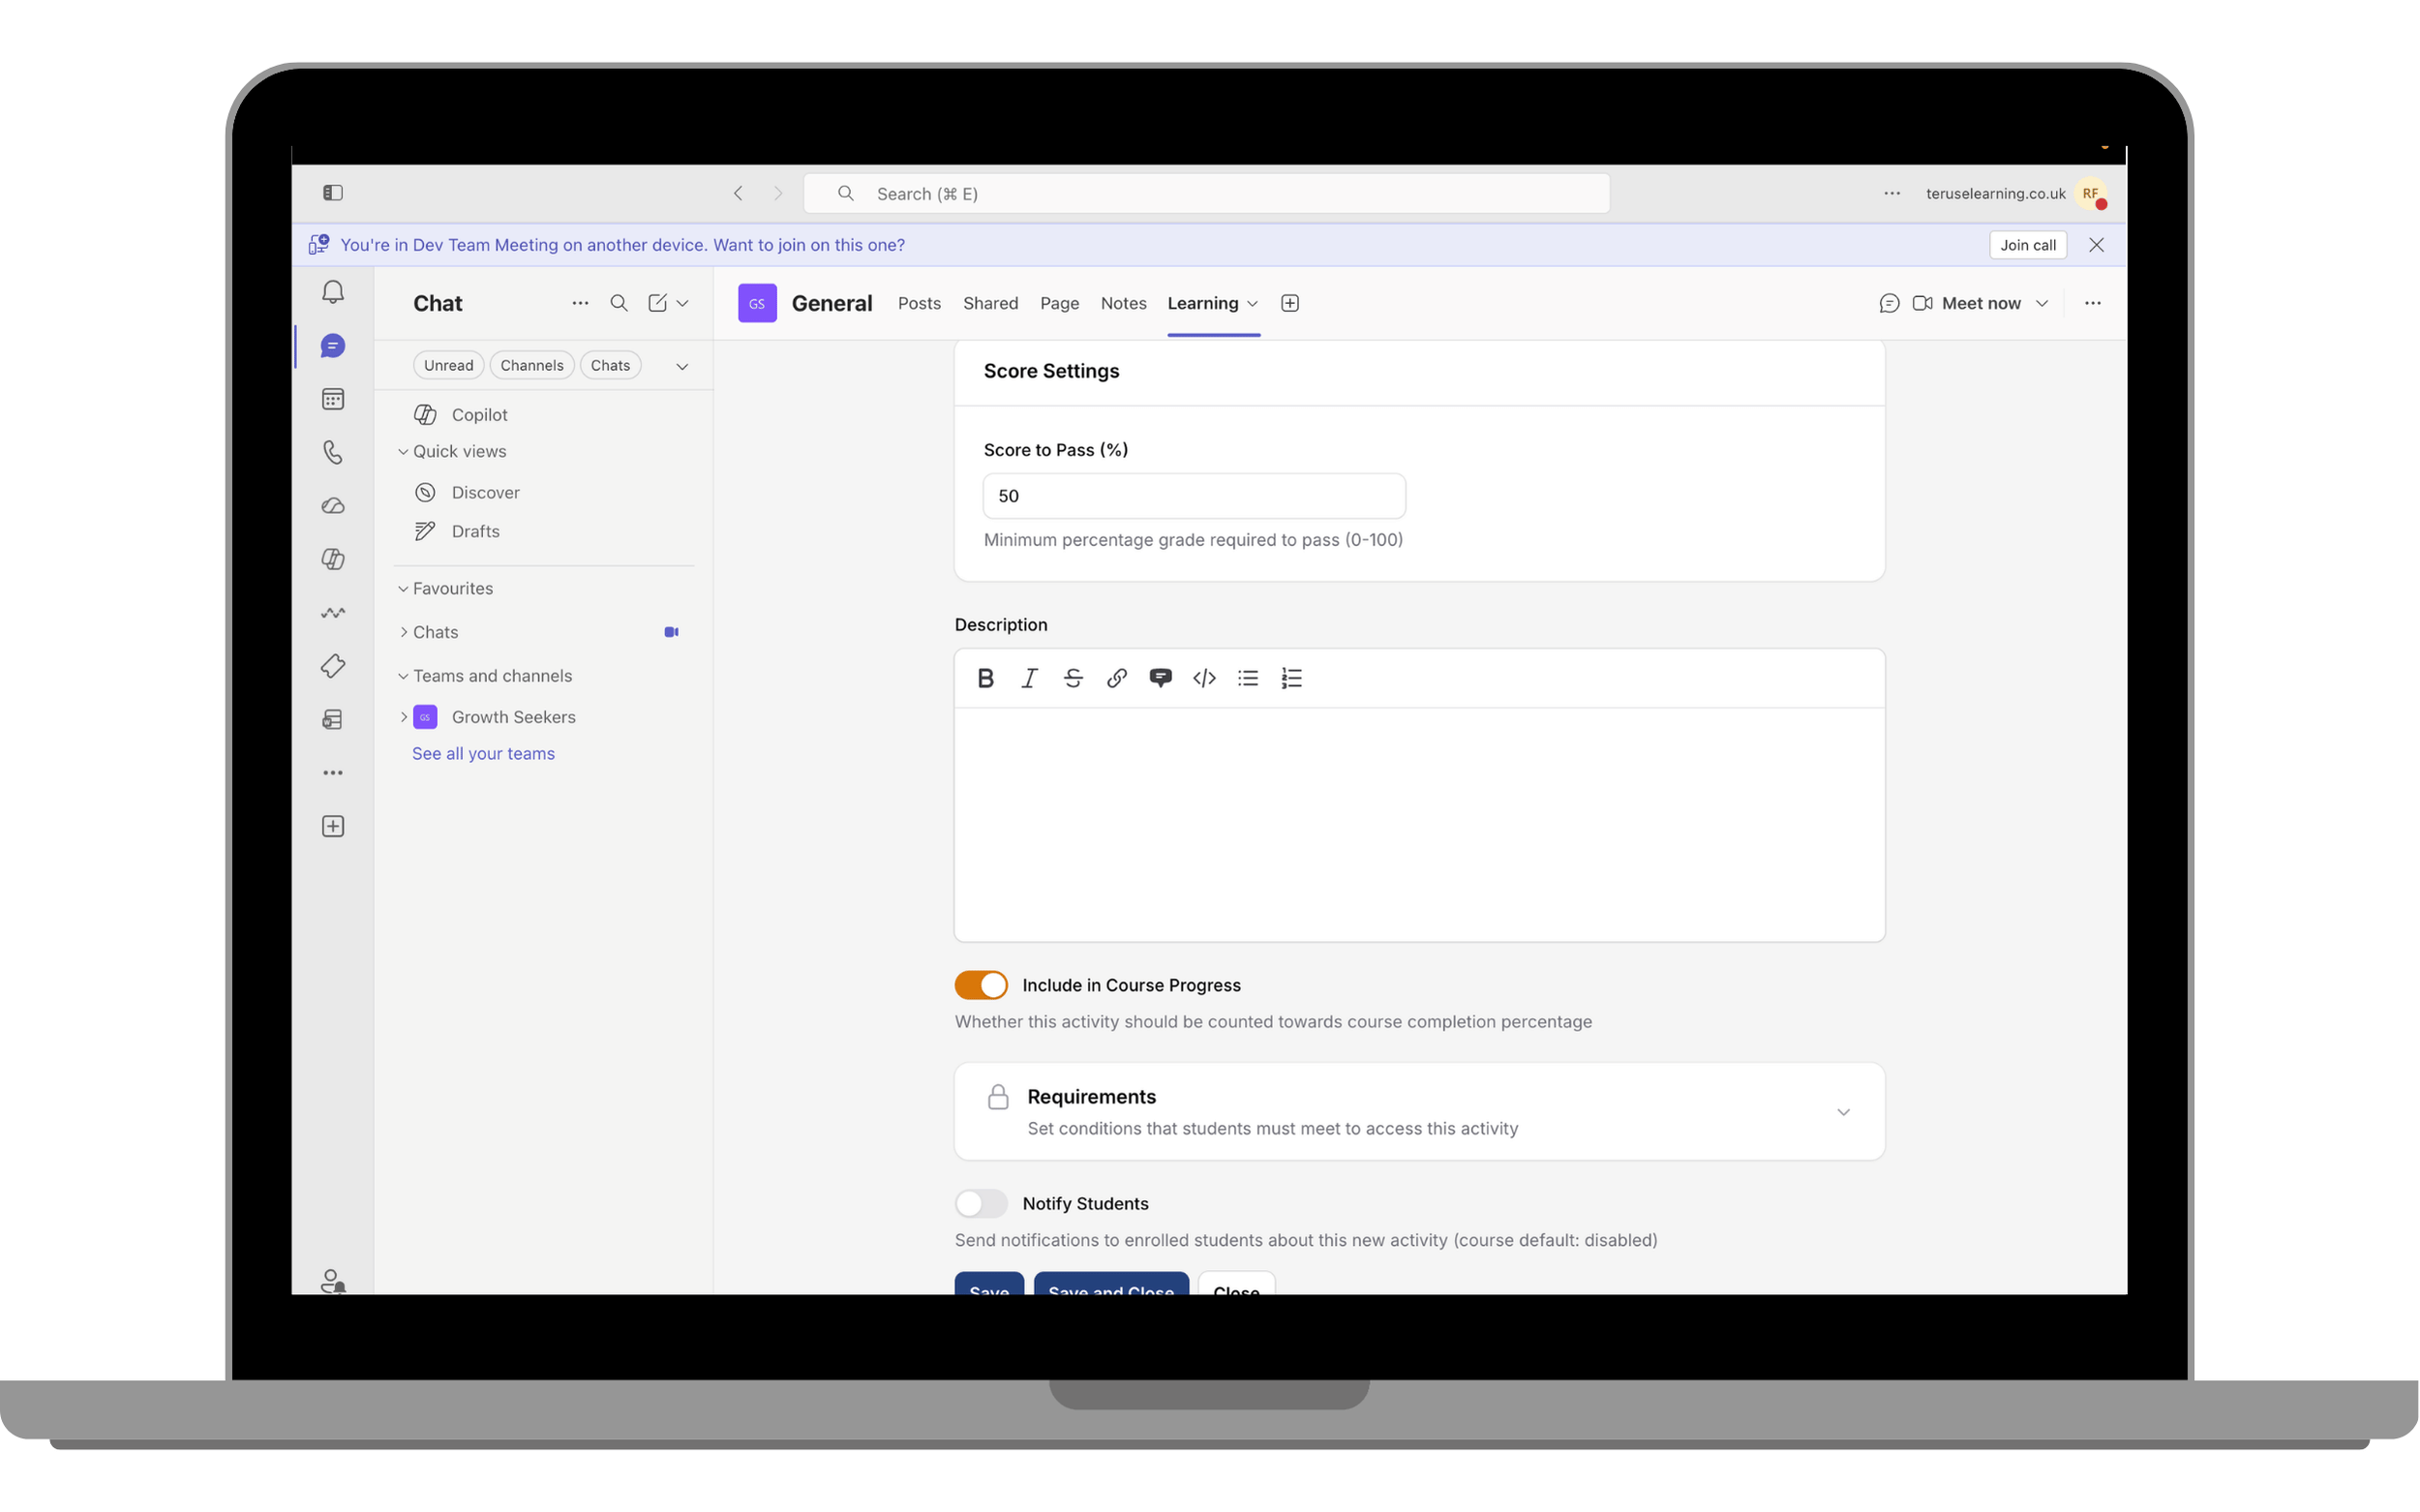
Choose Assignment activity. Enter a title and define submission requirements: allow text responses, file uploads, or both. For file uploads, specify permitted file types, max file size, and attempts.
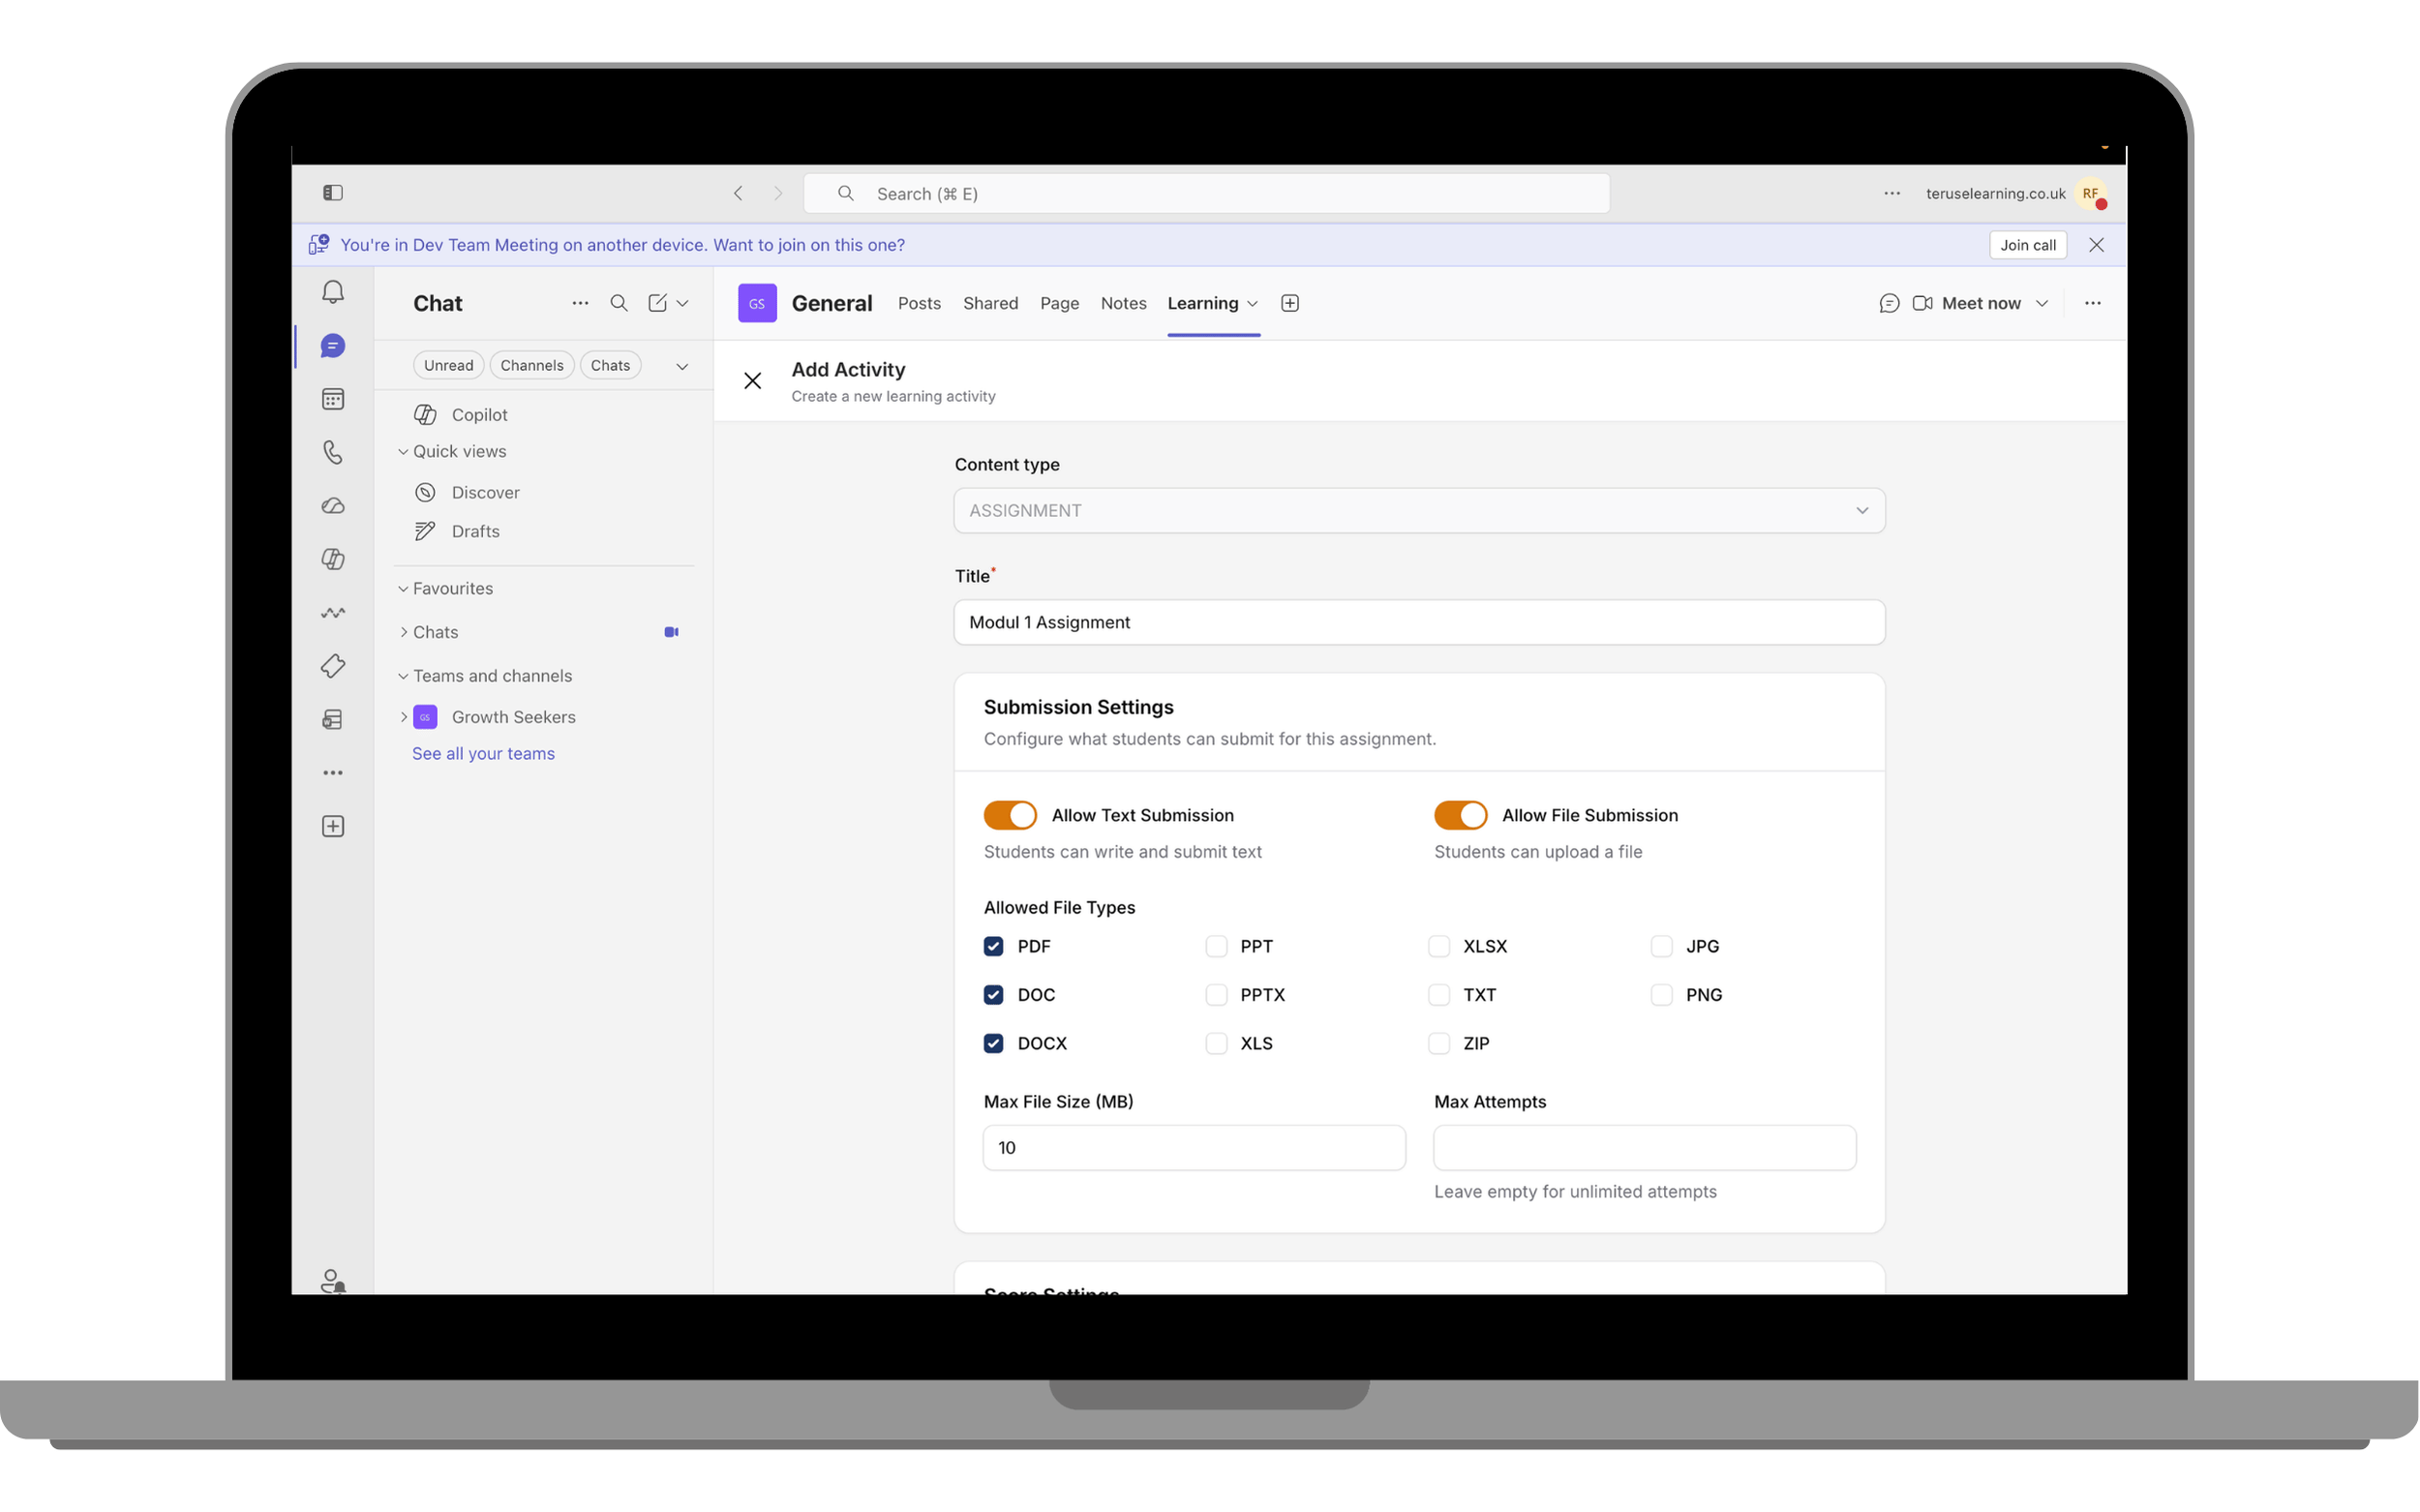
Enter details and save
Enter passing score and description, then save.
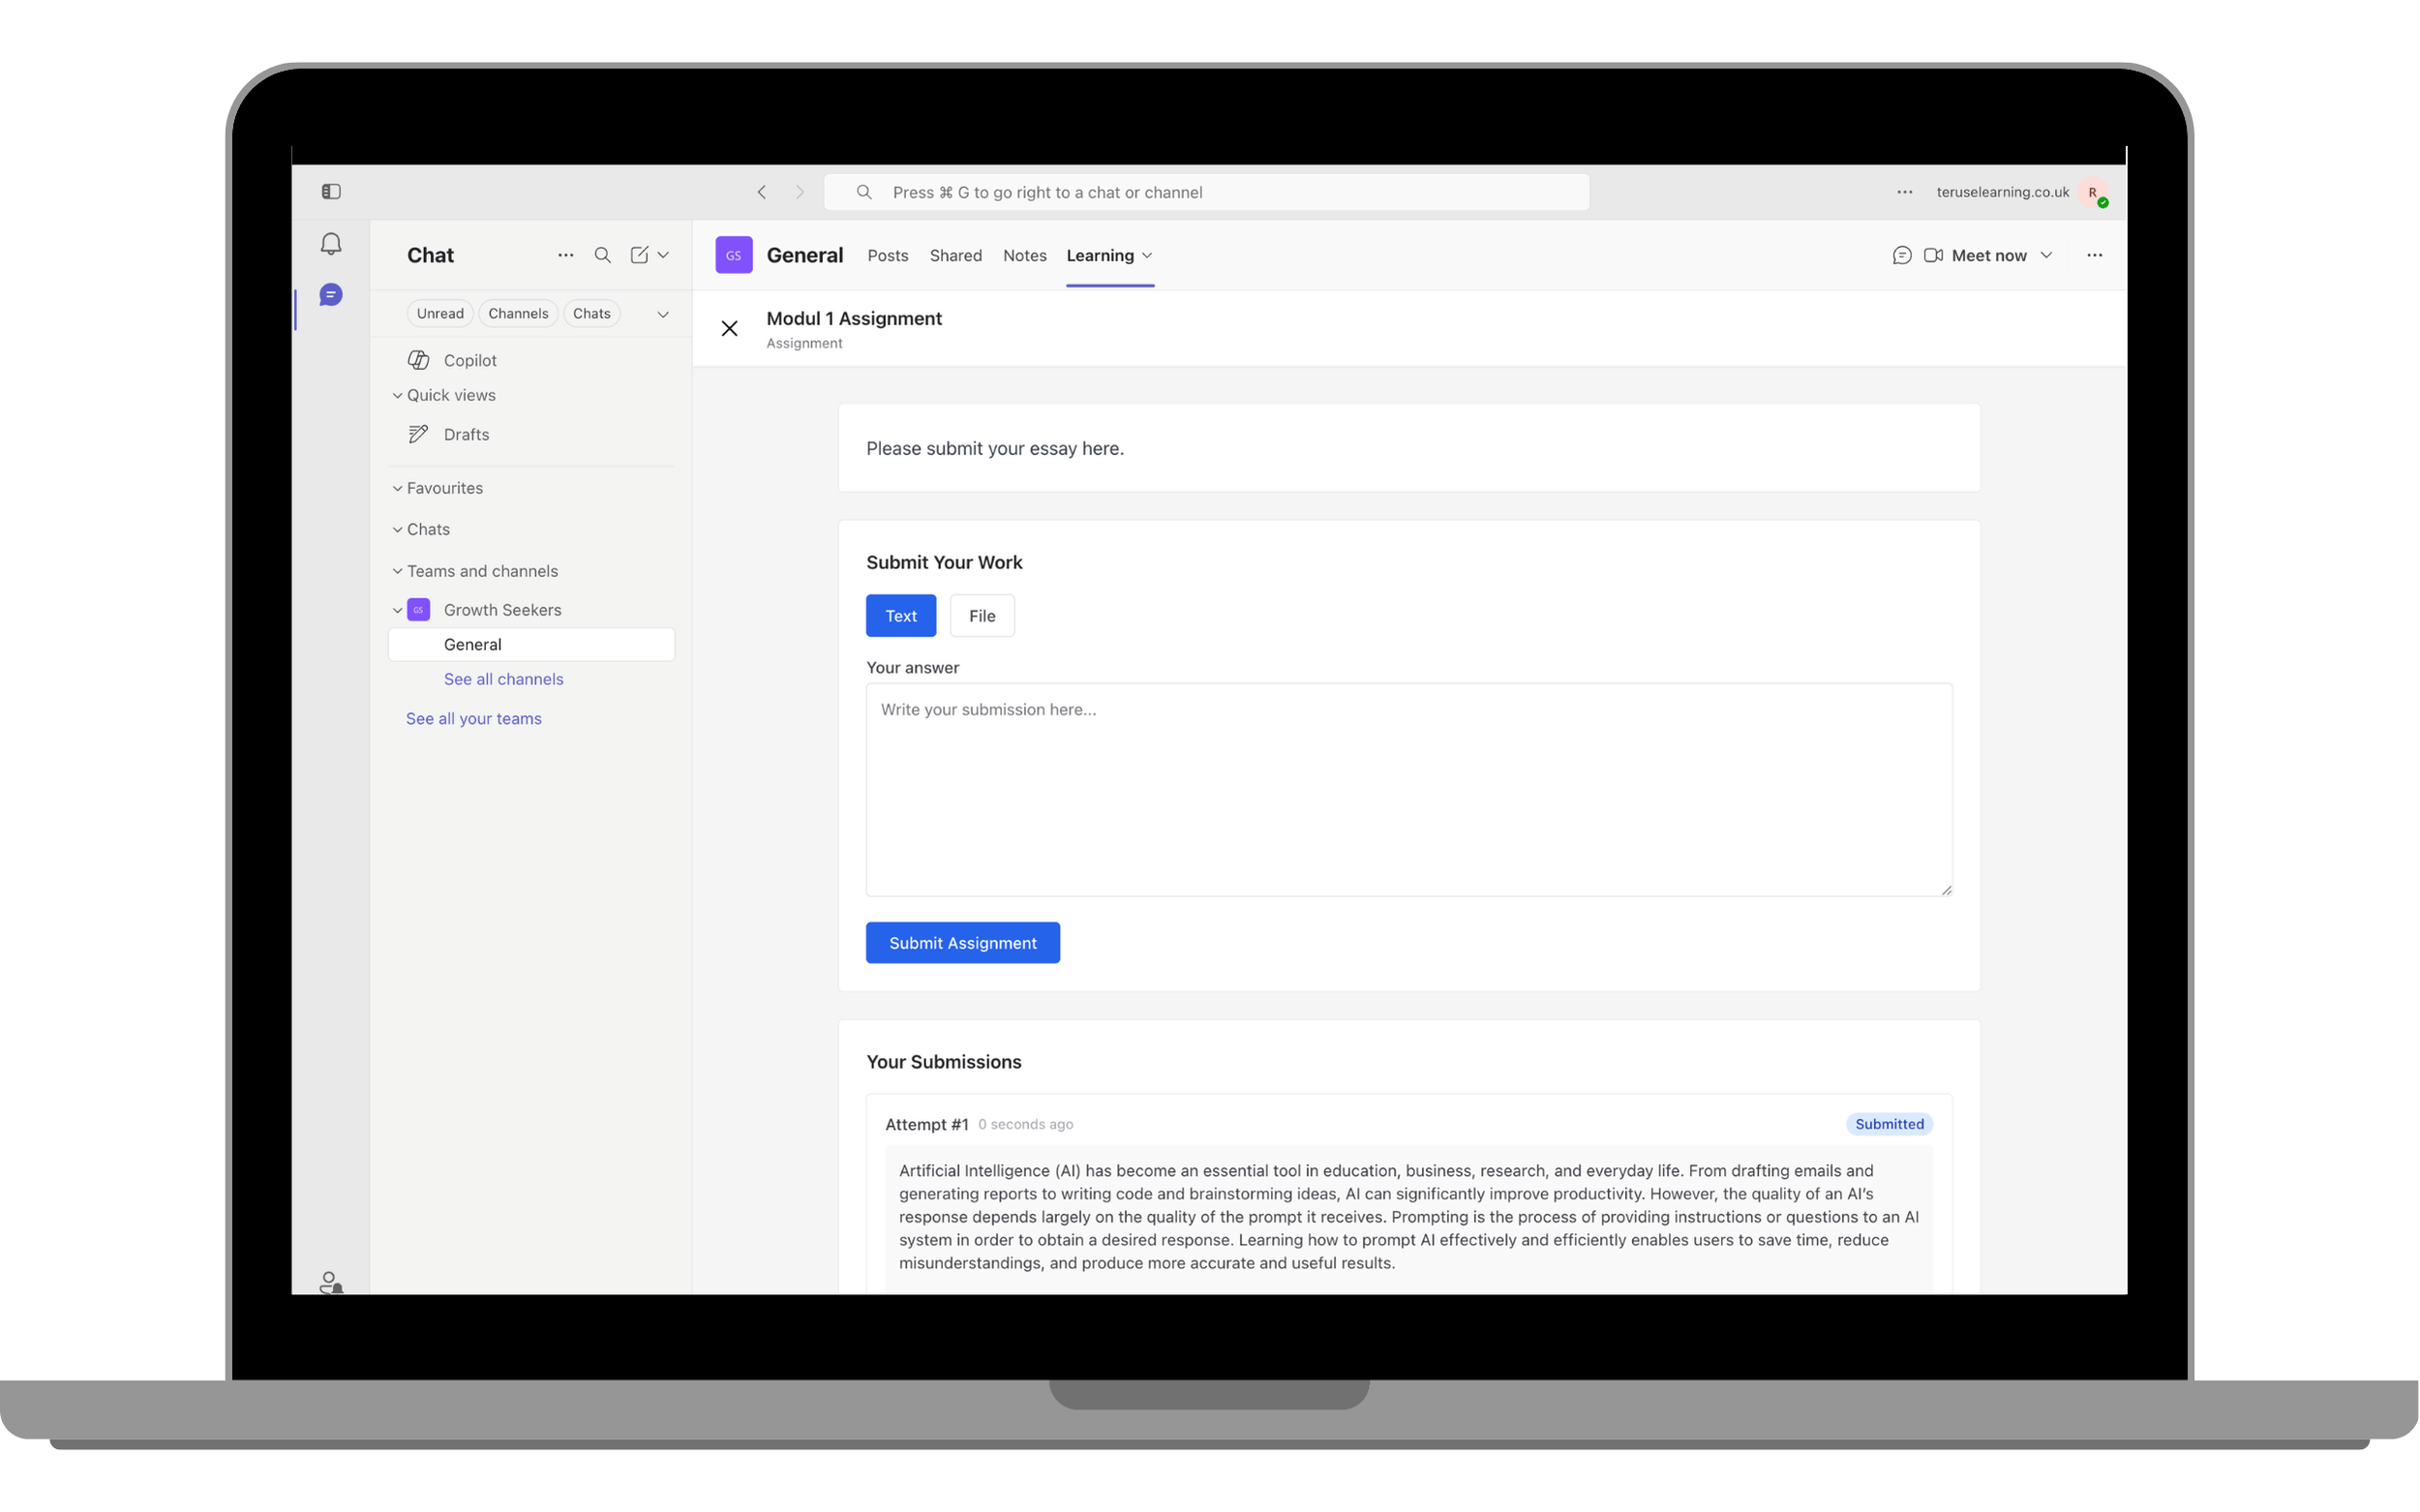
Learners submit work
Learners submit by uploading files, entering text, or both.
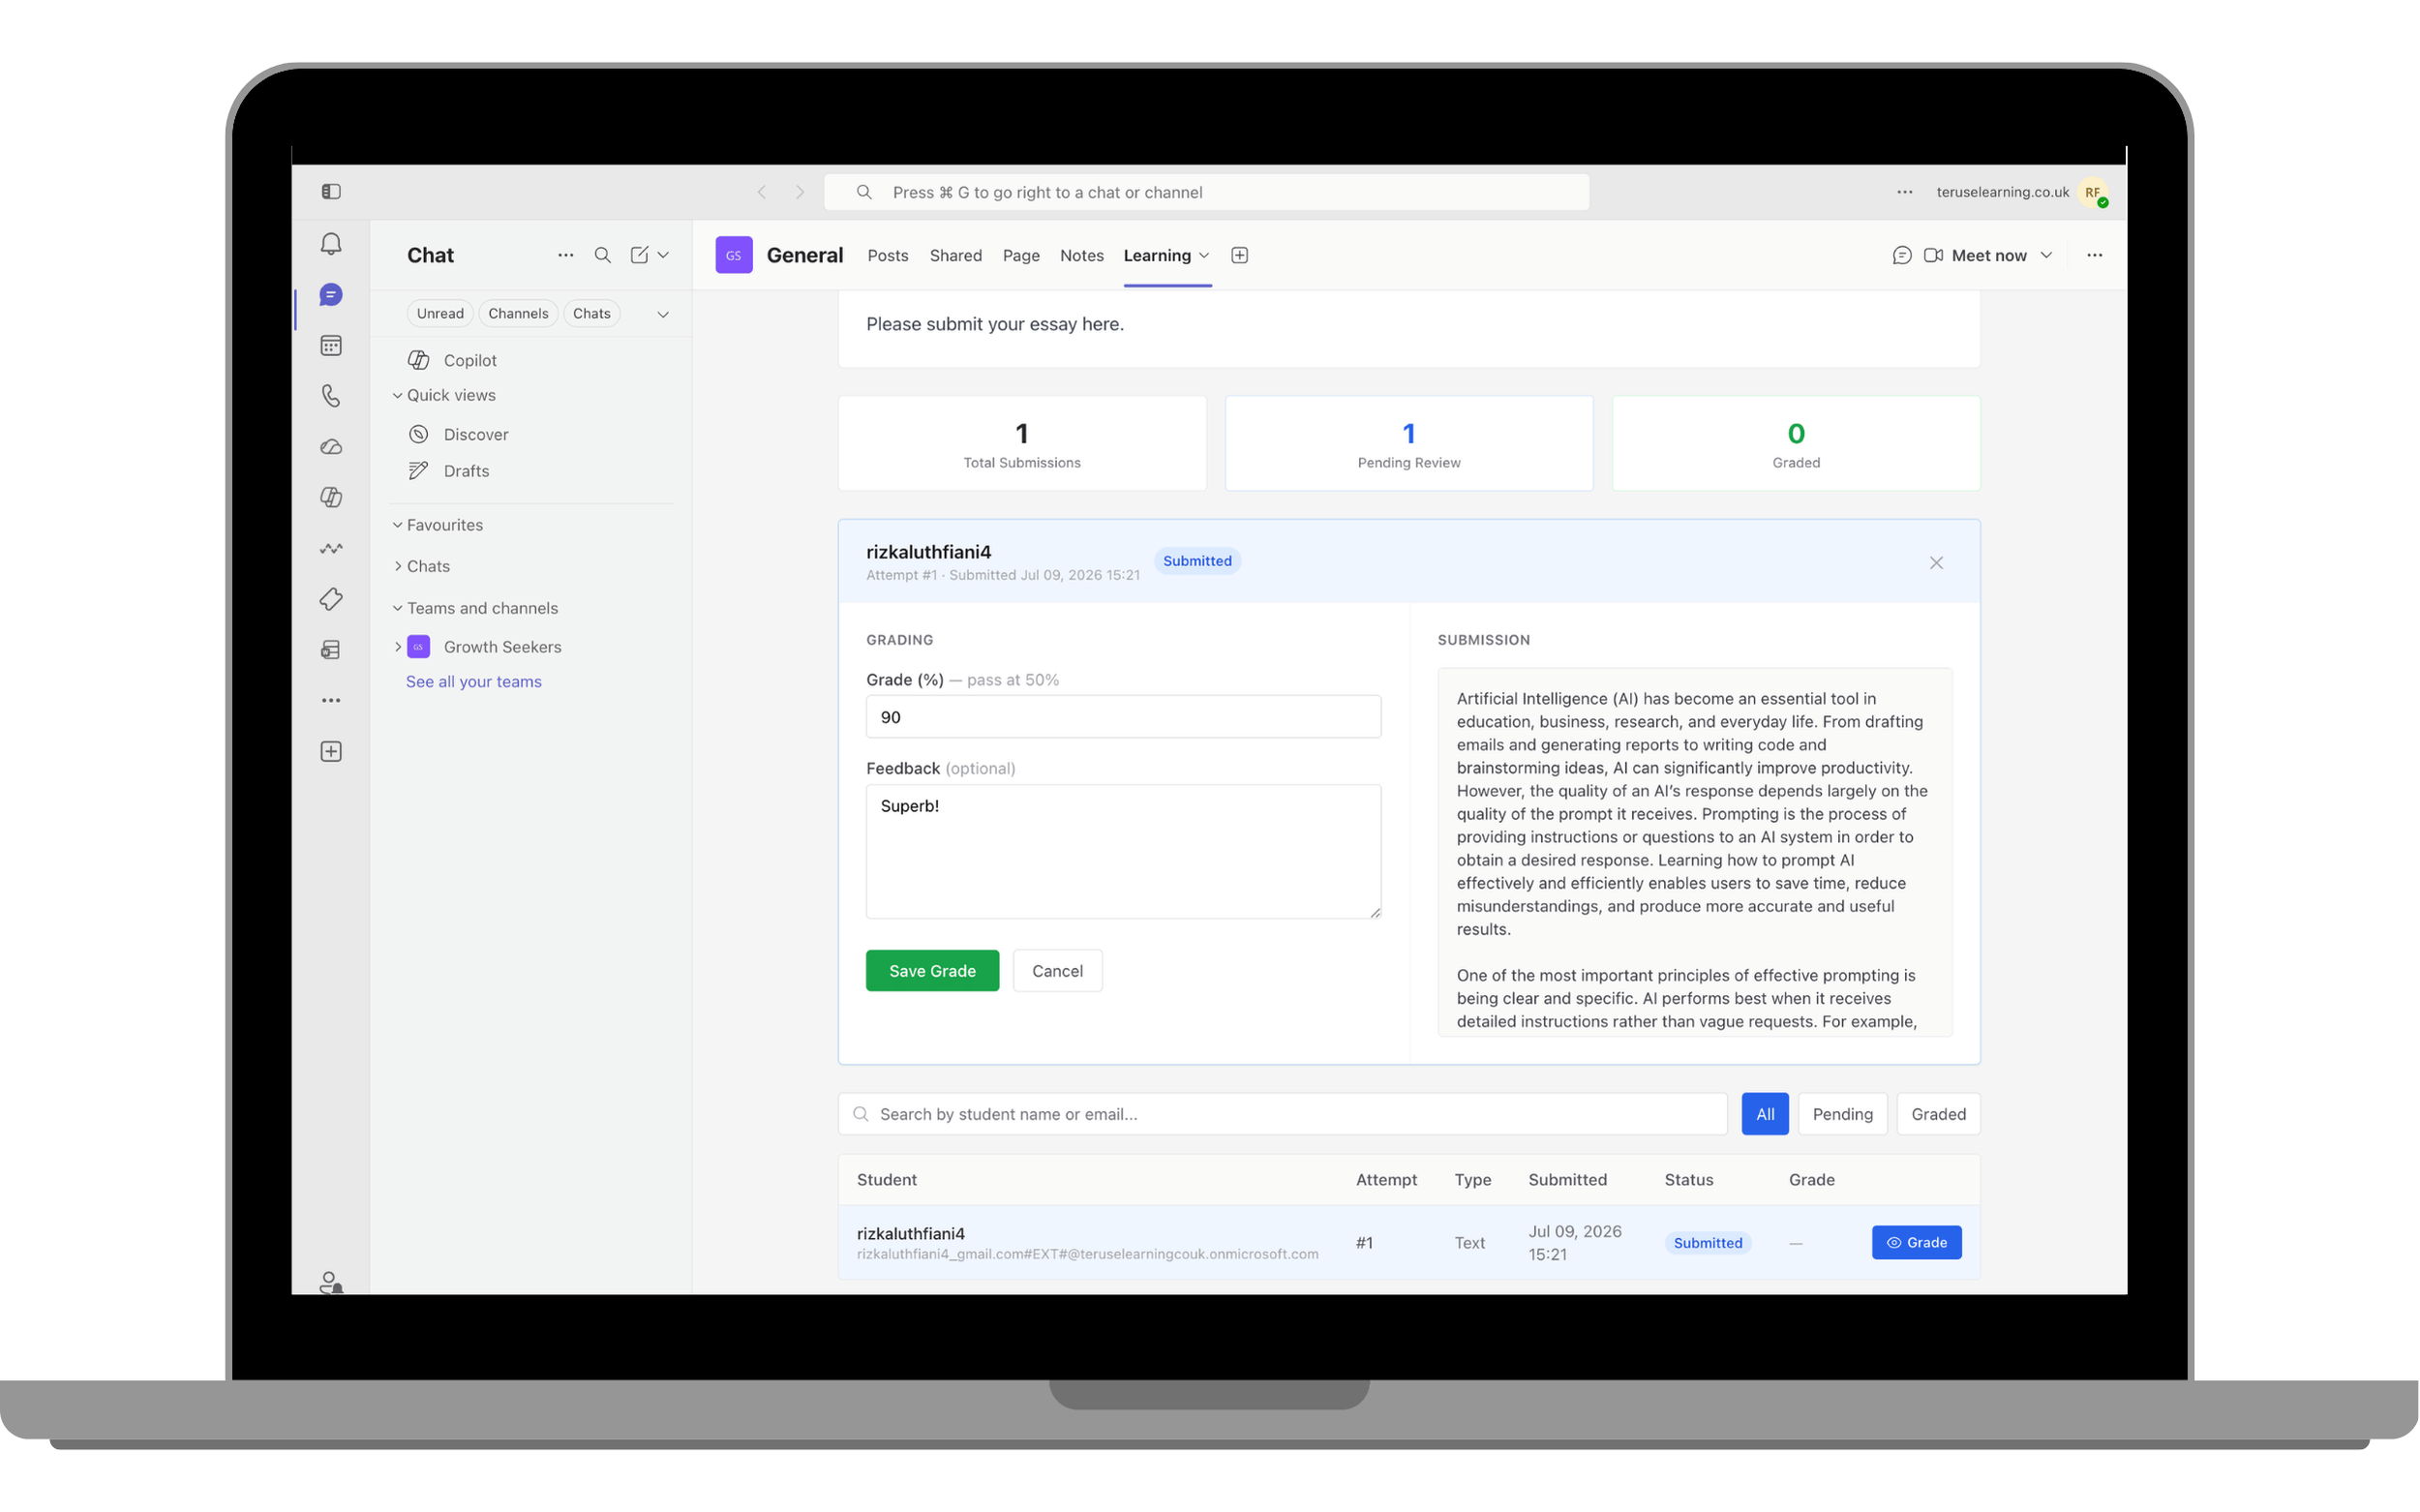
Review and grade
Teachers review submissions, assign grades, and provide feedback.
Requirements
Control learning sequence by setting prerequisites for activities and sections.
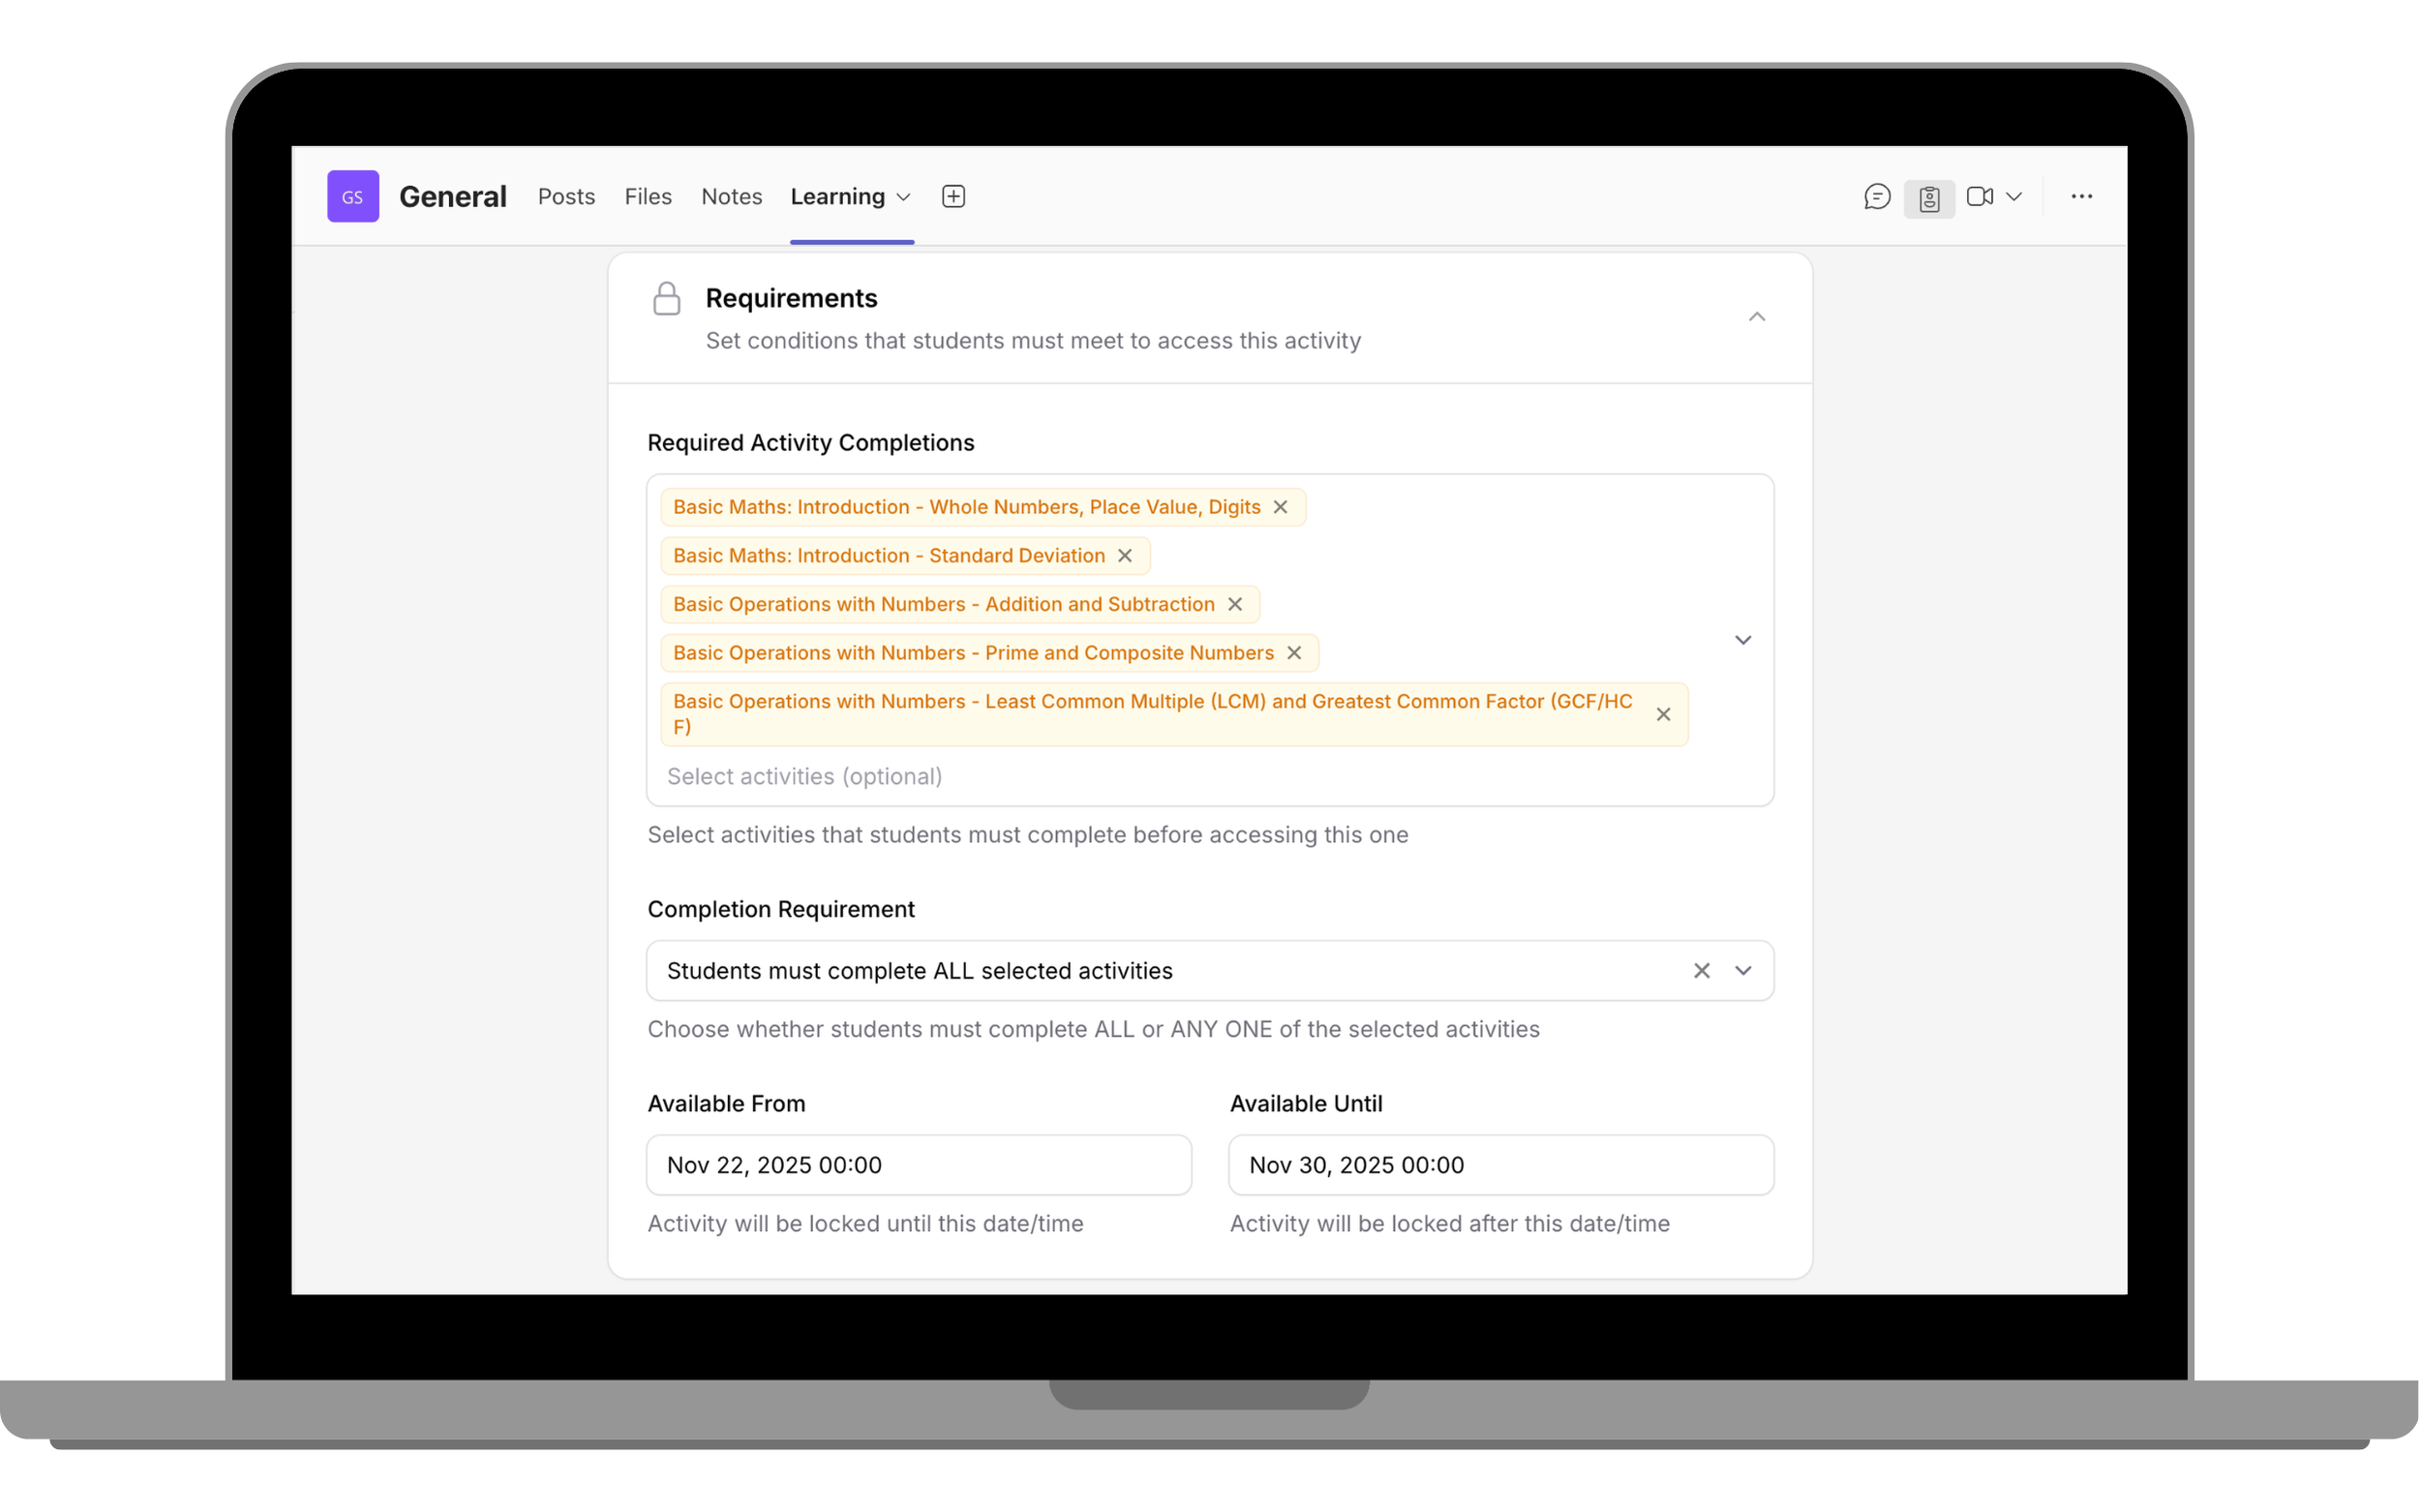
Activity Requirements lock individual activities until prerequisite activities are completed.
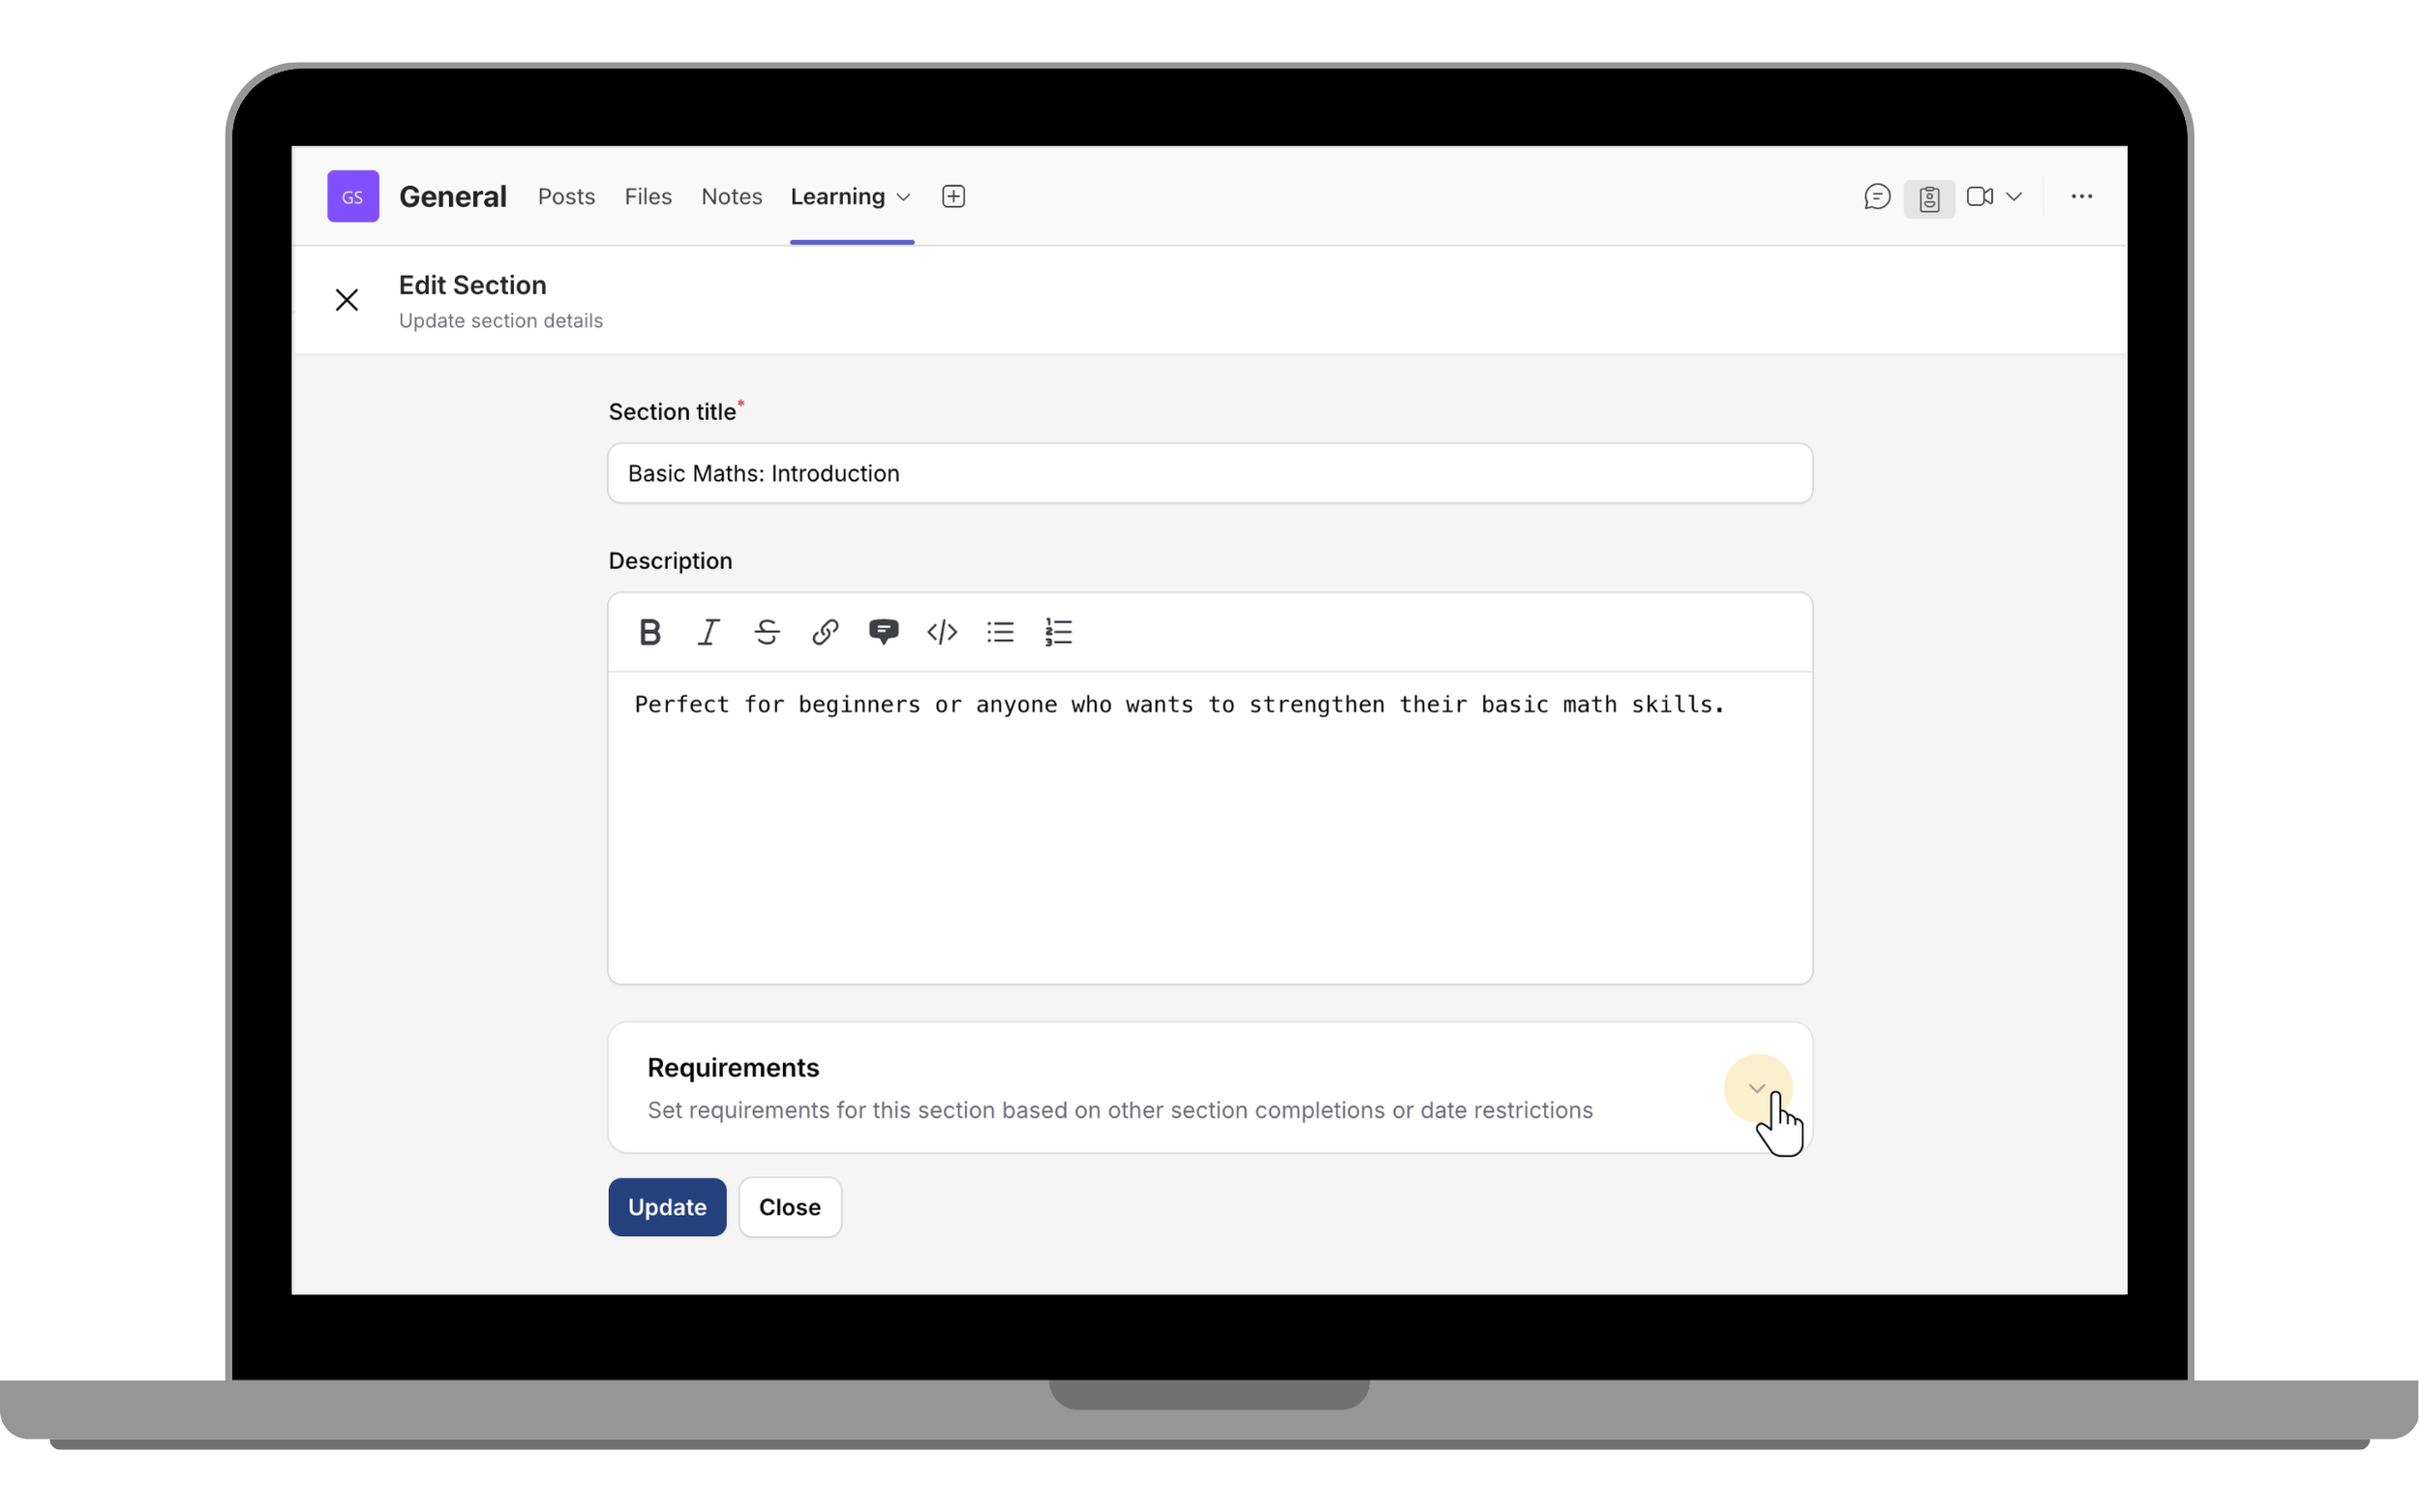
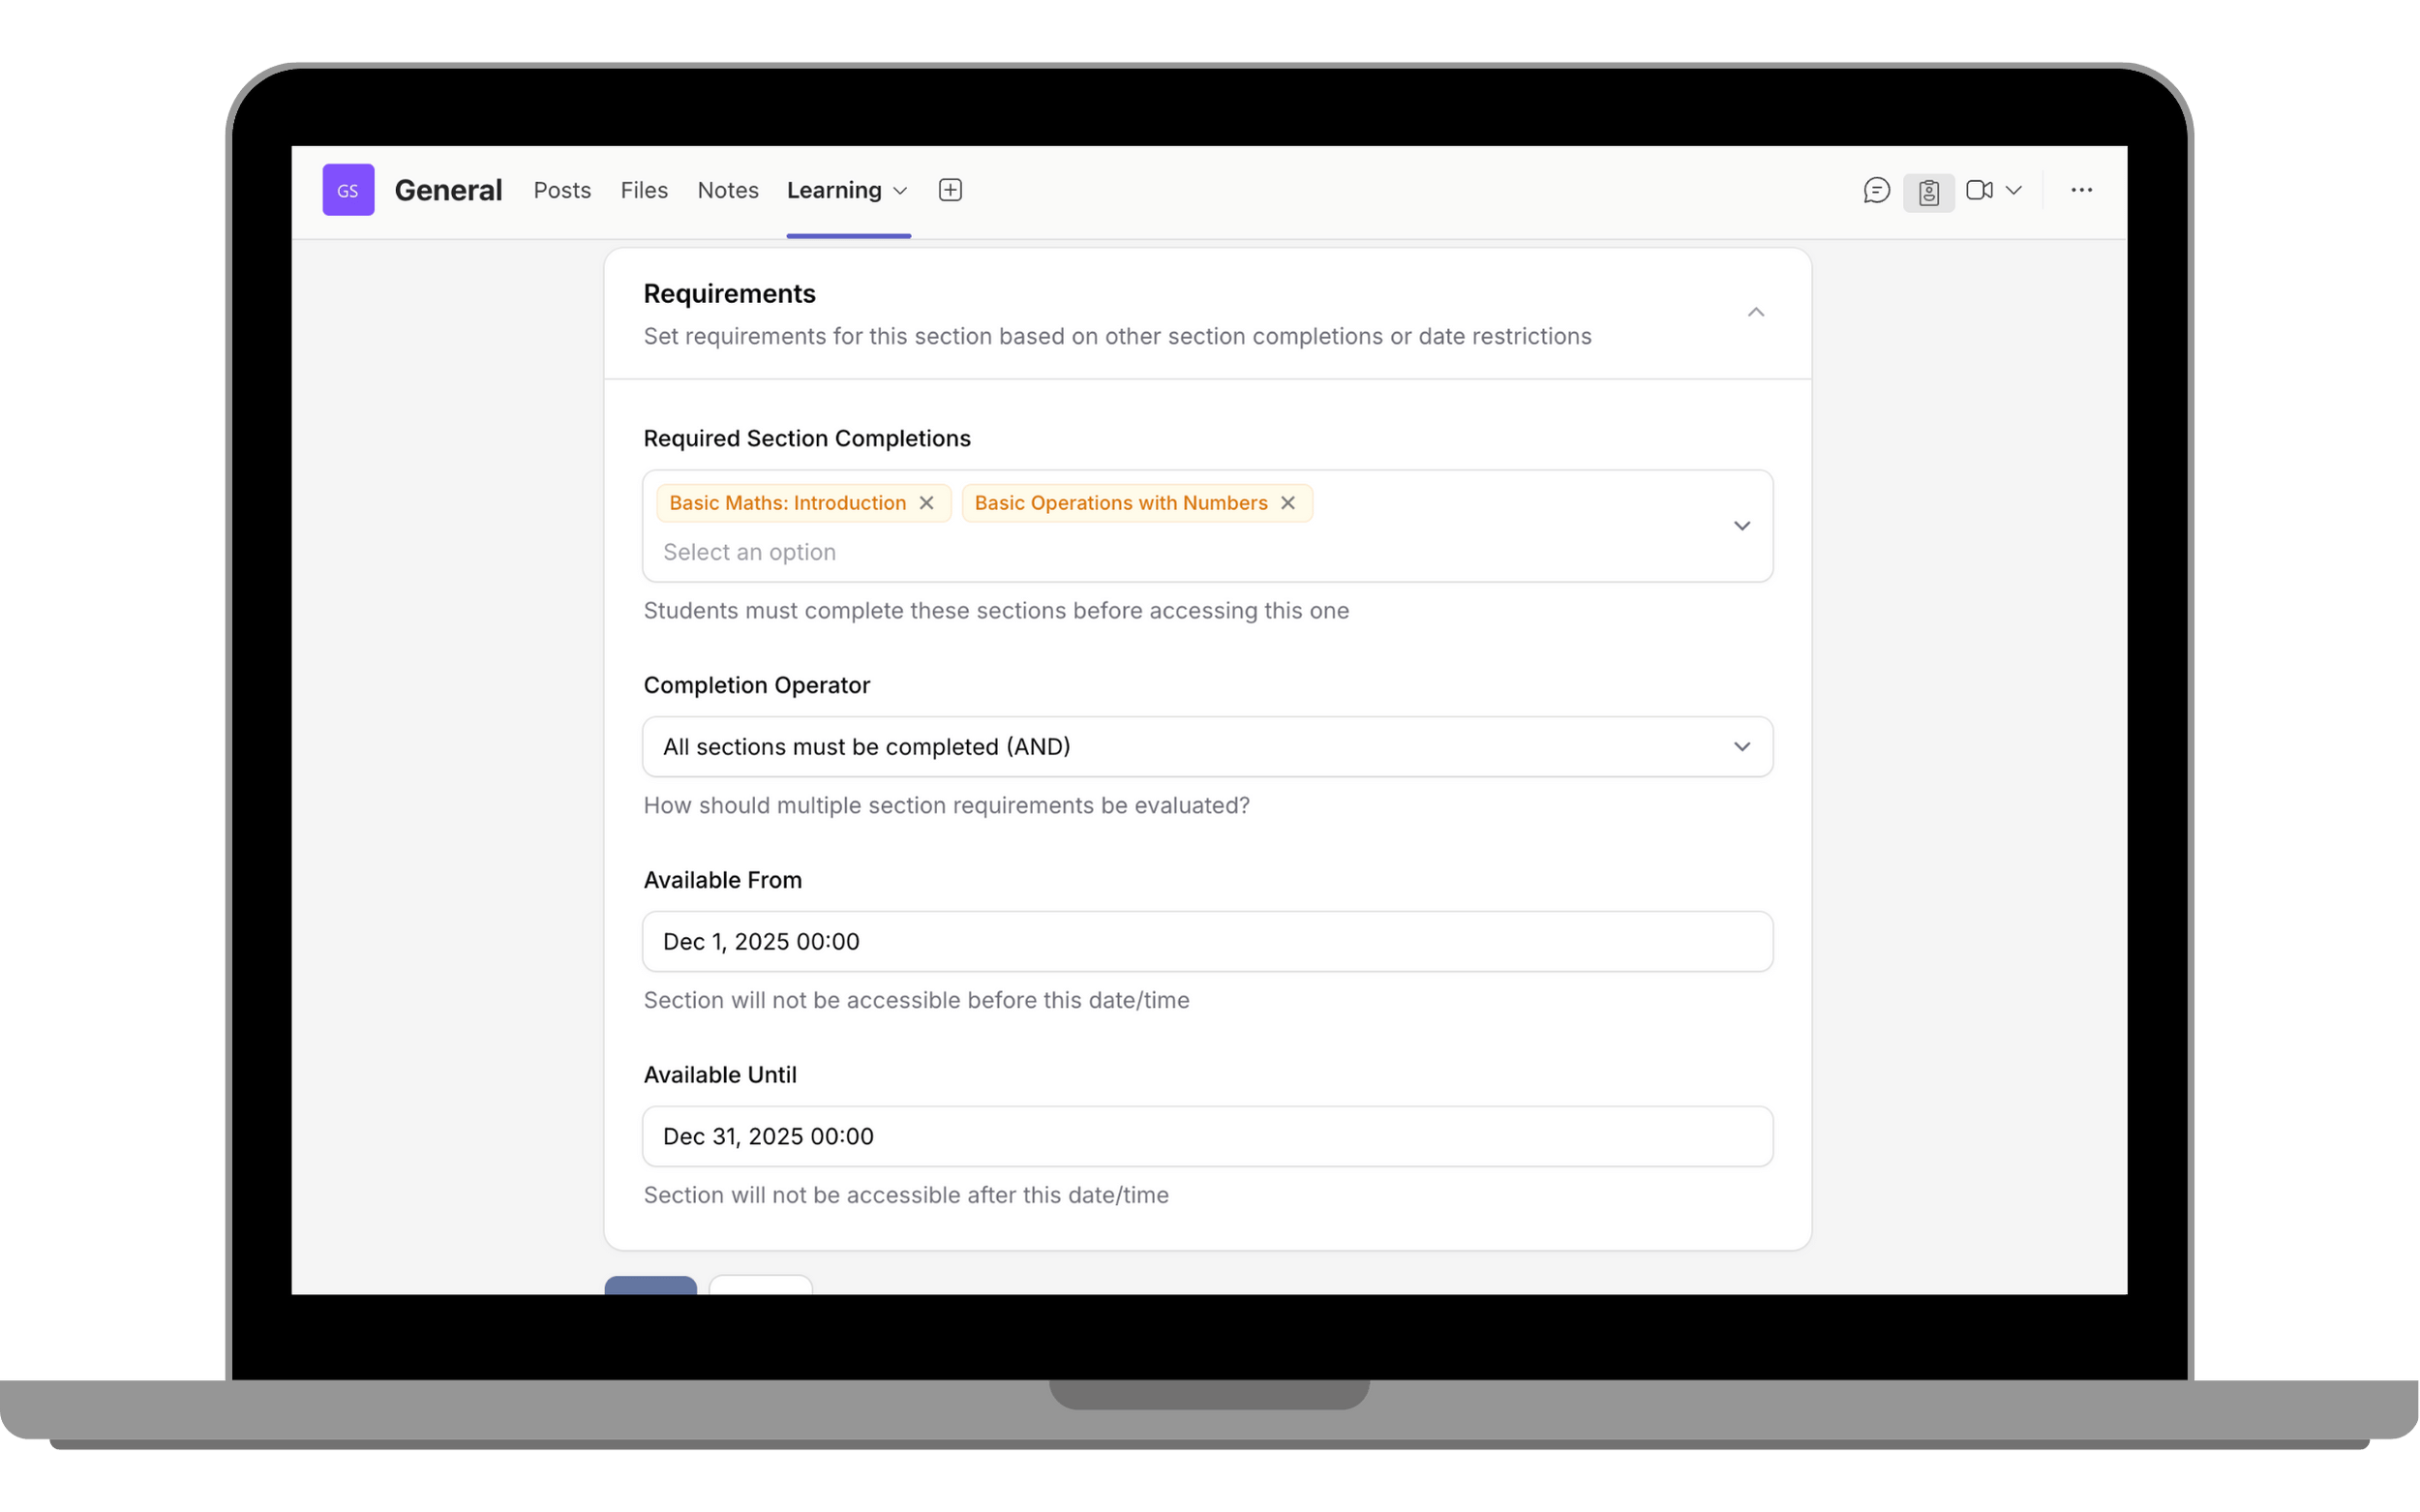
Section Requirements lock entire sections until previous sections are completed.
Open activity requirements
Open activity settings and expand the Requirements section.
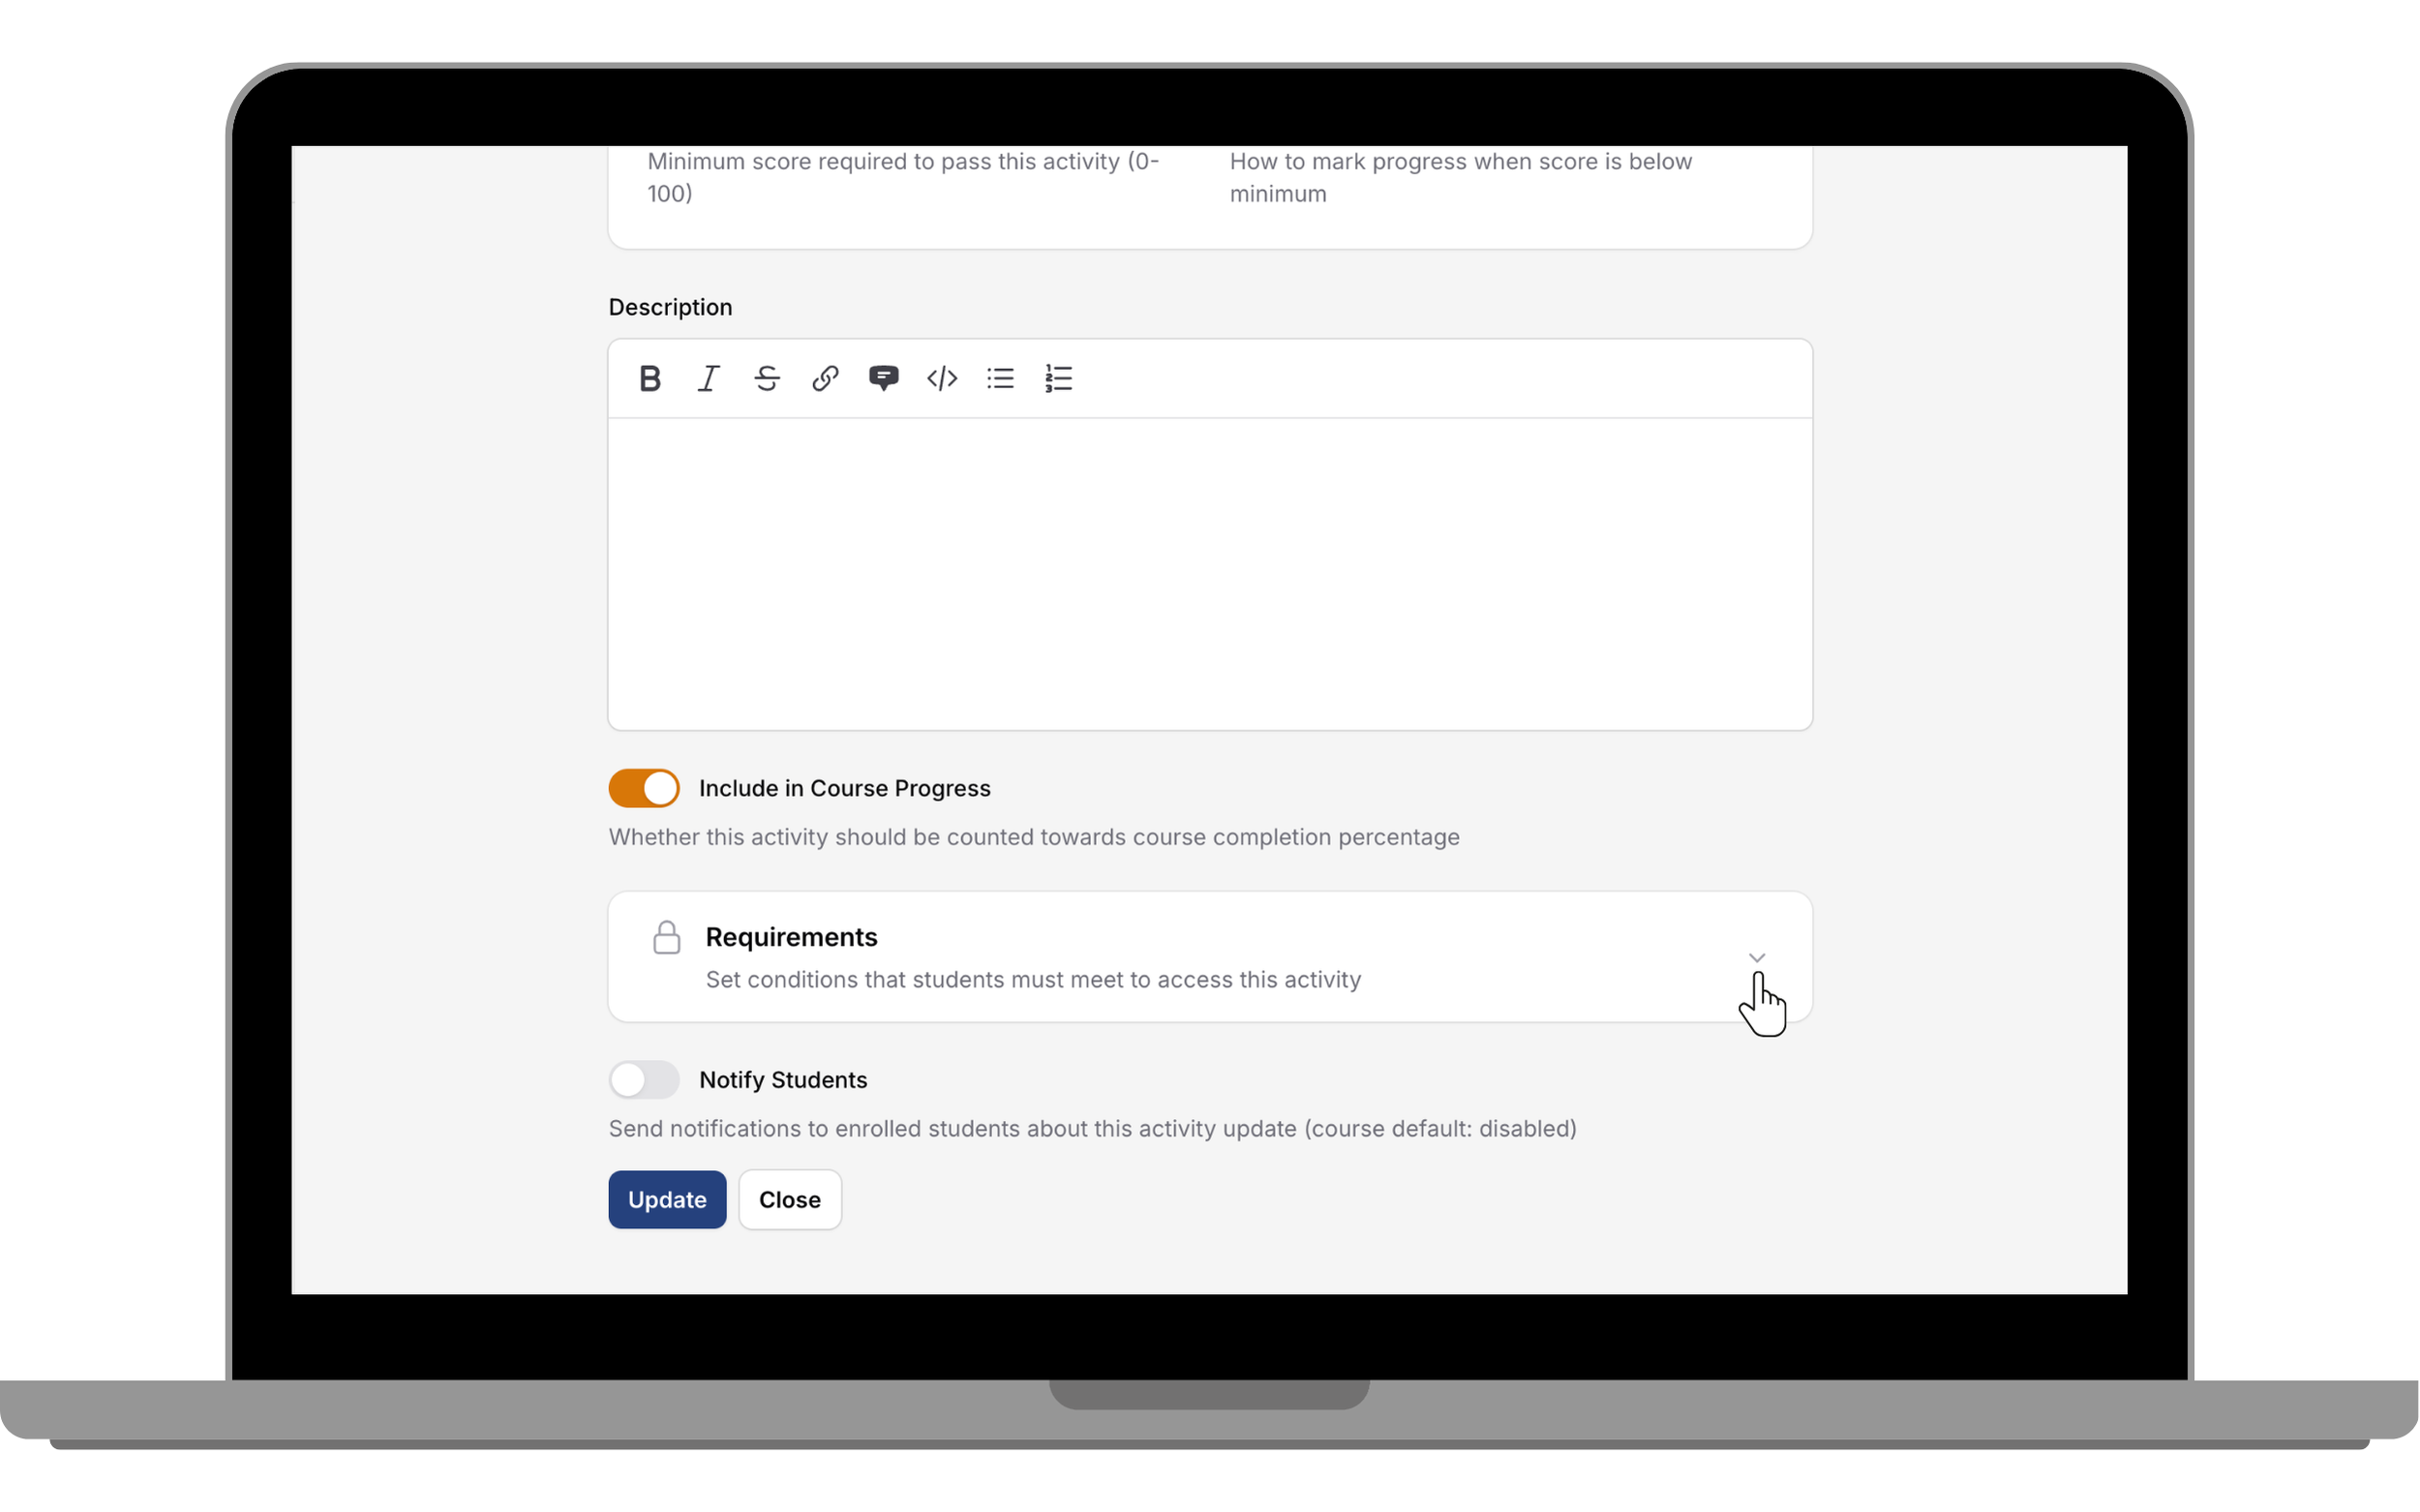
Select prerequisite activities
Select the activity or activities that learners must complete before they can access this activity.
Set availability dates
Set availability dates using Available From and Available Until if needed.
Set section requirements
Click Edit in the section area. Choose prerequisite sections that learners must complete.

Set section availability
Optionally define when the section is available for learners by setting Availability Dates.
Reordering
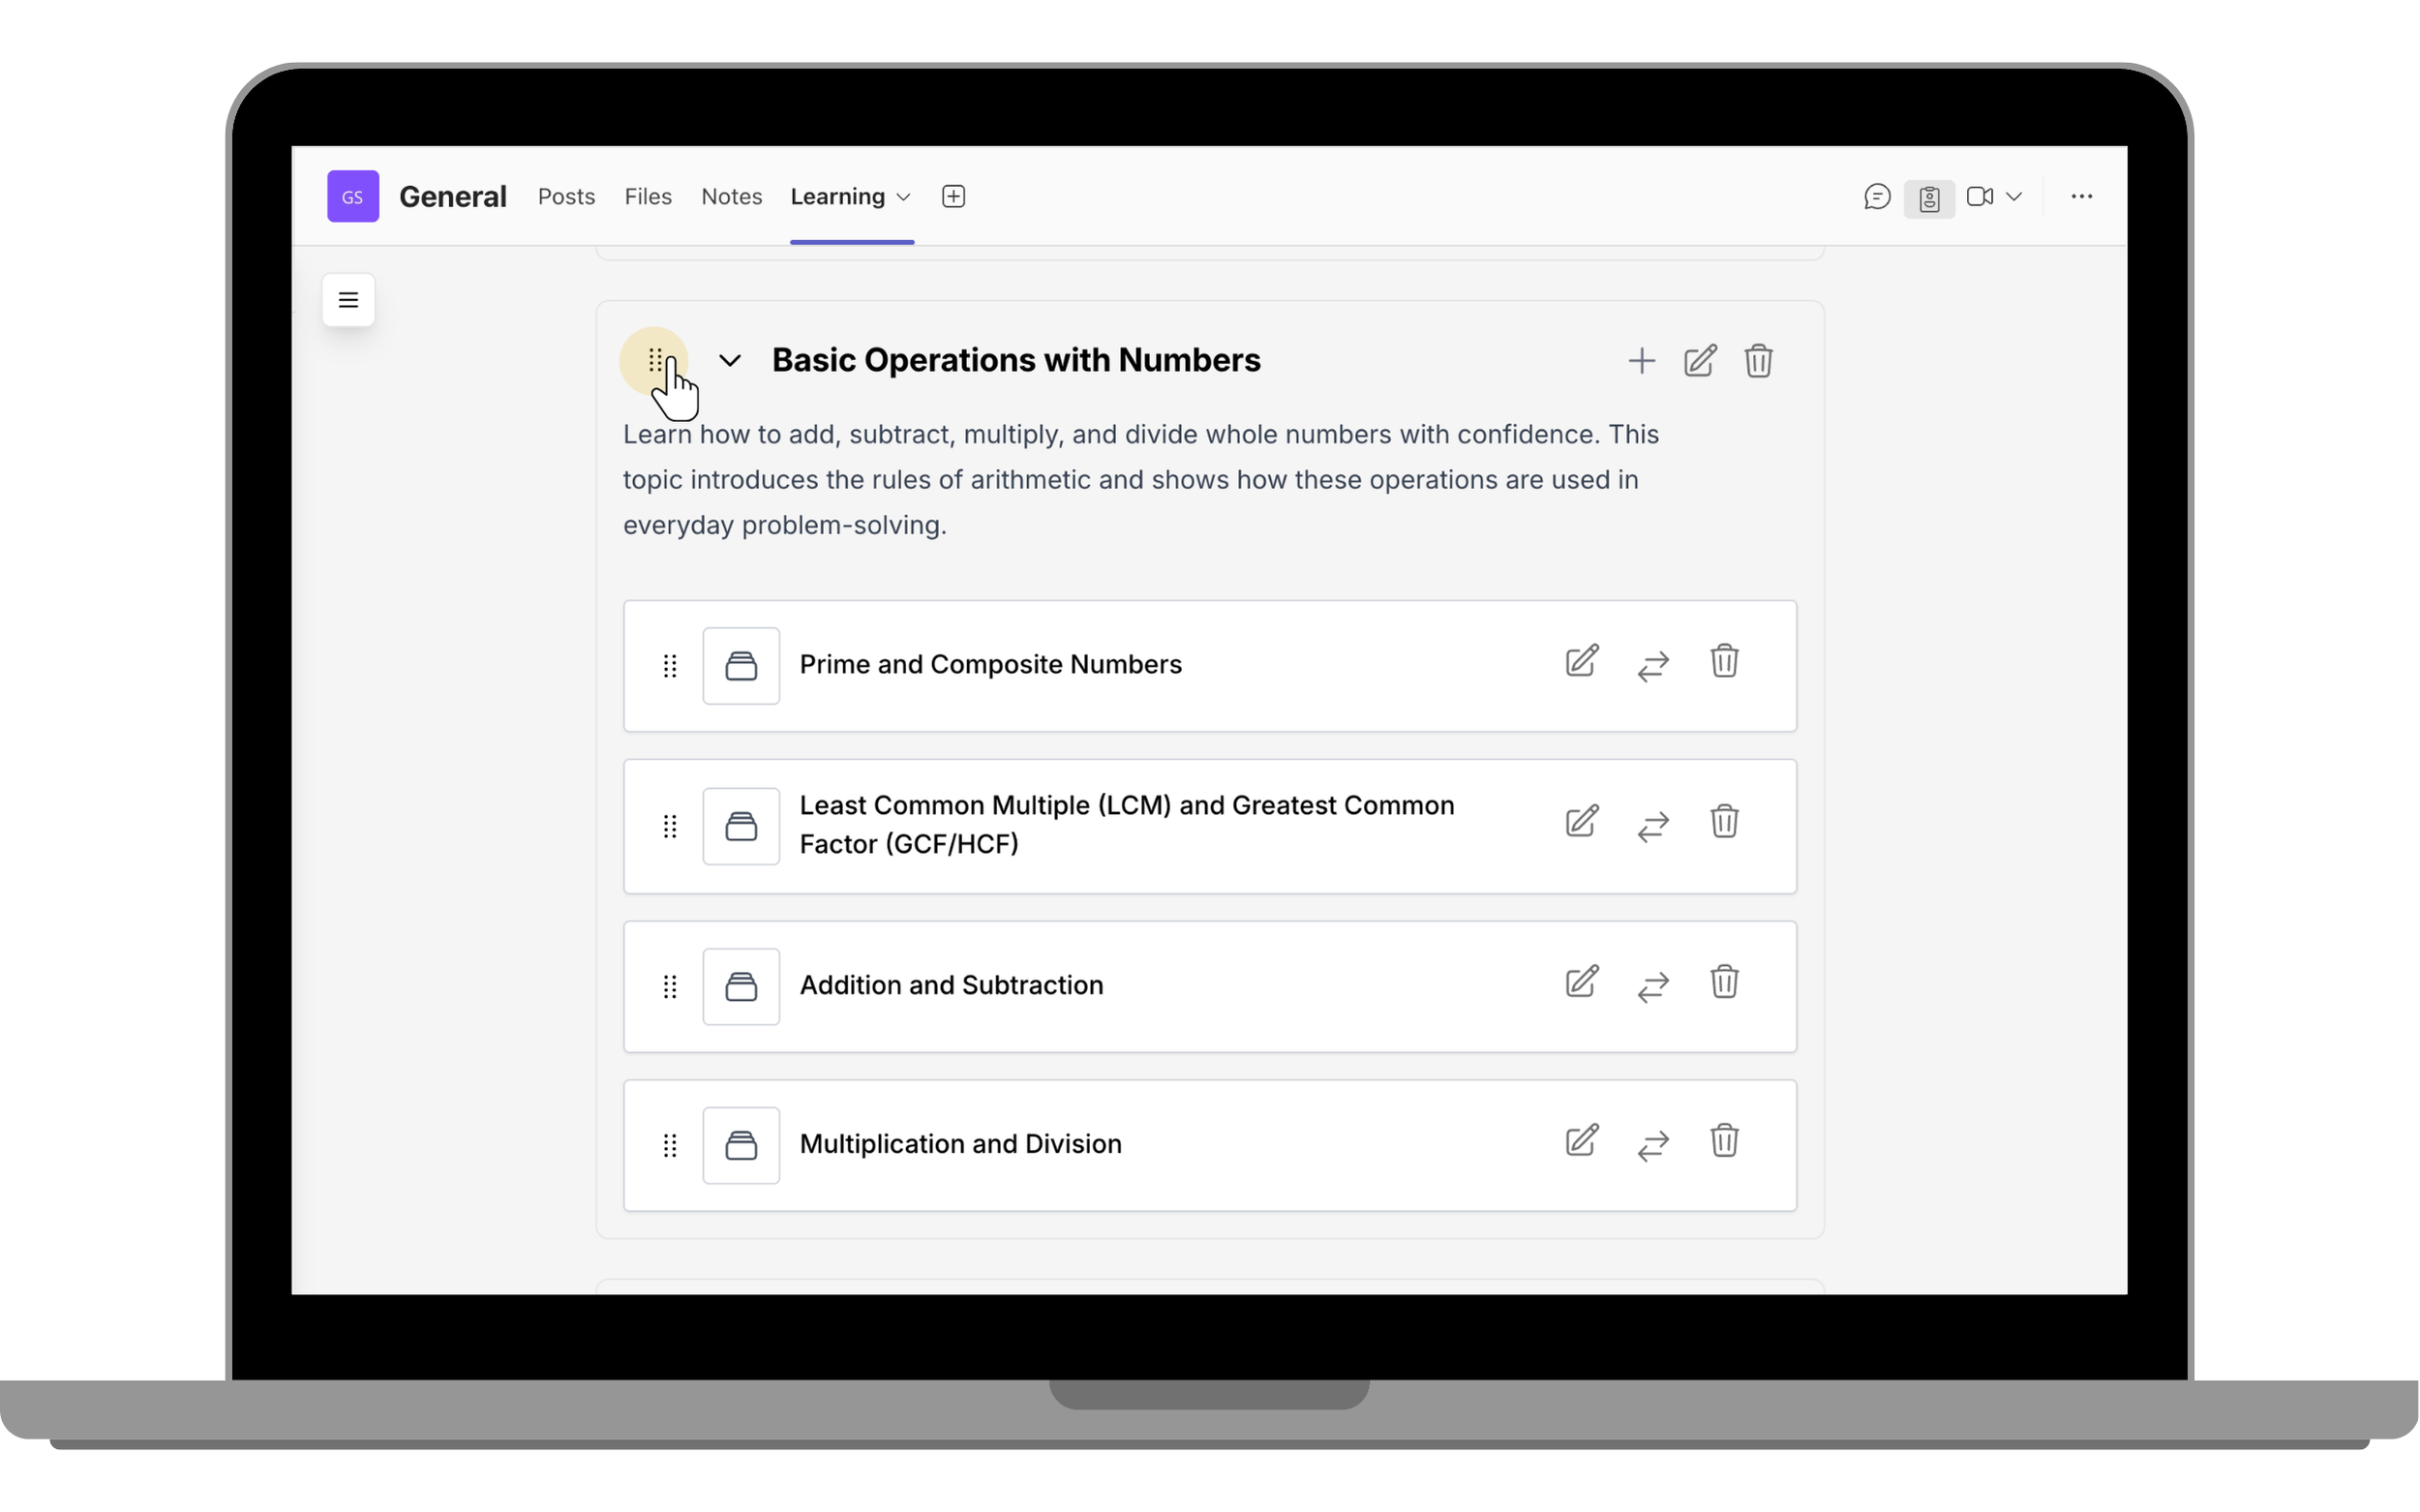
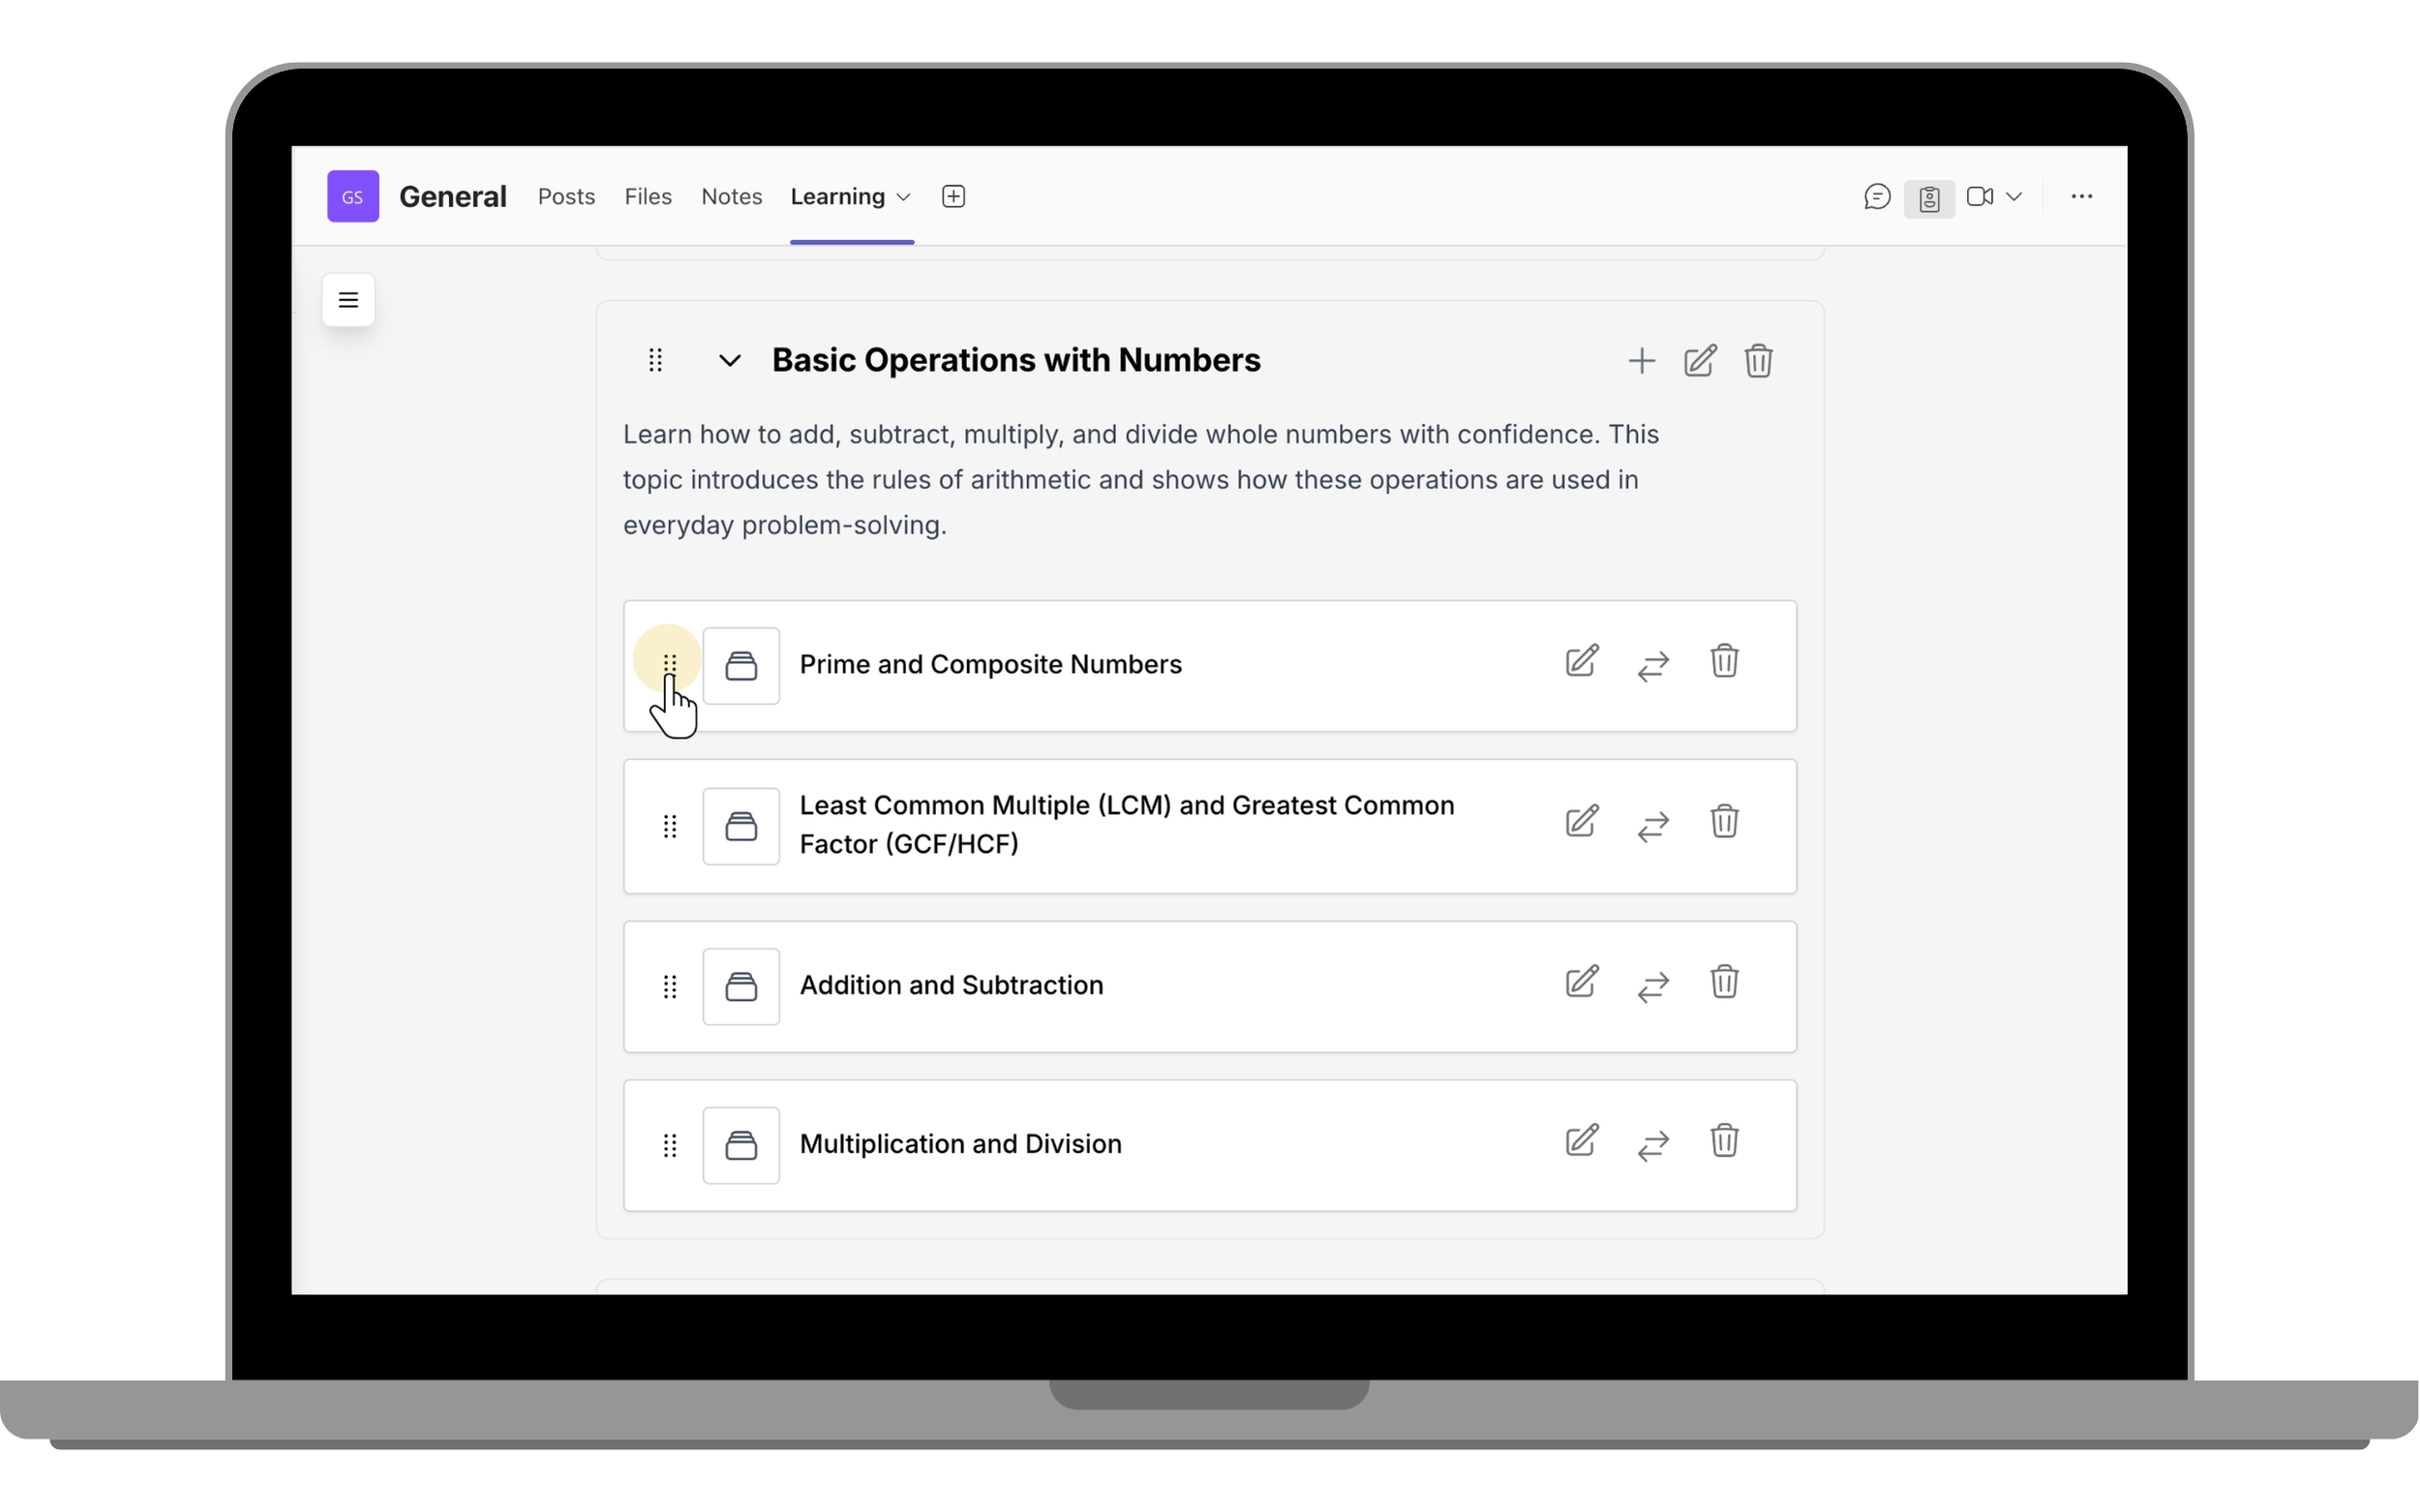
Rearrange your course content by dragging and dropping sections and activities into the desired order.
Drag to rearrange
Use drag-and-drop to rearrange activities.
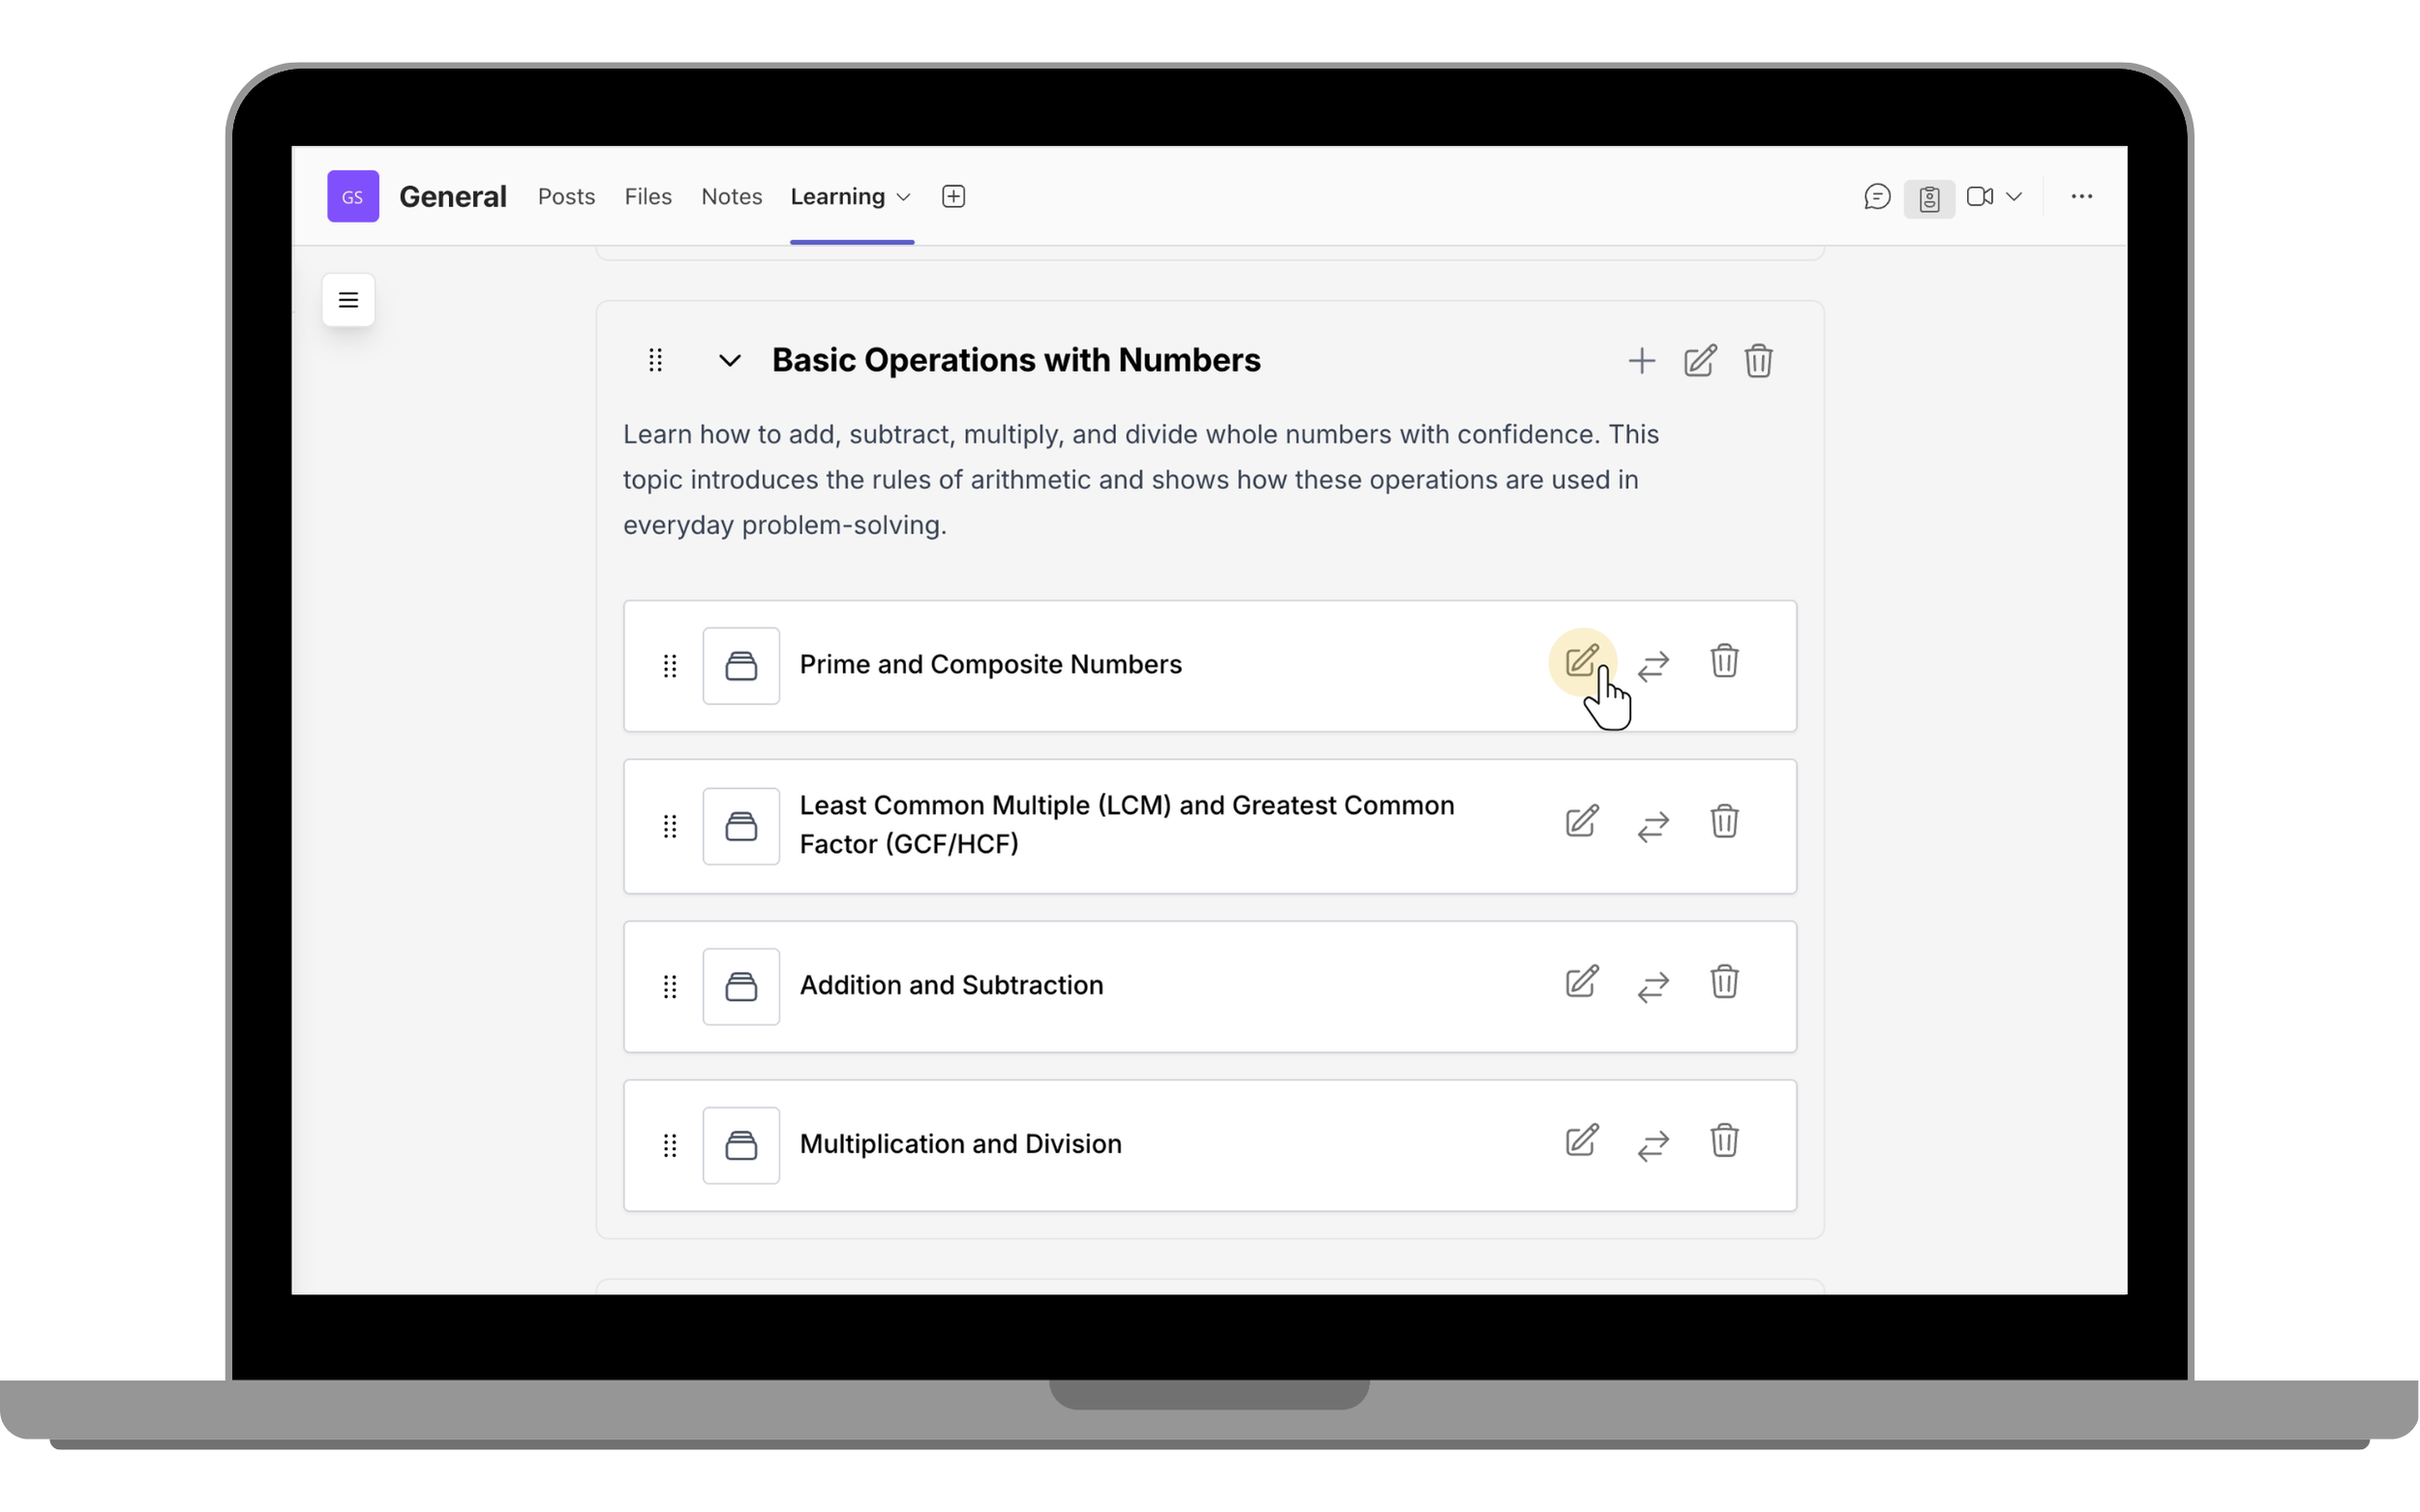
Edit an activity
Use the edit menu to modify an activity.
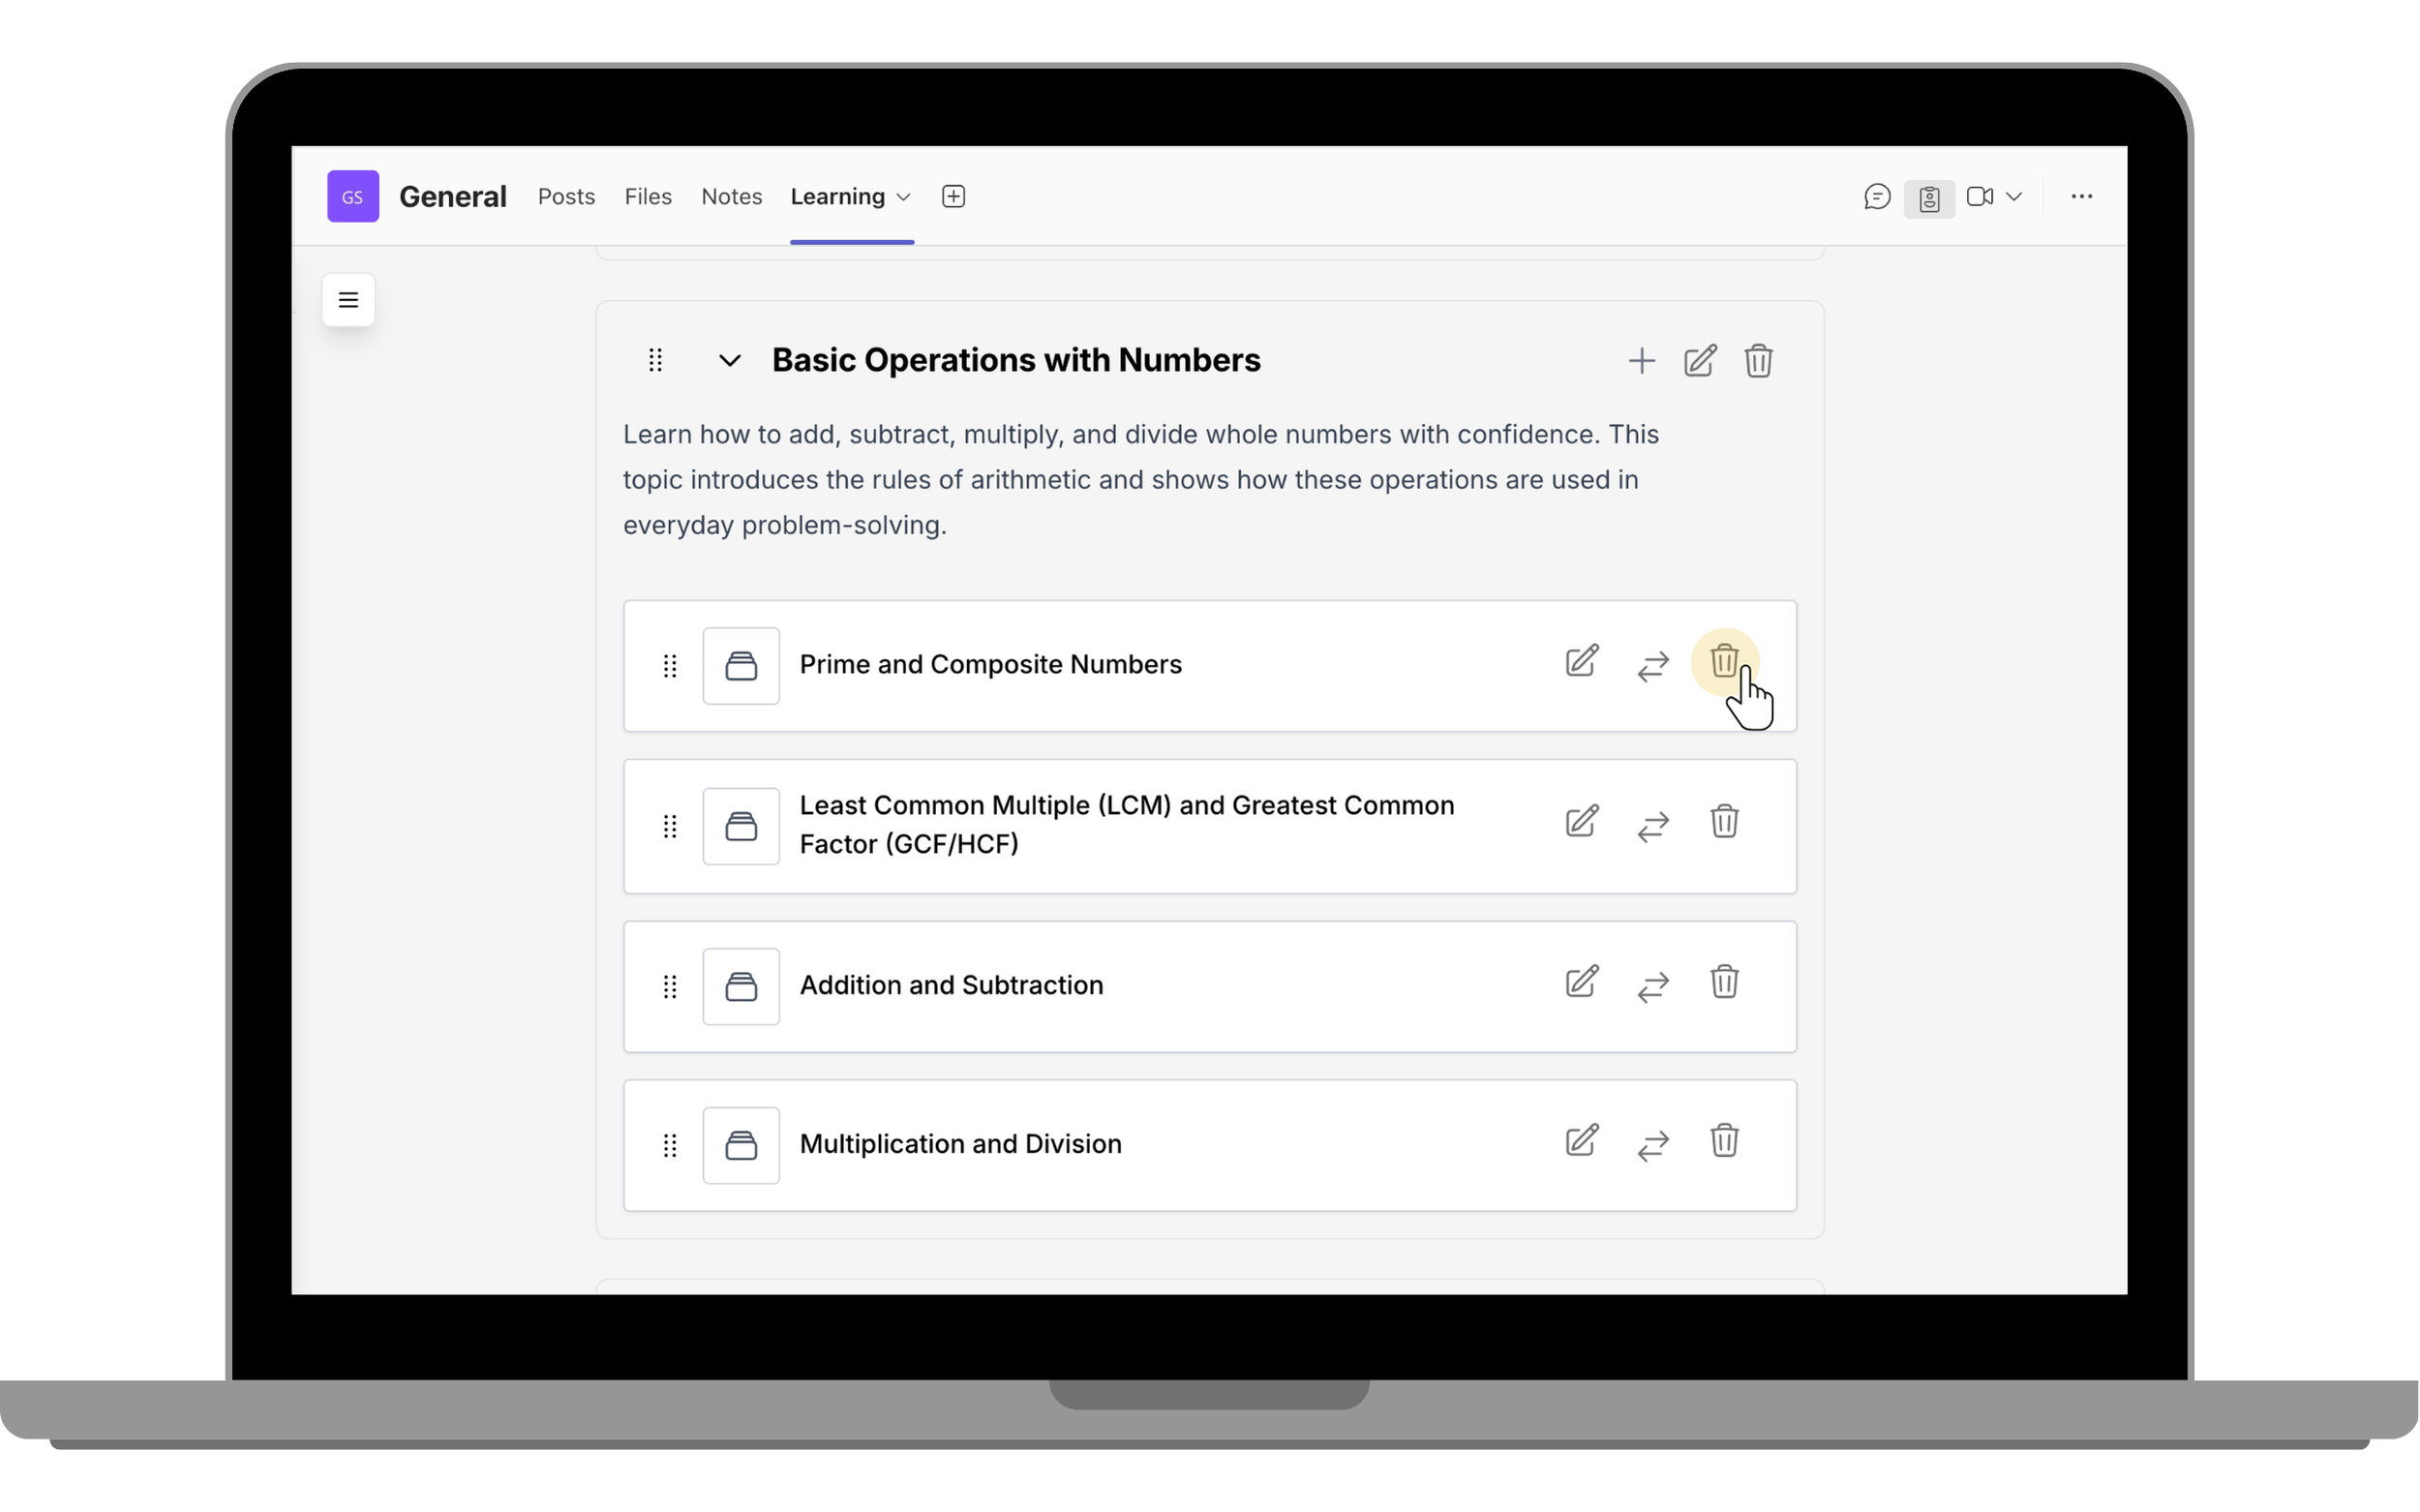
Delete an activity
Use the delete menu to remove an activity.
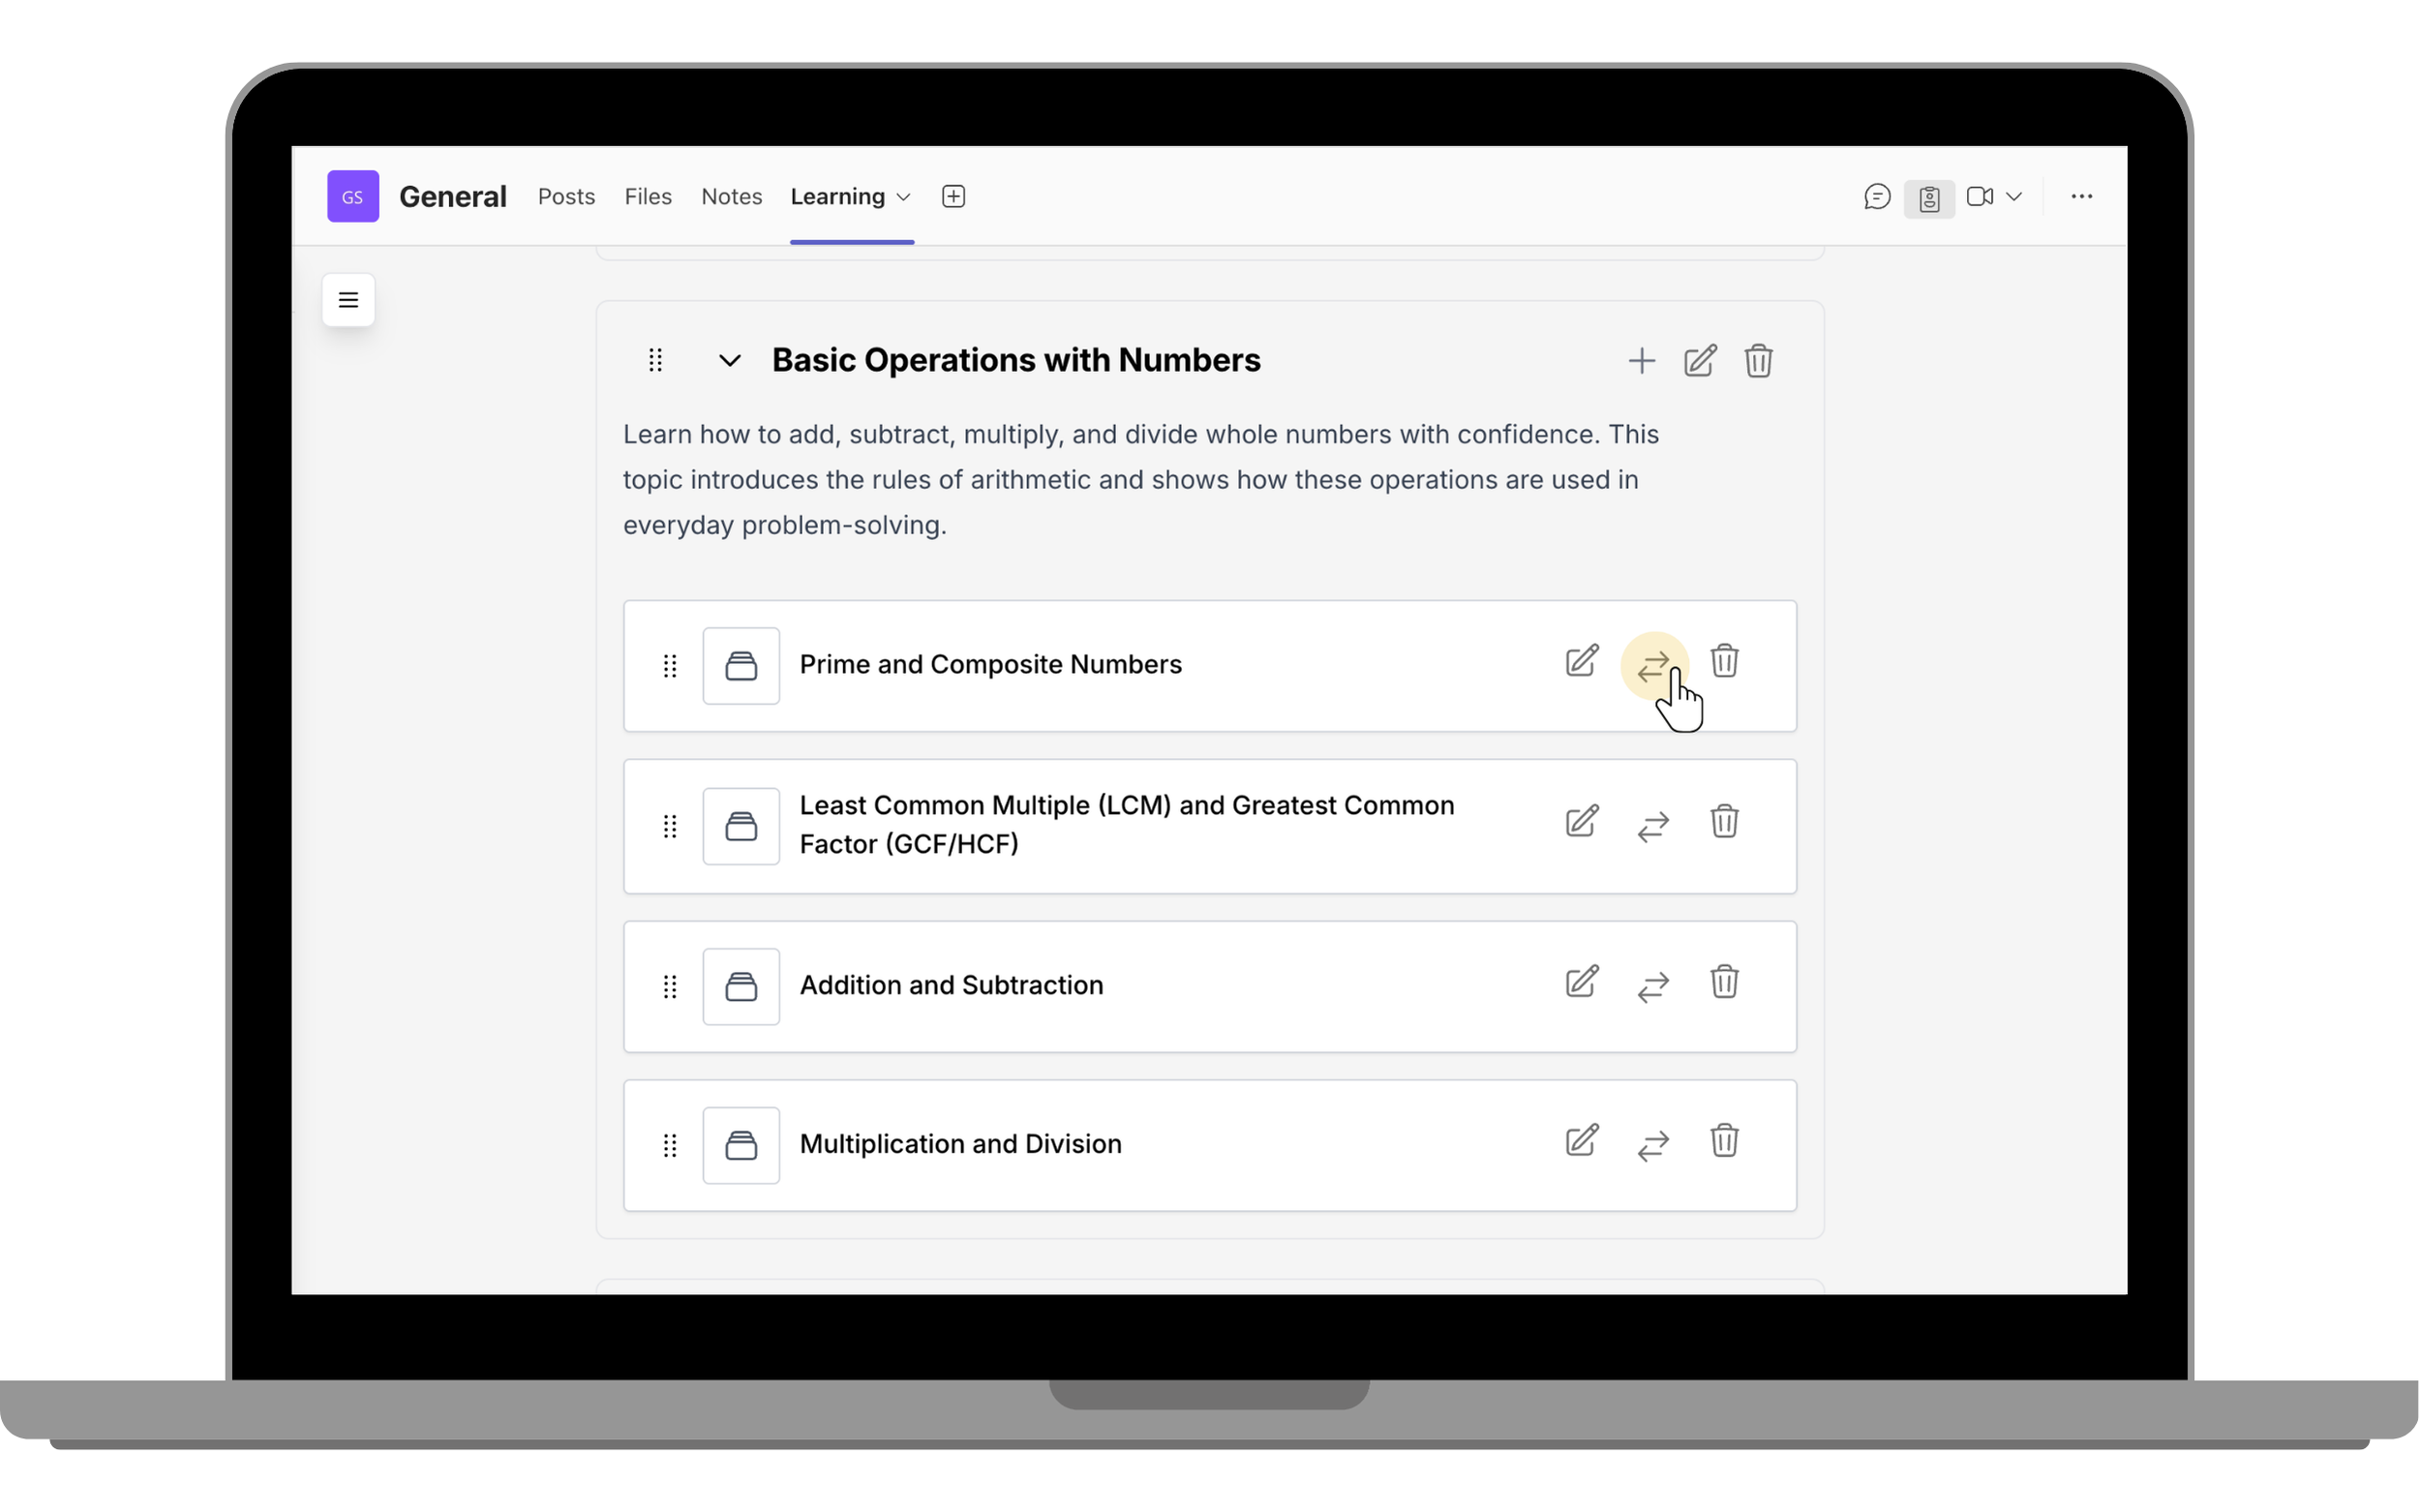
Move to another section
Move an activity to another section.
Reorder sections
Drag sections using the drag-and-drop icon and drop them into the desired position.